| |

Python PyAutoGUI ModuleWe all have seen various message boxes while performing multiple tasks on different types of applications and websites. These message boxes are of different types, such as alert message box, confirm message box, password message box, and many other types. These different types of message boxes are meant for displaying a particular message from the website or application on which we are performing the given task. Like the confirm message box asking for the confirmation from the user working on a website or application, and this confirmation can be about anything such as submission of application, etc. Therefore, these message boxes become a very important part of an application or website, enhancing their delivery quality. These messages are part of an application's Graphical User Interface (GUI), and these come in-built with the application or website. These message boxes are specially created to convey some important messages to the user that require the user's attention on that message. These message boxes help the applications or websites grab the user's spot attention so that important messages from these applications or websites never be missed. Almost every application or website in today's time has the in-built feature of message boxes in their GUI, and that's why learning about these message boxes is becoming important in today's time. Many programming languages have in-built or extended packages which can be used to create such message boxes, and these message boxes can be embedded in the GUI of the application or website. One can use the functions of these packages offered by different programming languages to create different types of message boxes. Talking particularly about Python, it alone offers several libraries & packages which we can use to create message boxes for GUI of any application or website. One such Python package is the pyautogui module which comes with lots of in-built, and we can use these functions to create message boxes. Therefore, in this tutorial, we will learn about this pyautogui module of Python and learn to create message boxes using the functions of this module. We will use the functions of this module in the example programs of this tutorial to create sample message boxes. Introduction to PyAutoGUI Module of PythonThe pyautogui module is a Python package that comes with multiple functions that can be used to automate the GUI of our system or machine. We can also use the functions of this module to automate the functioning of the keyboard and mouse of our system. Other than this, the pyautogui module also offers many other GUI functions which we can use to create message boxes for GUI of any application and website. This article only focuses on this functionality of the pyautogui module. It means that we will only talk and learn about these GUI functions (used to create message boxes) and learn about their implementation in this tutorial by using them in example programs. But, before we start learning about these functions, we have to first go through the installation part. PyAutoGUI Module of Python: InstallationThe pyautogui module of Python is not in-built, and therefore before we start learning about creating message boxes using the GUI functions of this module, we have to install this module in our system. We can use multiple ways to install the pyautogui module in our machine, but we will use the pip installer method to install this module. The major reason behind this is that the pip installer method is the simplest and easiest method to install this module, and we can install this module very quickly by using the pip installer method. To perform the installation of the pyautogui module using the pip installer method, first, we have to write the following pip installation command in the terminal shell of our system: Once we are done with writing the command mentioned above in the terminal shell, we only have to press the 'enter', which will start the installation process of the pyautogui module. When the installation process of the pyautogui module start, we have to wait for a short time until all dependencies required for this module are successfully installed in our system. 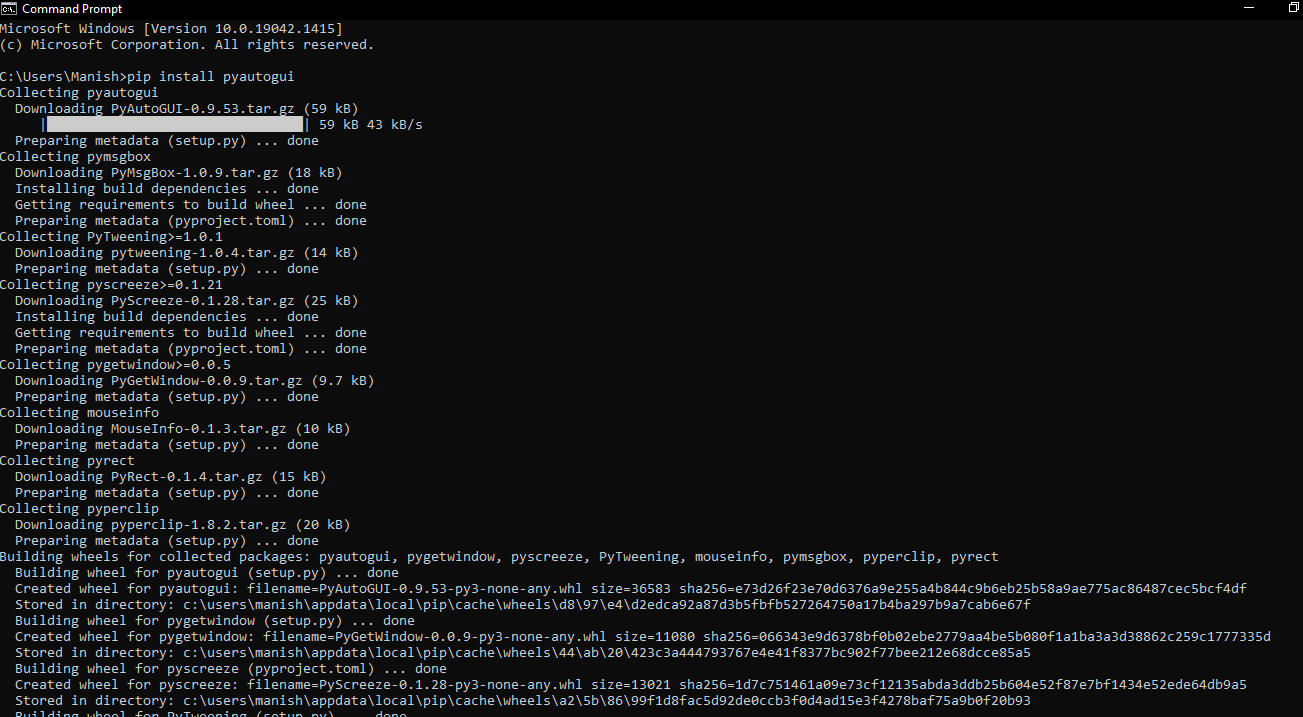
As we can see, the installation process for the pyautogui module is finished, and it means that we have successfully installed this module in our system. Now, we can import this module into example programs to work with the functions of this module and understand their implementation. PyAutoGUI Module of Python: ImplementationNow, we will learn the functioning of the GUI functions of the pyautogui module by using them in the example programs of this part. We will understand the implementation of only those GUI functions of the pyautogui module, which are used to create a message box in the application or website's GUI. We will create different types of message boxes using various GUI functions of the pyautogui module. Following are the different types of message boxes that we will create using the GUI functions of the pyautogui module:
Let's understand the implementation of those GUI functions of the pyautogui module, which we will use to create the message boxes given above by using them in example programs. 1) Alert Message Box:The pyautogui module has an alert() function, which we can use to create an alert message box by giving an input message in this function. Following is the syntax for using this function to create an alert message box: Look at the following example program to understand the implementation of the alert() function: Example 1: Look at the following Python program where we have created an alert message box: Output: 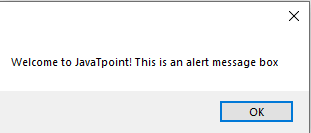
As we can see, an alert message box with the input message is shown in the output, and when we click ok on the alert message box, we will exit from it. That's how we can use the alert() function of the pyautogui module to create an alert message box. Explanation: First, we have imported the pyautogui module into the program as pag. After that, we have used the alert() function to create an alert message box, and we have provided an input message which will be displayed in the alert message box. 2) Confirmation Message Box:The pyautogui module has confirm() function, which is used to create a confirmation message box by giving an input message in this function. Following is the syntax for using this function to create a confirmation message box: Look at the following example program to understand the implementation of the confirm() function: Example 2: Look at the following Python program where we have created a confirmation message box: Output: 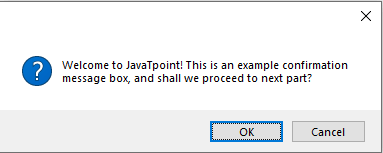
As we can see, a confirmation message box with the input message is shown in the output, and when we click ok on the confirm message box, we will exit from it. That's how we can use the confirm() function of the pyautogui module to create a confirmation message box. 3) Multiple Option Message Box:We can also use the confirm() function of the pyautogui module to create a multiple options message box. We just have to provide the buttons argument inside the confirm() function to display the multiple options in the output message box. Look at the following example program to understand the multiple option functioning of the confirm() function: Example 3: Look at the following Python program where we have created multiple options message box: Output: 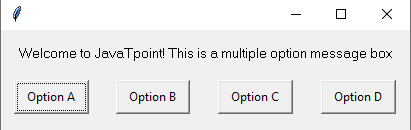
As we can see, we have displayed a multiple options message box in the output using the confirm() function. That's how we can use the buttons argument in the confirm() function to create a multiple options message box. 4) Prompt (Enter) Message Box:We can also create a prompt message box where we can enter a personal message using the prompt() function of the pyautogui module. We can write any message in the prompt message box, which we will display in the output. The text we will enter in the output will be displayed in the output window if we press ok after entering a message, and if we press the cancel button, none will be displayed. Look at the following example program to understand the implementation of the prompt() function: Example 4: Look at the following Python program where we have created a prompt message box: Output: 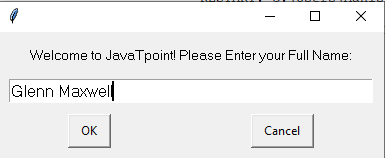
As we can see, a prompt message box where we have entered the input message is shown in the output. That's how we can use the prompt() function of this module to create a prompt message box. 5) Password Message Box:We can also create a password message box using the pyautogui module, and creating a password message box using this module is similar to creating the prompt message box. The pyautogui module has password() function, in which we create a password message box where the user will enter the password manually. The password or text entered in the password message box will be hidden. Look at the following example program to understand the implementation of the password() function: Example 4: Look at the following Python program where we have created a password message box: Output: 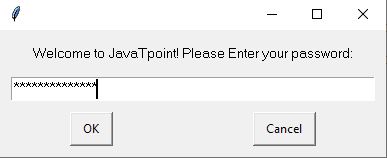
As we can see, a password message box where we have entered the password or input message is shown in the output. That's how we can use the password() function of this module to create a password message box.
Next TopicPython Pyperclip Module
|
 For Videos Join Our Youtube Channel: Join Now
Feedback
- Send your Feedback to [email protected]
Help Others, Please Share


