Python Tutorial
Python OOPs
Python MySQL
Python MongoDB
Python SQLite
Python Questions
Plotly
Python Tkinter (GUI)
Python Web Blocker
Python MCQ
Related Tutorials
Python Programs
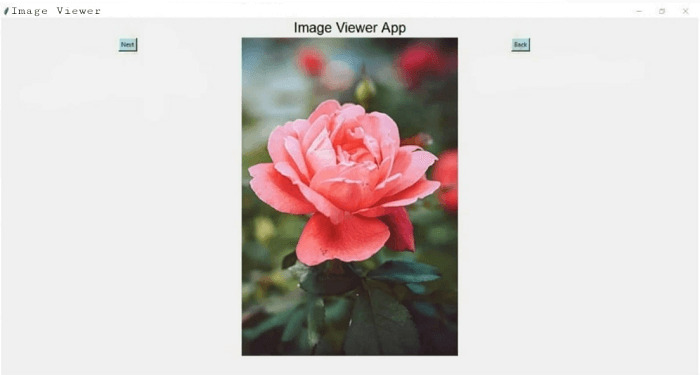
Image Viewer App Using Tkinter in PythonWith the help of a next and back button, users of the Image Viewer App may navigate between images and see them one at a time. Let's follow a few simple steps to construct an image viewer app in Python. Information Regarding Image Viewer App :The app called an image viewer helps us showcase images one by one. Here, while examining the photographs, we may go back and forth. These images' sizes vary at random, and they are displayed as such. These images will be shown only one at a time and their movement of next and backward will be determined by the buttons. Program Specifics :In this project, we're going to build a Tkinter Module-based image viewer application. Tkinter is a built-in library that is excellent for creating GUI programmes in Python. It is a standard Python interface to the Tk GUI toolkit provided with Python. Python provides a variety of tools to let us quickly develop our own GUI applications. The quickest and simplest method for producing GUI apps is Python with Tkinter. The PIL Module will also be used to perform operations on the images. The PIL library, which is the standard image processing software, will be used for image processing. It is a simple image processing programme that may be used for picture creation, editing, and storing. Unlike Tkinter, it is not built-in, thus we must install it before using it. We'll make sure a user can navigate through a collection of photographs using the programme. Program requirements :We will need the Tkinter Module and PIL Module to develop this project. For the construction of this project, some basic Python expertise will also be needed.
Steps to be followed for making a Python Image Viewer :The steps below are what we will be following to create this application :
Walking through the code :Let us begin by going through each step in more depth. First, Importing the Essential Modules : To use these modules in our program, we will import them from the Python libraries. Secondly, Making the GUI : We will use the Tk() technique to build the GUI Window that will show case our widgets. Then, we use the resizable() function to make our window re-sizeable. This is essential since we want to include photos of all sizes, and the size of our window varies as a result. Then title() technique will enable us to give the window a title. Then the Label() method will be used to give a label to window widget that might show text. We will create a label widget on our window using the Label() function, which will enable us to show text. We will alter this label's font, size, foreground, background, and other elements as well. We will use the Frames() function to add a frame to our GUI Window. We will customise the frame's height, width, backdrop, foreground, and other attributes. To display our photographs on the constructed frame, we developed this frame. Using this button() method, we were able to add a button to our window. We have designed two buttons:
We also have displayed the widgets using the x and y coordinates parameters by using the place() function. Thirdly, Creating a list of Images : We will use the open() function to open the photos we want to include in the list and save them to various variables (img1, img2 and img3). Using a loop, we will generate a list of these variables and show them in the newly formed frame. We have used the pack() function to display the widgets on the window. Pack() method is an automatic technique that shows widgets without specifying their x and y coordinates. Lastly, Defining Forward and Backward movement of Images :When the Next Button is pressed, this Forward() method will be activated. A global variable named j is created. The next image is shown and variable j is increased when the next button is pressed. When the Back Button is clicked, this backward() method will be activated. A global variable named j is created. The previous image is shown and variable j is decremented when the back button is pressed. Complete Code :Output: The screenshot of the output of the program that we have created in the earlier part of this article is attached below. 
Conclusion :Python's Tkinter library makes it very easy to create an image viewer application. With just a few lines of code, you can build a fairly beautiful image viewer. You can indeed make this application more helpful with a little more additions. Although there are many more features you can include, here we just used a few straightforward ones to start with a basic application. Hope you learnt something new from this article. |
 For Videos Join Our Youtube Channel: Join Now
Feedback
- Send your Feedback to [email protected]
Help Others, Please Share


