| |

Building 2048 Game in Python2048 is a famous yet simple mathematical sliding puzzle game played by a single player. 2048 is quite an addictive game; the main things performed in this game are adding numbers and merging the tiles. So, let us build this game using the Tkinter library in Python. But before we get started, let us clear some fundamentals. What is the 2048 Game?2048 is a single-player game where the player combines the numbered tiles to obtain a higher numbered tile. The players begin this game with two tiles; the lowest possible number available is 2. Then, the players will play by combining the tiles with the same number to have a title with the summation of the number displayed on those two tiles. Many strategies have been developed to achieve the number 2048 and be a winner in the game. However, there are some who strived for a greater height, which is scoring beyond 2048. Once the players obtain the tile with the number 2048, they are asked if they still want to continue the game. Some of them stop there, and some are determined to continue. The 2048 Game does not involve any complicated controls. The controls we will use are upward, downward, and sideways. The rules of the Game are also simple. We have to move the tiles, and on every move, a new tile pops up in a random manner anywhere in the box. Whenever two tiles with the same number collide as we move them, they will merge into a single tile with the sum of the numbers printed on them initially. Prerequisites of Python 2048 Game ProjectThe main objective of this project is to design a Graphical User Interface (GUI) for the 2048 Game in Python. We will be developing a simple 2048 game where we will make use of the Tkinter package to create its Graphical User Interface and random module to display a tile randomly. We will also use different color codes for different numbered tiles. This project requires a good knowledge of loops and functions in Python and its Tkinter package. Tkinter is the Python binding to the Tk toolkit, which is utilized across many programming languages to build Graphical User Interface (GUI). Moreover, a good understanding of the methods and attributes of the Python random module is also needed, which is used to generate random numbers or objects. Let us now start building the project. Implementation of Building 2048 Game in PythonWe will start by creating a new folder as - '2048'. Inside this folder, we will create a Python program file as - 'main.py', where we will write the source code of the project. Now that we have set up the structure for the application, it is time for us to open the 'main.py' file and start the coding part. To keep the concept clear and understandable, we have divided the complete project code into different segments. The following is the step-by-step approach that we will opt to work on the project: Step 1: Import the required module. Step 2: Create a class to structure the game. Step 3: Define the colors and font styles of the application. Step 4: Define a method to make Graphical User Interface (GUI). Step 5: Create a scoreboard for the game. Step 6: Create a method to start the game. Step 7: Define the methods to manipulate the matrix. Step 8: Define a method to insert a new tile randomly. Step 9: Define a method to update GUI. Step 10: Define the methods for pressing arrow keys to play the game. Step 11: Define the methods to check if any moves are possible. Step 12: Define a method for game over. Step 13: Define the main function to run the application. Let us understand the implementation of the above steps in detail. Importing the Necessary ModulesWe will start by importing the required modules like random and tkinter for the project.
Let us consider the following snippet of code illustrating the same. File: main.py Explanation: In the above snippet of code, we have imported the random module. We have also imported everything from the tkinter module using the asterisk '*' after the import statement. Creating a Class to Structure the GameWe will now define a class that will create a structure for the game. This class will consist of all the methods and attributes needed for the game. So, let us start by defining a class and an initializing method for the application. File: main.py Explanation: In the above snippet of code, we have defined a class as GameApplication that inherits from the Tkinter Frame widget. This class will maintain the structure of the Graphical User Interface (GUI). Moreover, this whole application will run using this class. In this class, we defined a constructor called the Frame constructor to construct the application as a frame widget. We have then called the grid() method to create a grid for the game. We have then set the title of the application with the help of the title() method. We have then created a frame widget using the Frame() class and set its background color to color_scheme, border width to 3px, and size to 600x600. We have then again used the grid() method to set the position of the frame on the window and set the top padding to 120px. We have then called the app_GUI() and start() methods and bound the arrow keys to their respective functions. At last, we have called the mainloop() method. Defining the Colors and Font Styles for the ApplicationWe will now define the colors we will need for the different widgets of the application. We will also define some font styles that we will use throughout the application. Let us consider the following snippet of code illustrating the same. File: main.py Explanation: In the above snippet of code, we have defined the colors and font styles that we will need for different widgets of the application. We have defined the color of the grid, empty cells, messages, numbered cells, and cell numbers. We have then defined the font style of the scoreboard, message, and the numbers displayed in the cells. Defining a Method to make Graphical User Interface (GUI)We will now define a method to create a Graphical User Interface (GUI), i.e., making a 4x4 grid having empty cells. Let us consider the following snippet of code illustrating the same. File: main.py Explanation: In the above snippet of code, we have defined a method as app_GUI(). Inside this method, we have created an empty list of cells. We then used a nested for-loop to create a 4x4 matrix. We have created an empty list of rows inside the first loop where the cell data will be appended after every inner loop iteration. We have created a frame inside the second loop using the Frame() class and set its master parameter to the main_frame. We have also set the background color of the frame to the color of the empty cell defined earlier and the width and height of the frame to 150px each. We then used the grid() method to set the position of the frame in the grid format. We then created a label using the Label() class to display the number on the cell. We have set the master parameter of this label to main_frame and the background color to empty cell color. After that, we created a dictionary to store the cell data and used the grid() method to set the position of the label in the cell. We have then appended the cell data to the list of rows using the append() method. At last, we have appended the row to the list of cells using the append() method. Creating a Scoreboard for the GameLet us consider the following snippet of code illustrating the way of creating a scoreboard for the game where the player's score will display. File: main.py Explanation: In the above snippet of code, we have created a frame using the Frame() class. We have then set its position on the window using the place() method. We then used the Label() class to create the labels where to display the score. We then used the grid() method to set the position of these labels in the frame. Defining a Method to Start the GameWe will now define a method to start the game. This method will generate two random cells with 2s and set the initial value of the score to 0. File: main.py Explanation: In the above snippet of code, we have defined a method as start(). We have created a 4x4 matrix or a 2D list in this method. We first initialized the matrix with all zeros. We then randomly selected the row and column numbers ranging between 0 and 3 using the random.randint() method and set the value of the selected cell to 2. We have also configured the background, foreground, and text color and the font style of the cell, and the number displayed on it. We then used the while-loop to randomly select another row and column if any cell is not 0. We have then again set the value of the selected cell to 2 and configured the background, foreground, and text color along with the font style of the cell and the number displayed on it. At last, we have set the initial value of the score to 0. Defining the Methods to Manipulate the MatrixWe will now define some methods to manipulate the matrix. These methods will allow us to compress all the non-zero numbers in the matrix towards one side of the board, combining all horizontally adjacent non-zero numbers having the same value in the matrix and merging them to a single position, reversing the order of each row on the matrix, and transpose the matrix. Let us consider the following snippet of code illustrating the implementation of the first method to compress all the non-zero numbers. File: main.py Explanation: In the above snippet of code, we have defined a method as compress_cells() that will stack up all the non-zero numbers in the matrix toward one end of the board, removing all the empty cell gaps between them. Inside this method, we have created a matrix as MatrixOne consisting of all zeros in the nested for-loop for each row in the matrix. We then created a variable as positionFill and kept a record of the number of cells consisting of a non-zero number. If the cell value is non-zero, the value in the new matrix at i will fill the position to the value. Then, we will increment the filled position by one and set the matrix equal to MatrixOne. Let us define another method to add all horizontally adjacent non-zero numbers of the same value together and merge them into a single position. File: main.py Explanation: In the above code snippet, we have defined the method as combine_cells(), which will add all the horizontally adjacent non-zero numbers with the same value in the matrix and merge them to the left position. Inside this method, we have created a nested for-loop and used the index as j+1 to iterate until column two. After that, we checked if the value at the matrix's index (i, j) is not zero and is equal to the value at the index (i, j+1). We multiplied the value at the index (i, j) by two and set the value at the index (i, j+1) to zero. We have then updated the score by adding the newly combined values. Let us now define another method to reverse the order of each row in the matrix. File: main.py Explanation: In the above code snippet, we have defined a method as reverse_order() that will reverse the order of each row in the matrix. Inside this method, we have created an empty list as MatrixOne. We then created a nested for-loop and appended an empty list to MatrixOne in the outer loop. Inside the second loop, we have reversed the value and the main matrix equal to MatrixOne. Let us now define a method to flip the matrix over its diagonal. File: main.py Explanation: In the above code snippet, we have defined a method as transpose_matrix() that will flip the matrix over its diagonal. Inside this method, we have created a 4x4 matrix as MatrixOne, having all of its elements as zeros. Then, we created a nested for-loop and set every value at the index (i, j) in MatrixOne with the value at the index (j, i) in the current matrix. We have then set the main matrix to MatrixOne. Defining a Method to Insert a New Tile RandomlyLet us now consider the following snippet of code to define a method to randomly insert a new 2- or 4-numbered tile into an empty cell. File: main.py Explanation: In the above code snippet, we have defined a method as insert_tile(). Inside this method, we randomly selected the row and column from the matrix using the random.randint() method. We then ran the while loop and randomly selected the row and column from the matrix again. At last, we have used the random.choice() to set the value of the selected cell as either 2 or 4. Defining a Method to Update Graphical User Interface (GUI)We will now define a method to update the Graphical User Interface (GUI) to resemble the newly manipulated matrix. Let us consider the following snippet of code demonstrating the implementation of the same. File: main.py Explanation: In the above snippet of code, we have defined a method as update_GUI(). Inside this method, we have created a nested for-loop and checked if any cell value is equal to 0 configuring the background and foreground color specified in the color and font chart along with the text in that cell accordingly. We have then updated and displayed the score. At last, we have called the Tkinter Frame's update_idletasks() method to display the widget immediately. Defining the Methods for Pressing Arrow Keys to Play the GameWe will now define the methods to bind the arrow keys (Left, Right, Up, and Down) for playing the game. Left Arrow Key Binding Let us first consider the following snippet of code demonstrating the implementation of the method for the Left Arrow key. File: main.py Explanation: In the above code snippet, we have defined a method as left_key(). Inside this method, we have called the compress_cells() method to compress non-zero numbers to the left side of the matrix. We have then called the combine_cells() method to combine horizontally adjacent numbers. We again called the compress_cells() method to eliminate newly created zeros cells from the combine_cells() method. We have then added a new tile using the insert_tile() method and updated the Graphical User Interface (GUI) by calling the update_GUI() method. At last, we have called the gameover() method to over the game. Right Arrow Key Binding We will now define another method for the Right Arrow key. File: main.py Explanation: In the above code snippet, we have defined a method as right_key(). Inside this method, we have called the reverse_order() method to transform the right swipe into a left swipe. We have then called the compress_cells() method to compress non-zero numbers to the left side of the matrix and called the combine_cells() method to combine horizontally adjacent numbers. We again called the compress_cells() method to eliminate newly created zeros cells from the combine_cells() method. After that, we again called the reverse_order() method to reverse the order of the matrix back to its original orientation. We have then added a new tile using the insert_tile() method and updated the Graphical User Interface (GUI) by calling the update_GUI() method. At last, we have called the gameover() method to over the game. Up Arrow Key BindingLet us define a method for the Up Arrow key. File: main.py Explanation: In the above code snippet, we have defined a method as up_key(). Inside this method, we have called the transpose_matrix() method to flip the matrix at its diagonal to make it work similar to the left move. We have then called the compress_cells() method to compress non-zero numbers to the left side of the matrix and called the combine_cells() method to combine horizontally adjacent numbers. We again called the compress_cells() method to eliminate newly created zeros cells from the combine_cells() method. After that, we again called the transpose_matrix() method to transpose the matrix back to its original orientation. We have then added a new tile using the insert_tile() method and updated the Graphical User Interface (GUI) by calling the update_GUI() method. At last, we have called the gameover() method to over the game. Down Arrow Key BindingLet us define a method for the Down Arrow key. File: main.py Explanation: In the above code snippet, we have defined a method as up_key(). Inside this method, we have called the transpose_matrix() and reverse_order() methods to transpose and reverse the matrix so that the downward movement will become the leftward movement. We have then called the compress_cells() method to compress non-zero numbers to the left side of the matrix and called the combine_cells() method to combine horizontally adjacent numbers. We again called the compress_cells() method to eliminate newly created zeros cells from the combine_cells() method. After that, we again called the reverse_order() and transpose_matrix() methods to reverse the order of the matrix and transpose it back to its original orientation. We have then added a new tile using the insert_tile() method and updated the Graphical User Interface (GUI) by calling the update_GUI() method. At last, we have called the gameover() method to over the game. Defining the Methods to Check if Any Moves Are PossibleWe will now define the methods to check for possible horizontal and vertical moves. Checking Horizontal Moves Let us first consider the following snippet of code to understand the implementation of the method to check the horizontal moves. File: main.py Explanation: In the above snippet of code, we have defined a method as horizontal_move_exists(). Within this method, we have used the nested for-loop to iterate through the matrix and return True if two horizontally adjacent tiles are the same. Checking Vertical Moves Let us first consider the following snippet of code to understand the implementation of the method to check the vertical moves. File: main.py Explanation: In the above snippet of code, we have defined a method as vertical_move_exists(). Within this method, we have used the nested for-loop to iterate through the matrix and return True if two vertically adjacent tiles are the same. Defining a Method for the Game OverWe will now define a method for the game over. This method will check whether the player has created a 2048 tile or left no moves to continue the game and display the 'WIN' or 'LOSE' message accordingly. Let us consider the following snippet of code illustrating the same. File: main.py Explanation: In the above snippet of code, we have defined a method as gameover(). Within this method, we have used the conditional statement to check if the player has created a tile of 2048 yet or if there do not exist any further moves in the game. For the conditions, we have created a separate frame along with a Label to display the 'WIN' or 'LOSE' message accordingly. Defining the Main Function to Run the ApplicationWe will now define a function that will call the GameApplication() class and define a main function to run the application. File: main.py Explanation: In the above code snippet, we have defined a function as the game(). Inside this function, we have called the GameApplication() class. At last, we have defined a main function and called the game() function to run the application. Hence, we have successfully written the code for the 2048 Game Project in Python. We can now save and run the project file to see the results. The Complete Project CodeA complete code of 2048 Game in Python for one's reference is shown below: File: main.py Output: $ python main.py 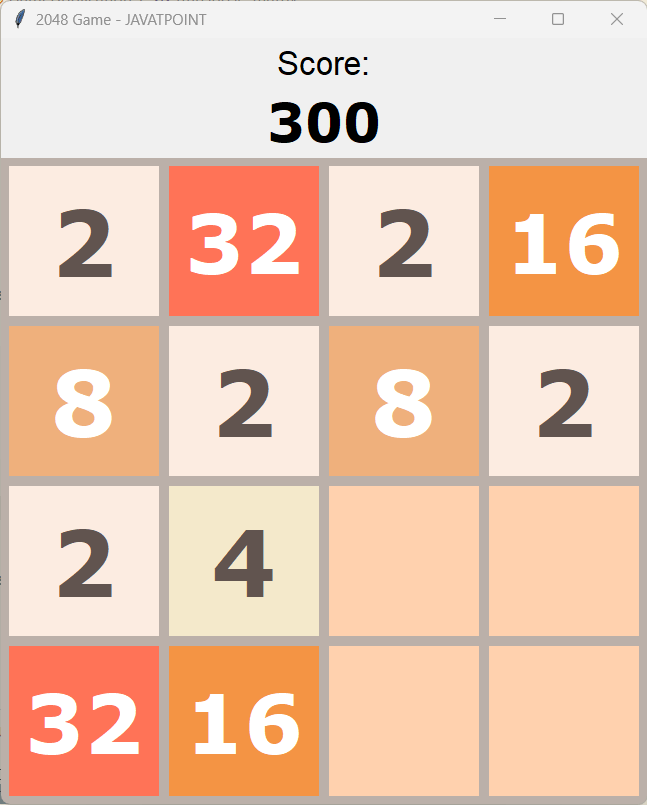
Next TopicQuicksort in Python
|
 For Videos Join Our Youtube Channel: Join Now
Feedback
- Send your Feedback to [email protected]
Help Others, Please Share


