| |
Python Tutorial
Python OOPs
Python MySQL
Python MongoDB
Python SQLite
Python Questions
Plotly
Python Tkinter (GUI)
Python Web Blocker
Python MCQ
Related Tutorials
Python Programs

DBSCAN algorithm in PythonIn this tutorial, we will learn how we can implement and use the DBSCAN algorithm in Python. In 1996, DBSCAN or Density-Based Spatial Clustering of Applications with Noise, a clustering algorithm, was first proposed, and it was awarded the 'Test of Time' award in the year 2014. The 'Test of Time' award was given to DBSCAN at Data Mining Conference, KDD. We will not learn about the DBSCAN algorithm here and only discuss the implementation of the DBSCAN algorithm in Python. But if we have to understand the implementation of the DBSCAN algorithm, we should have at least a basic idea about it. Therefore, if it is advisable that if you don't know what the DBSCAN algorithm is or how it works, then you should first learn about the DBSCAN algorithm and its working. Implementation of DBSCAN algorithm in PythonWe will perform the implementation operation of the DBSCAN algorithm in this section, and we will do this in steps so that it will be easy to understand and learn. We are going to use a dataset in this implementation process to perform various operations (including those we do in the DBSCAN algorithm) on it. Before we start the implementation process, we should fulfil the prerequisites to implement the DBSCAN algorithm inside a Python program. Prerequisites for implementation of DBSCAN algorithm:We have to fulfil the following prerequisites before we proceed with the implementation part of the DBSCAN algorithm in this section: 1. Numpy library: We should make sure that the numpy library is installed in our system and that too of the latest version as we are going to use functions on the numpy library on the dataset we will use in the implementation process. If numpy library is not present in our system or we haven't installed it before, then we can use the following command in the command prompt terminal present in our device to install it: 
When we press the enter key, the numpy library is started installing in our system. 
After some time, we will see that the numpy library is successfully installed in our system (Here, we already have the numpy library present in our system). 2. Panda library: Like numpy library, panda library is also the required library that should be present in our system, and if it is not present in our system, we can use the following command in the command prompt terminal to install it with pip installer: 3. matplotlib library: It is also an important library in the implementation process of the DBSCAN algorithm as functions of this library will help us display results from the dataset. If the matplotlib library is not present in our system, then we can use the following command in the command prompt terminal present to install it with pip installer: 4. Sklearn library: Sklearn library is going to be one of the major requirements while performing the implementation operation of the DBSCAN algorithm as we have to import various modules from the Sklearn library itself in the program, such as preprocessing decomposing etc. Therefore, we should make sure that the Sklearn library is present in our system or not, and if it is not present in our system, then we can use the following command in the command prompt terminal present to install it with pip installer: 5. Last but not least, we should also be aware of the DBSCAN algorithm (what it is and how it works), as we have discussed already, so that we can easily understand the implementation of it in Python. Before we move forward, we should make sure that we have fulfilled all the prerequisites that we have listed down above so that we don't have to face any problems while following the implementation steps. Implementation steps for the DBSCAN algorithm:Now, we will perform the implementation of the DBSCAN algorithm in Python. Still, we will do this in steps as we have mentioned earlier so that the implementation part does not get any complex, and we can understand it very easily. We have to follow the following steps in order to implement the DBSCAN algorithm and its logic inside a Python program: Step 1: Importing all the required libraries: First and foremost, we have to import all the required libraries which we have installed in the prerequisites part so that we can use their functions while implementing the DBSCAN algorithm. Here, we have firstly imported all the required libraries or modules of libraries inside the program: Step 2: Loading the Data: In this step, we have to load that data, and we can do this by importing or loading the dataset (that is required in the DBSCAN algorithm to work on it) inside the program. To load the dataset inside the program, we will use the read.csv() function of the panda's library and print the information from the dataset as we have done below: Output:
       BALANCE  BALANCE_FREQUENCY  ...  PRC_FULL_PAYMENT  TENURE
0    40.900749           0.818182  ...          0.000000      12
1  3202.467416           0.909091  ...          0.222222      12
2  2495.148862           1.000000  ...          0.000000      12
3  1666.670542           0.636364  ...          0.000000      12
4   817.714335           1.000000  ...          0.000000      12

[5 rows x 17 columns]
The data as given in the output above will be printed when we run the program, and we will work on this data from the dataset file we loaded. Step 3: Preprocessing the data: Now, we will start preprocessing the data of the dataset in this step by using the functions of preprocessing module of the Sklearn library. We have to use the following technique while preprocessing the data with Sklearn library functions: Step 4: Reduce the dimensionality of the data: In this step, we will be reducing the dimensionality of the scaled and normalized data so that the data can be visualized easily inside the program. We have to use the PCA function in the following way in order to transform the data and reduce its dimensionality: Output:
         C1        C2
0 -0.489949 -0.679976
1 -0.519099  0.544828
2  0.330633  0.268877
3 -0.481656 -0.097610
4 -0.563512 -0.482506
As we can see in the output, we have transformed the normalized data into two components which is the two columns (we can see them in the output), using the PCA. And, after that, we made dataframes from transformed data using the panda library dataframe() function. Step 5: Build a clustering model: Now, this is the most important step of the implementation as here we have to build a clustering model of the data (on which we are performing operations), and we can do this by using the DBSCAN function of the Sklearn library as we have used below: Step 6: Visualize the clustering model: Output: 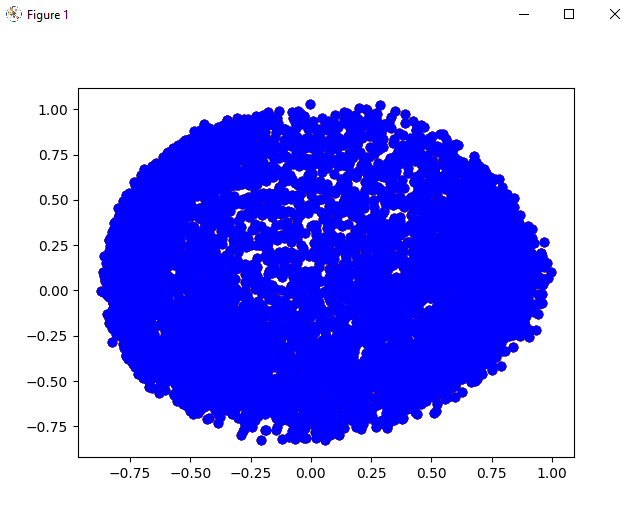
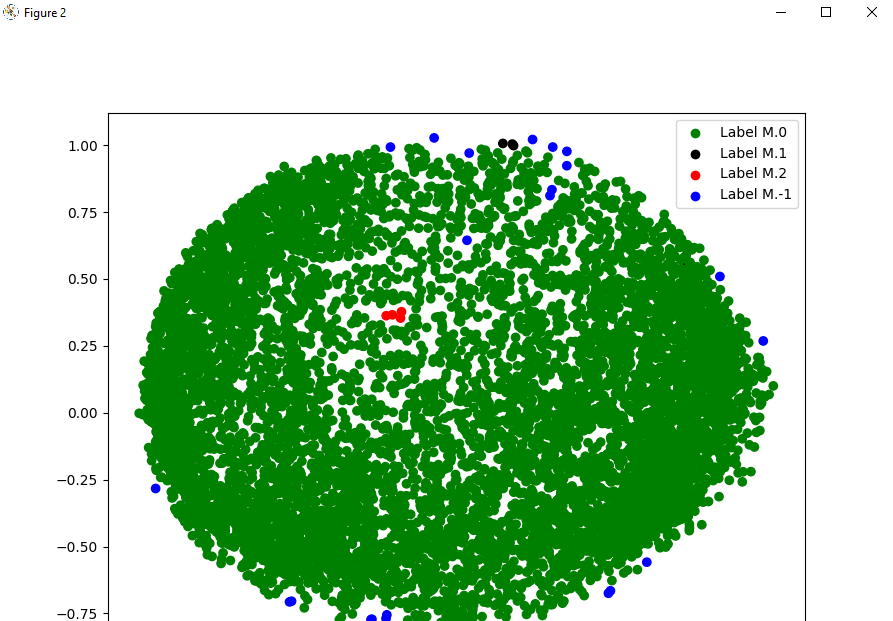
As we can see in the output, we have plotted the graph using the data points of the dataset and visualized the clustering by labelling the data points with different colours. Step 7: Tuning the parameters: In this step, we will be tuning the parameters of the module by changing the parameters that we have previously given in the DBSCAN function as follow: Step 8: Visualization of the changes: Now, after tuning the parameters of the cluster model we created, we will visualize the changes that will come in the cluster by labelling the data points in the dataset with different colours as we have done before. Output: 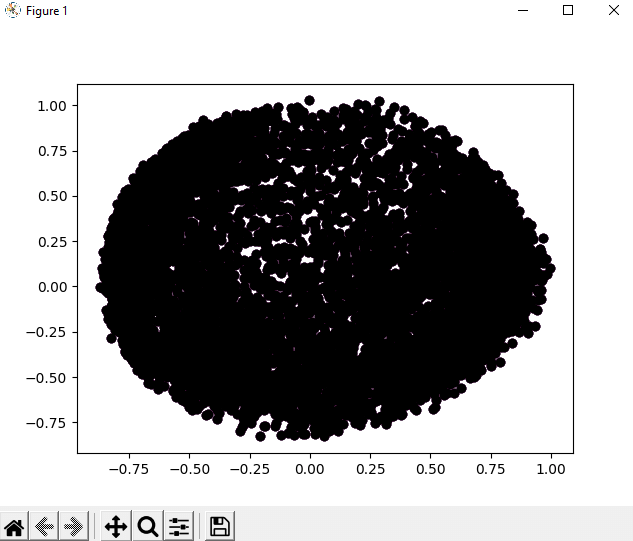
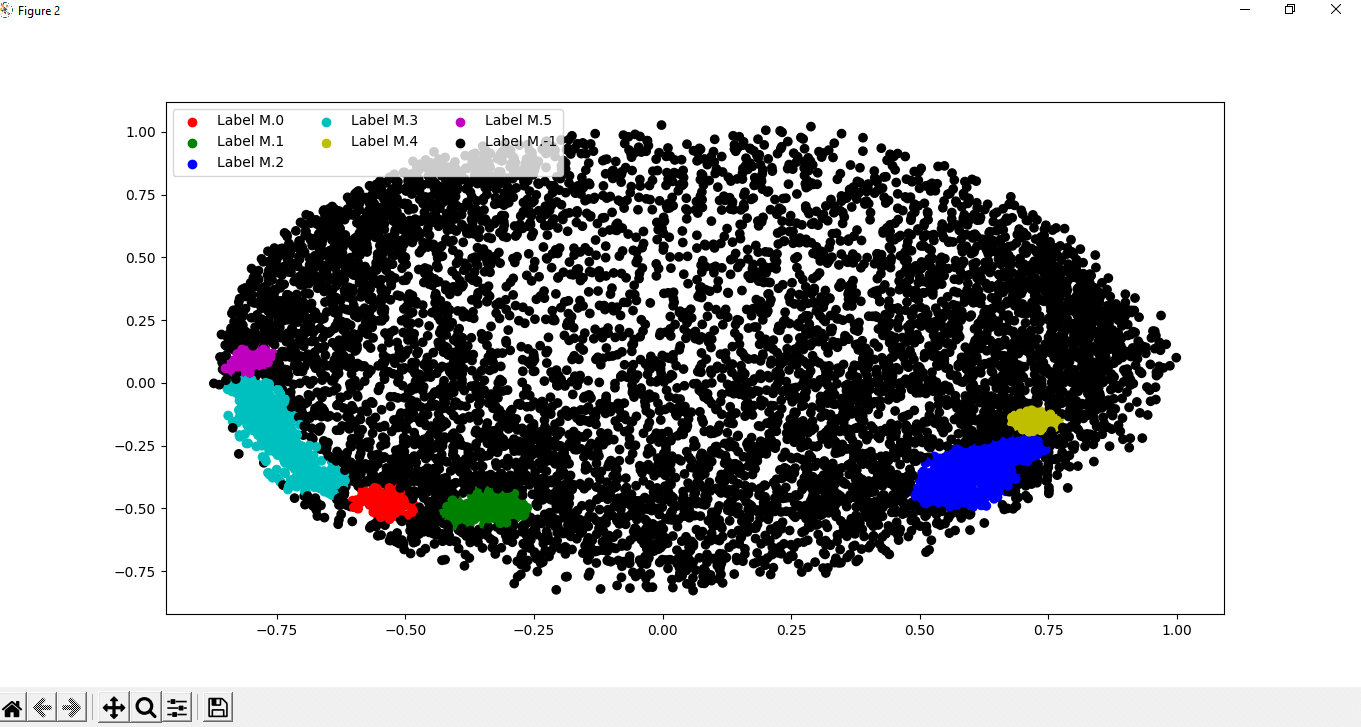
We can clearly observe the changes that have come in the cluster scattering of data points by tuning the parameters of the DBSCAN function by looking at the output. As we will observe the changes, we can also understand how the DBSCAN algorithm works and how it is helpful in the Visualization of cluster scattering of data points present in a dataset. |
 For Videos Join Our Youtube Channel: Join Now
Feedback
- Send your Feedback to [email protected]
Help Others, Please Share


