| |

Data Entry in ExcelData entry is inputting the information or data in a spreadsheet. Sometimes it is traditionally entered by entering row by row or cell by cell. The fastest method is to create a data entry form that is easy and user-friendly. Creating the data entry form saves the user's time and helps search individual records. Excel provides a unique form that is less error-prone and used for large worksheets. While typing the data directly in cells, searching for the particular data is tough. Scrolling up the column heading and searching at the bottom of the table sometimes leads to wrong data entry. The data entry form provided by Excel displays the information in a handy dialog box where the user can add the new records correctly and edit and update the selective ones. Data Validation helps to set the respective criteria in the form. Before learning, how to create a data entry form, the essential points to be noted are:
Process of Adding Form Tool in ExcelThe form tool is present in all Excel 2007 to 365 versions, even though the options are hidden in Excel. To make visible the form button in the Ribbon tab or Quick Access Toolbar, the steps to be followed are: In Excel 2007, click on the Office button, which displays several options in that Choose Excel option. The Excel option displays various options; choose "Customize" among those options. 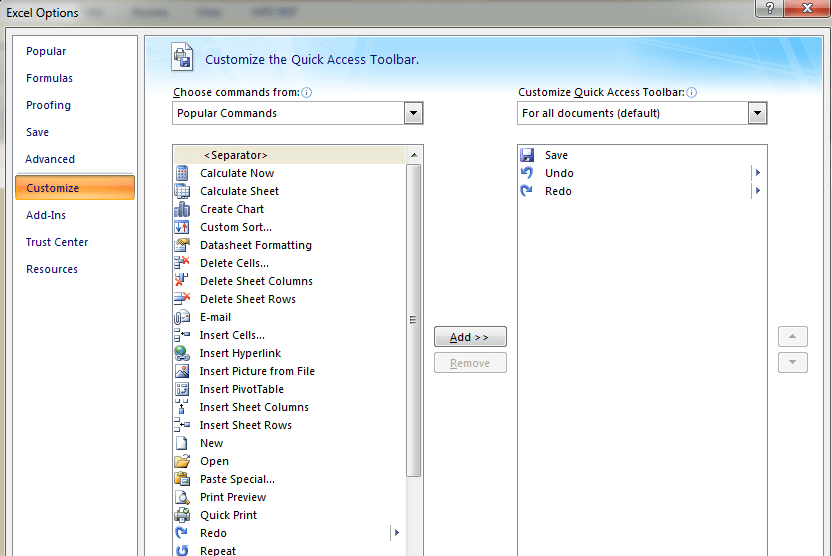
Click the drop-down arrow present in the Choose Commands from option. Choose "All Commands" OR "Commands Not in the Ribbon" among the options. In the "All Command" option, choose "Form." 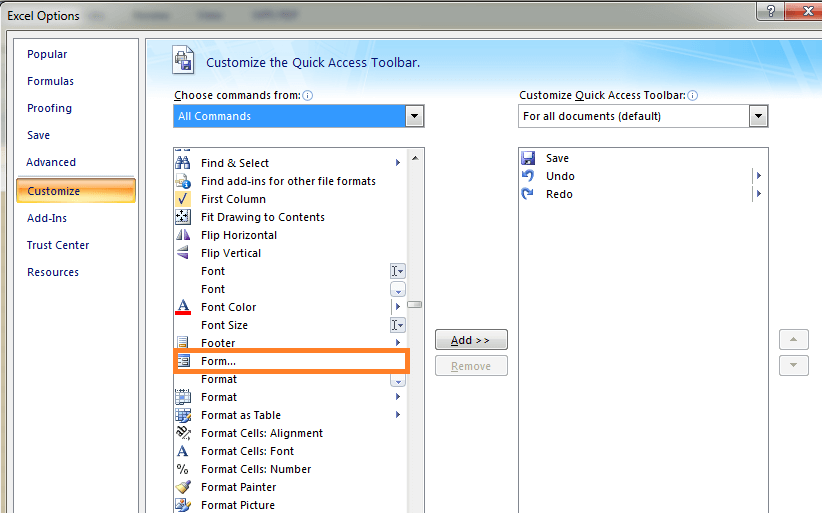
Click Add, and the form is added to the Customize Quick Access Toolbar. Press the OK button to save the changes. 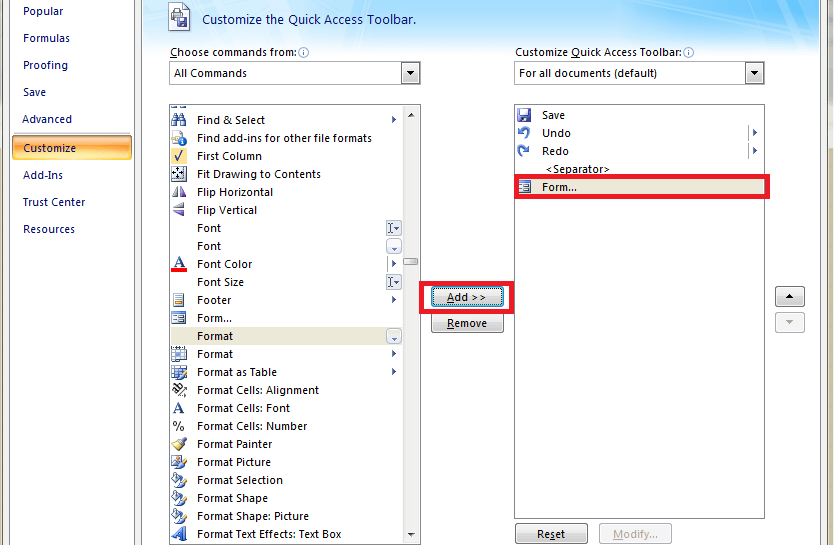
Now the Form icon will display in Quick Access Toolbar and be present in all the workbooks. A similar method is used to display the Form tool in the ribbon. 
Steps to create data entry formThe data must be represented as a table to create the form. The steps to be followed are: Enter the necessary header column and data in the cell range A1:E5. 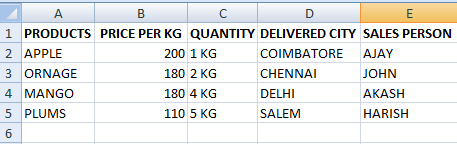
Select any of the cells to convert the data to the table and press CTRL+T. By pressing CTRL+T, the data is converted to a table. 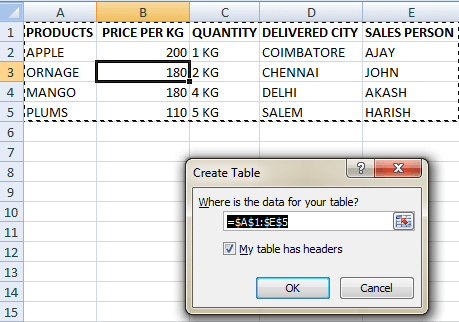
The table of the data is as follows: 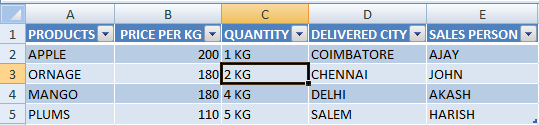
Click anywhere in the table, and click the form button. The form for the data is created. 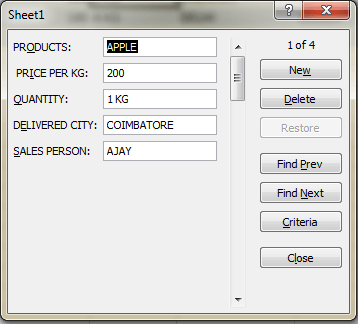
The explanation of the Form button is as follows:
Apart from these options, the keys used for navigation are:
Step to add new recordIf the user wants to add the new record to the data through the form, the steps to be followed are: Click or select any cell in the table. Then click the form icon present in the Quick Access Toolbar. The form will display 
In the form, choose the option New button. The form will display a new record. Enter the required details in the new form. 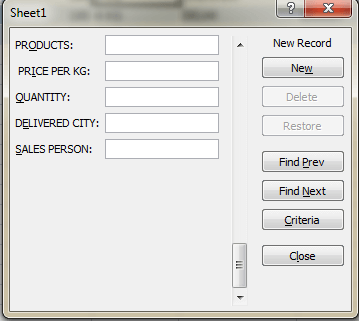
After entering the necessary details in the form, press Enter or click New Record. If the New Record option is clicked, the previous record entered is saved in the table. 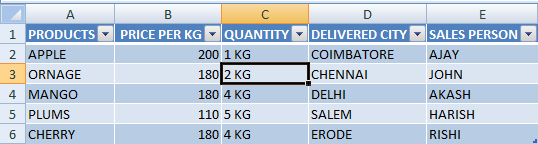
Here the data cherry is added to the table range. Note:To add specific information quickly, several shortcuts are used as follows: CTRL+; This key is used to insert today's date. CTRL+SHIFT+; This key is used to enter the current time. Searching Specific RecordsThe Find Previous and Find Next button or vertical scroll bar is used to search specific records in the form. The Criteria option is used to find the records based on specific criteria. For example, in the given data, the word APPLE is typed in the Product section, and click the Find Next option to find the details of APPLE. 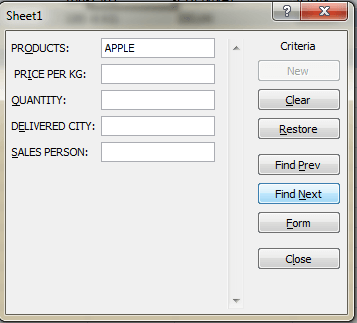
After clicking the Find Next option, the data next to APPLE is displayed. While searching the specific characters, the wildcard is used, which helps to elaborate the text. For example, to find the products containing the word "MAN," type the character *MAN* in the Product section. 
In the concept of Numbers and Dates, the logical operator is used, such as greater than(>), less than(<), equal to(=), not equal to(<>), etc. Updating and Restoring RecordsIf the entered record is wrong, the Criteria or navigation button is used to retrieve and update the record containing incorrect data. The Enter key is pressed to correct the record. The steps to update and restore the record is as follows: Click anywhere in the data and press the form icon. The form will display. For example, to change the salesperson in Salem, use the criteria or navigation button to display the data in the form. 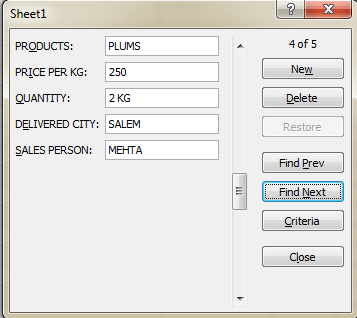
In the form, the salesperson of Salem is changed to John from Mehta. After changing the data, press the Enter button. 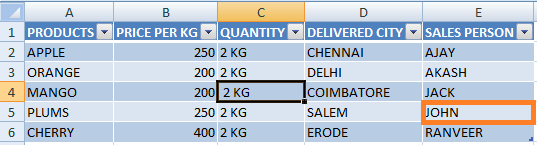
Here the new name is updated. Before pressing the Enter key, if the restore button is pressed, the old data will be updated. To restore the existing data, press Ctrl+Z to display the data in a table. Using Data Validation in the data entry formData validation is the process of restricting the user to input data to certain criteria. The data validation decides what data type should be entered in the table. Some of the data validation examples are as follows:
These are some examples of data validation in Excel. To make the data accurate and organized, data validation is used. It restricts various data types, such as numbers, text, and dates, to specific limits in a particular cell. To use the data validation present for the data present in the table, the steps to be followed are: Select the necessary cells in the data. Here the data range selected is A2:E6. Select the Data Validation option from the Data Tools group. There display several options, and in that choose Data Validation. 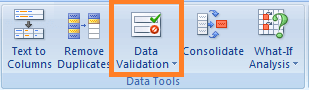
The data validation option can be displayed by pressing the Alt>D>L key separately. 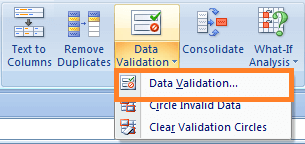
The data Validation dialog box will appear. In that, choose the necessary criteria. Click the drop-down button present in Allow option in the Settings group. 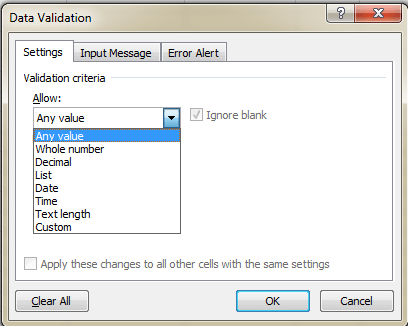
Several options are shown in the image that chooses the required option. Here the option "Whole Number " is chosen. The Data option displays various options, such as, 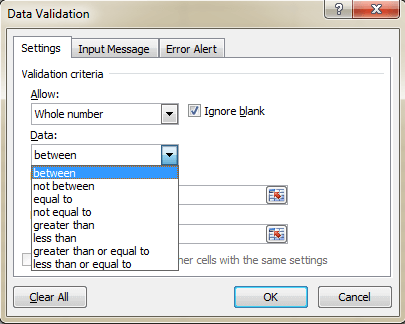
shown in the image, in that, choose the option "Between." Enter the Minimum value and Maximum value in the text box. Click OK. 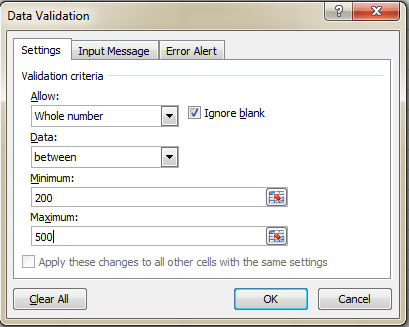
To check whether the criteria are applied, select any of the cells in the table displaying the form. In that, the Price of Apple is entered as 700. Click Enter. 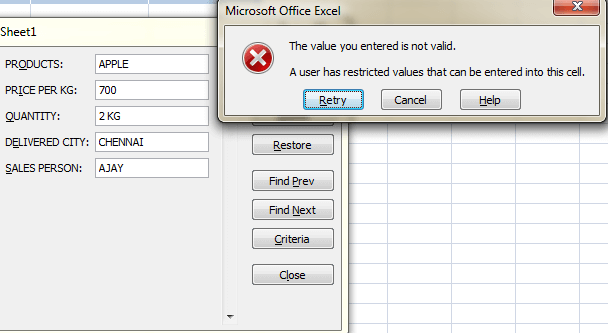
Here a warning message is displayed, showing that specific criteria are applied to the data, which restricts the entered value for the selected cell. Similarly, the process is followed to set the data validation process for text. Adding the required input messageOnly the user knows the criteria after applying the data validation to the particular range of cells. If external users try to enter some new values, which are restricted, the third-party user doesn't know the criteria. To rectify this problem, the user can type an input message in the Input Message Tab. This message shows what type of data should be entered. To add an input message, the steps to be followed are: Click the Data Validation option from the Data Tools Group. The Data Validation dialog box will appear. In that, choose the "Input Message Tab." 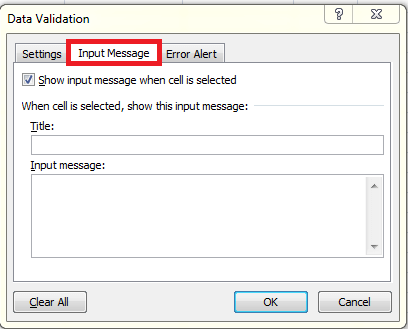
Check whether the "Show input message when the cell is selected " is checked. Enter the required title in the title box, and the required input message is checked. 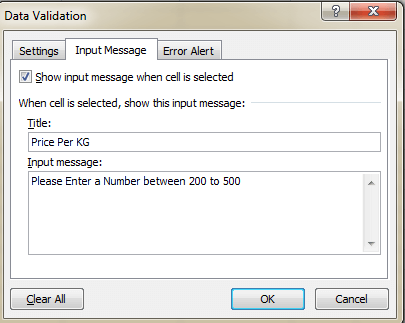
Click Ok. To check the criteria in the data, change any value in the Price per kg column. Here the cost of the orange is selected. After selecting the value, the message will be displayed as follows: 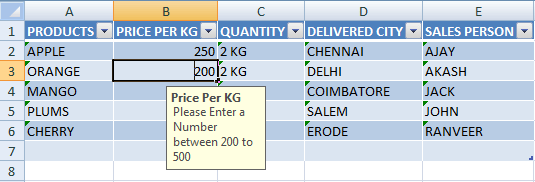
Similarly, the user can change the input message based on the criteria. Displaying the required Error MessageThe user can choose the required Error Message to display when the wrong value is entered. The type of alert message is as follows: Stop(default):This strict error message restricts the user from entering invalid data. The user can choose the "Retry" option or the "Cancel" button, where the entry is removed. 
WarningThe Warning error message warns users not to enter invalid data but allows them to enter it. The option "Yes" can be pressed to enter the invalid data, and "No" option is used to edit it, and the "Cancel" option is used to remove the entry. 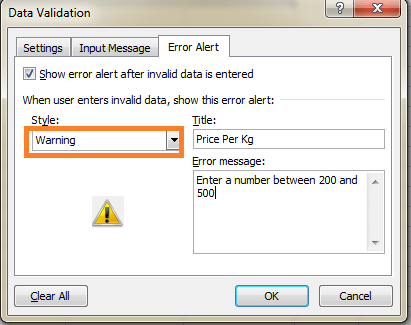
InformationThe permissive alert type informs the user about the invalid data entry. The "OK" button is pressed to enter the invalid data or the "Cancel" button to remove the data. 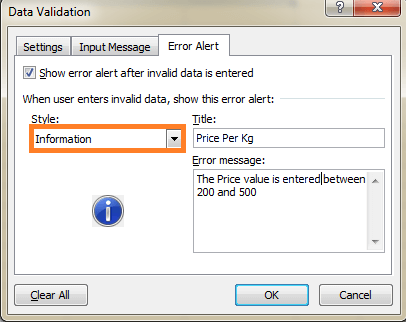
SummaryThe steps and methods to create a form in Excel are explained in this tutorial. The form in Excel can be created quickly and efficiently, which helps the user based on the data requirement.
Next Topic#
|
 For Videos Join Our Youtube Channel: Join Now
Feedback
- Send your Feedback to [email protected]
Help Others, Please Share


