Excel to JPGMS Excel or Microsoft Excel is one of the most commonly used spreadsheet programs worldwide. It comes included as part of Microsoft Office Suite. One of the main features of MS Excel is that it allows users to save their spreadsheet documents into various distinct formats. Even though it includes several file formats under its 'Save As' dialog, it lacks the JPG file format. That means Excel does not offer direct support to save spreadsheets into JPG. 
Converting an Excel document into a JPG or any other image format may be the most useful for some users. The JPG format is easily accessible on almost all devices without the need to install any third-party software. Therefore, we must know the handful of different ways to convert/ save Excel to JPG. In this article, we discuss the different methods to convert or save Excel files to JPG formats. Although there are countless alternate methods to perform this task, the following are the most essential and the easiest ones:
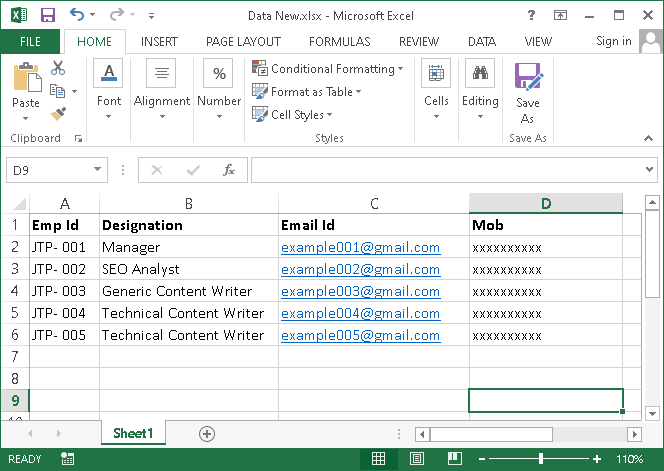
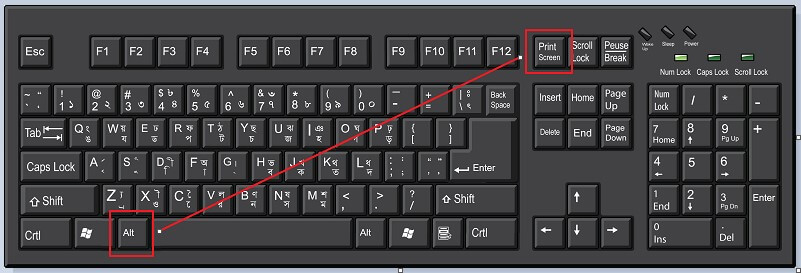
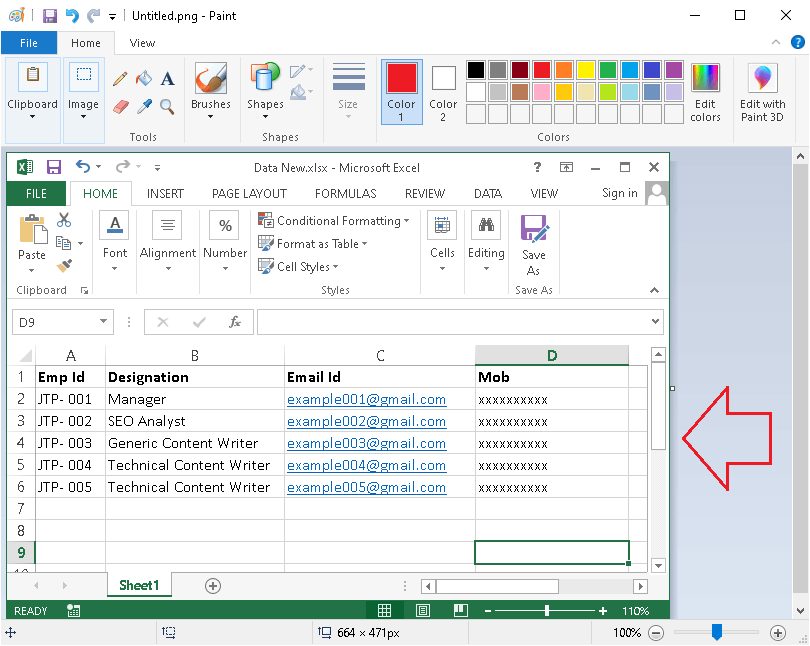
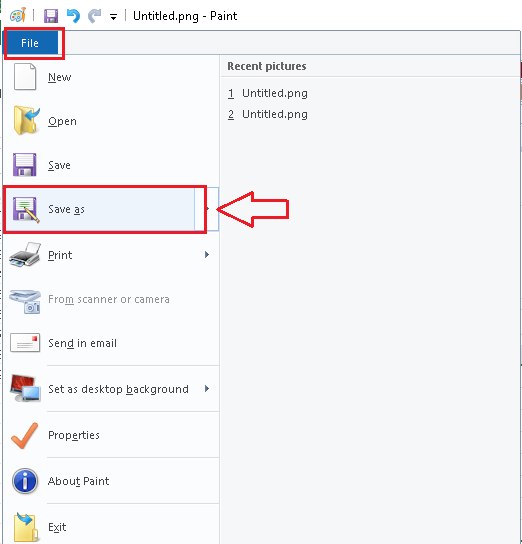
Let us discuss each of the above-listed methods in detail: Excel to JPG Using Print ScreenUsing the Print Screen button on the keyboard is the quick and the easiest solution to capture the on-screen part of the Excel sheet and then save it to JPG or any other image formats. However, this method is not helpful for vast amounts of data because it will take a long time to capture all the Excel sheets' screens separately. Thus, if we want to work offline with the small part of the Excel sheet while working on the file, we can use this method. This method includes the following steps:
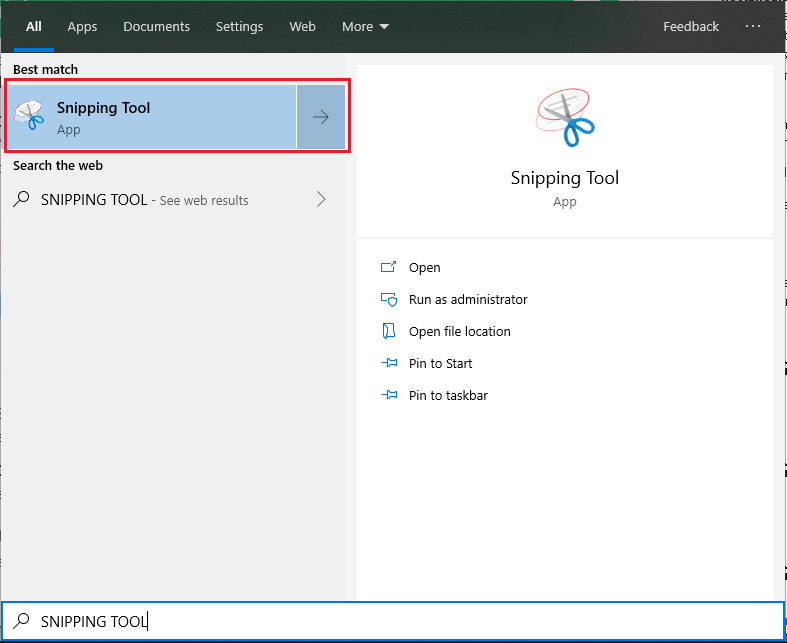
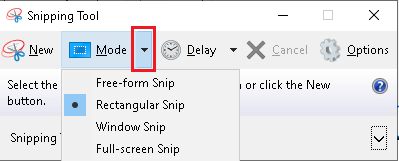
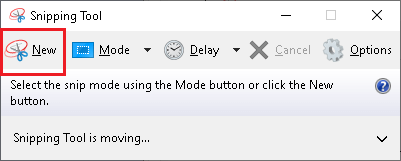
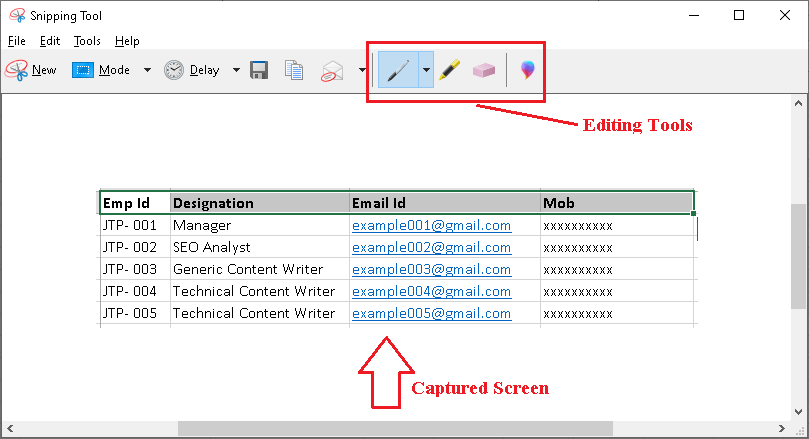
Since the shortcut 'Alt + PrtSc' captures the entire current window, it includes the ribbon, top menu, scrollbar, and other visible window contents. Therefore, we can use the Crop feature in the graphic editor application to remove the unnecessary areas of the image before saving it. Excel to JPG Using Image Snipping ToolAnother method to convert Excel to JPG includes the use of the snipping tool. This method also works offline and does not require any third-party software installed on a Windows computer. The snipping tool is a small program that comes included as a system utility with all the modern versions of Windows, after Windows 7. Unlike the Print Screen feature that captures entire visible contents of the screen, the snipping tool allows users to use different capturing options, such as:
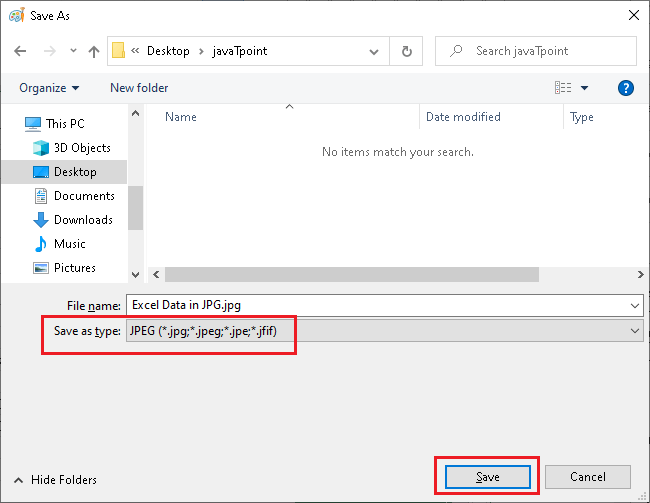
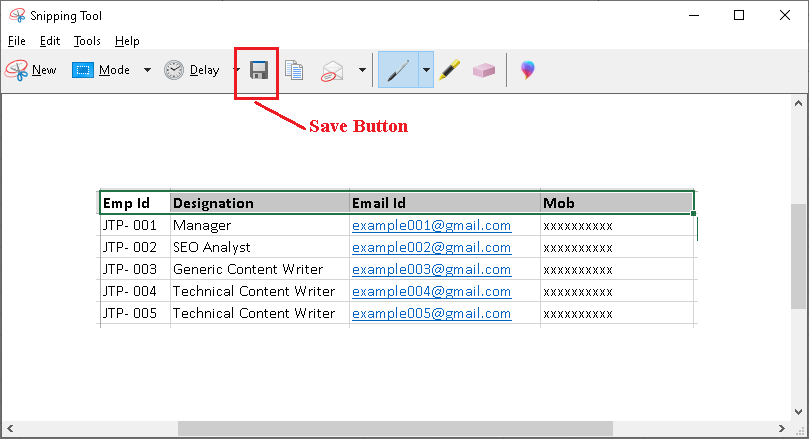
Therefore, using the snipping tool is a little more powerful than using the Print Screen feature. However, this also does not help much to convert vast amounts of data to JPG. This method includes the following steps:
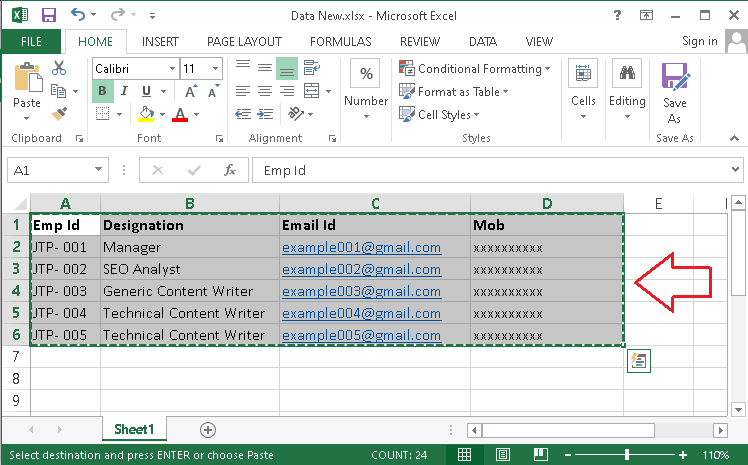
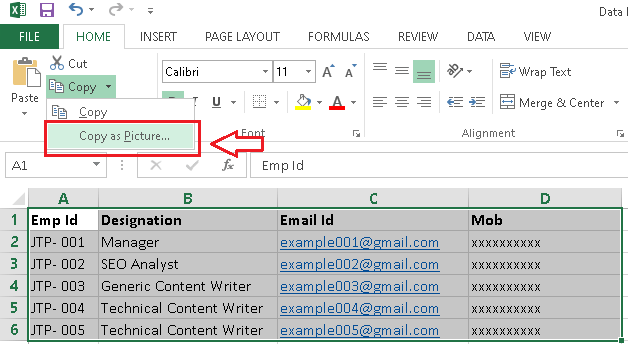
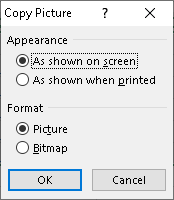
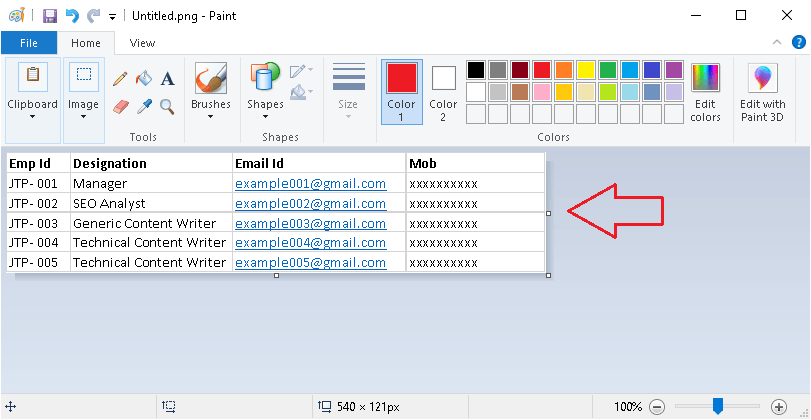
Excel to JPG Using Copy/ PastingIf we use the copy/ pasting feature to capture part of the Excel sheets, we can remove certain limitations. This means that we can select more data from the worksheet without making it visible on the screen like the above two methods. That way, we can even capture vast amounts of data. For example - a table with hundreds of thousands of rows. This method includes the following steps:
Excel to JPG Online ToolsAlthough we can use the above methods to work offline and complete the job or converting Excel to JPG, it can be a little complex in some cases. For example, suppose we need to convert lots of Excel files to JPG. This way, we will have to work on each file separately, which can be time-consuming. Luckily, we have numerous online tools that help us convert/ save Excel files as JPG in almost no time. The best thing about online converters/tools is that most of them are available on the web for free to use. The following are essential and the most popular Excel to JPG online tools: ZamzarZamzar is one of the most popular online tools to convert Excel files into JPG and several other formats. This tool offers a straightforward user interface and helps users convert their Excel files into JPG quickly. Users only need to select the desired Excel files using the Zamzar tool, and the corresponding files are uploaded on their servers. Next, users must select the format in which they want to convert the uploaded files and then click on the 'Convert Now' button. The files are automatically converted into desired formats, and the 'Download' button is displayed on the screen. This button allows users to save their JPG files to their devices easily. 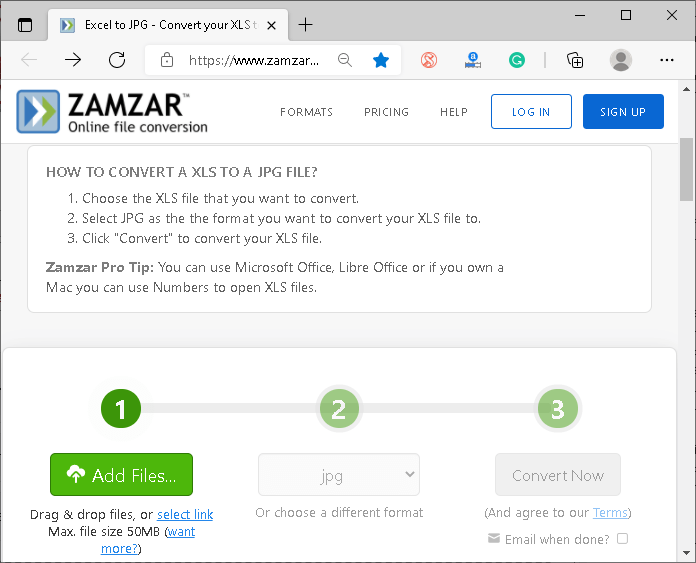
With Zamzar, it is impossible to upload the Excel file(s) with a size of more than 50MB in free accounts. Users must purchase Zamzar paid subscription accounts to unlock certain limits and utilize the tool's full potential. Link to Zamzar Tool: https://www.zamzar.com/convert/xls-to-jpg/ Online2PDFOnline2PDF is another popular online converter that allows users to convert Excel files to JPG without a hassle easily. Unlike Zamzar, the Online2PDF tool allows users to convert files with sizes more than 50MB. Users can select the Excel files with the size of up to 100 MB each. Additionally, this tool allows users to select up to 20 files at once; however, the total combined size should not exceed 150 MB. 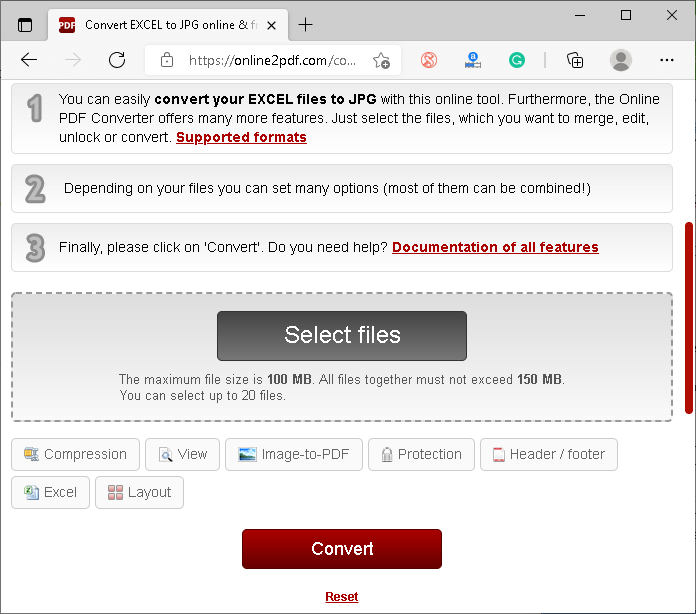
When converting files using the Online2PDF tool, the process is almost similar to the other online tools. Users are only required to upload the desired files, select the file format (such as the JPG in our case) and then click on the convert button. Lastly, the converted files can be saved locally using the 'Download' button. Link to Online2PDF Tool: https://online2pdf.com/convert-excel-to-jpg CloudConvertCloudConvert is another handy tool that allows users to convert most document formats, including Excel. This tool offers some advanced options for modification. That means users can modify some parameters for the outputs, such as the number of pages, pixel density, width, height, quality, and many more. In addition to this, CloudConvert promises users to provide the quality of the output formats precisely similar to the file saved through Office Suite. Although CloudConvert offers all the premium features for free, users can only convert up to 25 files in a day. Besides, users can get the premium subscription of CloudConvert to increase the daily limits according to their needs. 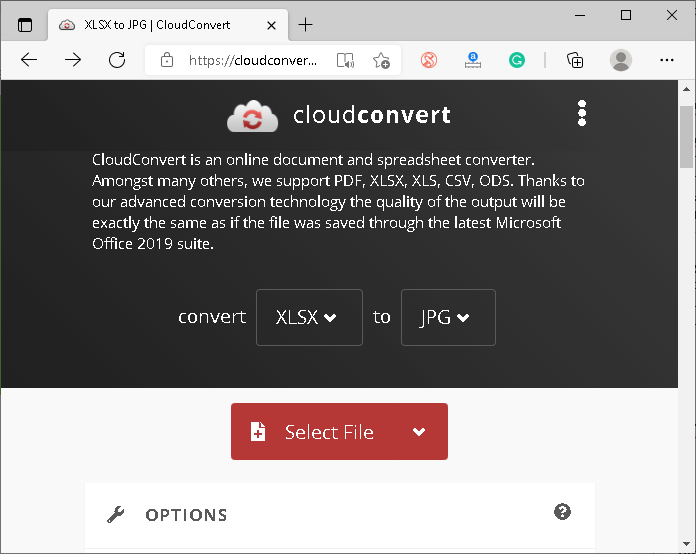
As shown in the above image, we must first select the Excel file like the other similar tools. Next, we need to adjust the parameters and get the output of Excel files in JPG format. Link to CloudConvert Tool: https://cloudconvert.com/xls-to-jpg SmallpdfEven though its name is Smallpdf, this particular tool can also be helpful for users to convert their Excel files to JPG online at no cost. The tool uses lossy compression techniques to shrink the Excel files' data to a smaller size to a maximum extent. However, the Smallpdf tool works in two steps; the file is first converted to pdf and then to JPG. Additionally, users must wait for the two different conversions, and it is a manual process. This means that users need to perform both the conversions manually one by one. That is the reason most people don't find this tool much helpful. 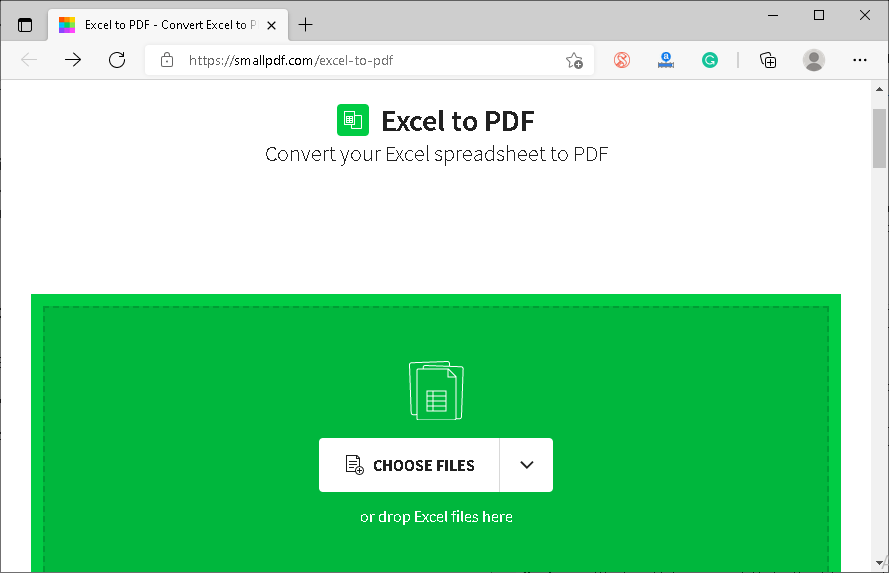
In particular, we must first choose the particular excel file(s) and wait to convert files to pdf format. Once the conversion is done, we must select the 'PDF to JPG' option from the right side menu and wait for the conversion. 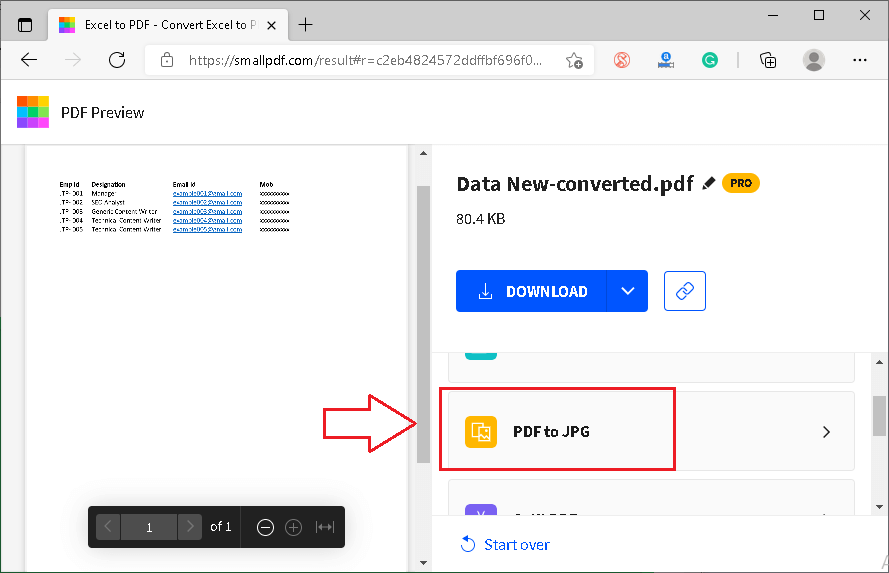
We can download the converted Excel files in JPG formats after the conversion. Link to Smallpdf Tool: https://smallpdf.com/excel-to-pdf Disclaimer: We do not take responsibility for the data security of the Excel files uploaded to any of the listed online tools. It is strongly recommended to read their terms & conditions or privacy policies to understand how they use data from Excel files uploaded to them.
Next TopicJPG to Excel
|
 For Videos Join Our Youtube Channel: Join Now
Feedback
- Send your Feedback to [email protected]
Help Others, Please Share


