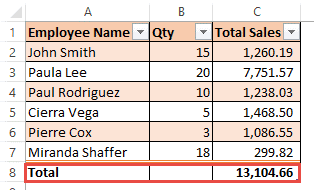
How can one Convert a Microsoft Excel table to range or vice versaIt was well known that, in the Microsoft Excel worksheets, we are required to organize, maintain, and analyze the given amount of data every now and then efficiently. And in this respective tutorial, we will see how one can easily convert the Microsoft Excel table to a normal range in Microsoft Excel. Despite this, we will also describe the various methods that can be used for the purpose of converting any data range to the Table in Excel. But before that, we will understand some of the basic terminologies, such as:
Moreover, the Table in Microsoft Excel is primarily considered one of the most powerful tools that can be used to organize, manage, update, as well as analyzing the various entries in a given dataset respectively. What is Range in Microsoft Excel?Range: In Microsoft Excel, a group of the selected cells in a given dataset is only a range. And we can easily select any number of the cells in a given dataset, and the reference of the leftmost top cell and the bottom rightmost cell is Range.
What do we meant by the term Named Range in Microsoft Excel? A named range in Microsoft Excel is basically considered as a simple range of cells with a name but the main purpose of making use of the named ranges is to just make use of the references in order to a group of cells.
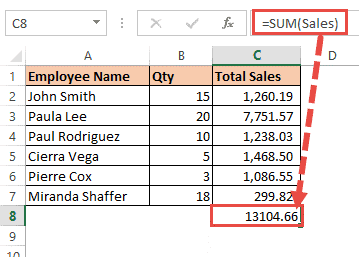
And for the purpose of converting a particular range of cells to a named range, we all need to do is to just select out the Range, and then we will be typing the name into the Name Box and pressing out the return key: 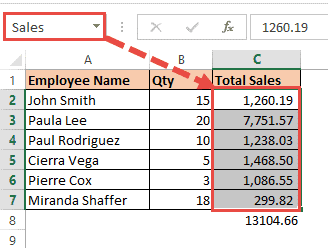
Moreover, we can easily identify a named range by just selecting the Range of the cells. And if in case we see a name instead of a cell reference in the name box, then in that case the Range of cells primarily belongs to a Named range. What is Table in Microsoft Excel?Table: In Microsoft Excel, Table is a kind of advanced Range which is having an inbuilt features and an Excel Table is a pre-structured up-to-date range with different offered features such as Header Rows, Total Rows, Banded Rows, etc. And it is very much easy in order to distinguish the Tables from Ranges. It was well known that Microsoft Excel Table has a frozen heading, borderlines, auto-filter, sort options, and a distinct viewing format. 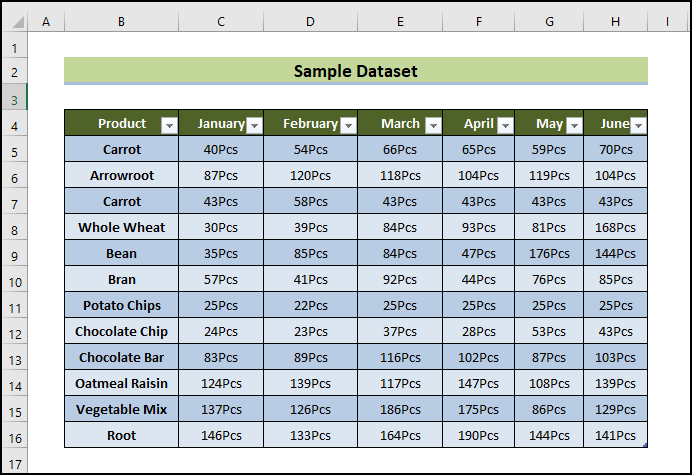
What are the basic differences between the Range and Table in Microsoft Excel?At a very first glance, it is much easy in order to differentiate between a table and a range effectively that are widely used in Microsoft Excel. Now we will be seeing out some of the basic differences that exist in between an Excel Table and a Range:
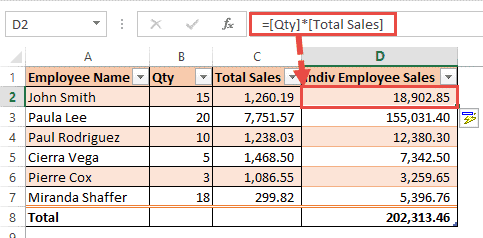
What do we mean by convert an Excel table to a range in Microsoft Excel?It was well known that Microsoft Excel most probably allow us to quickly transform a given table back to a normal range, as this will be removing all the table features but keep table style formatting preserved. Below, we will find detailed guidance how to achieve this: How can one convert a table to a range in Microsoft Excel? The fastest way that can be used to transform the given Table into a normal range is this: we first need to right-click on any cell in our selected Table, and then we will click on the Table> Convert to Range. 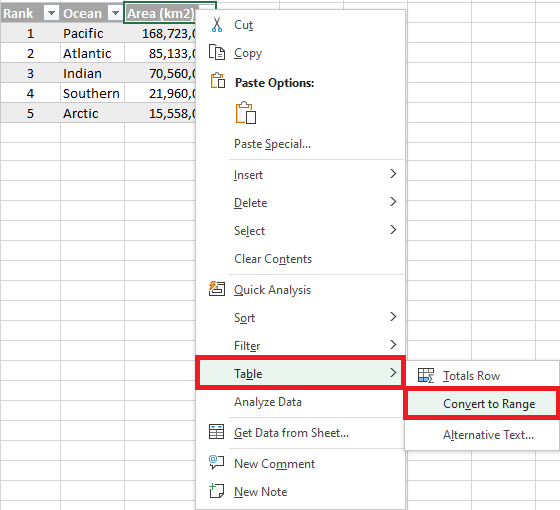
And we can perform out the same operation by making use of the ribbon: Step 1: Firstly we will select any cell in the Table in order to activate the Table Design tab. Step 2: After that, on the Table Design tab, in the Tools group, we will be clicking on the option that is: Convert to Range. 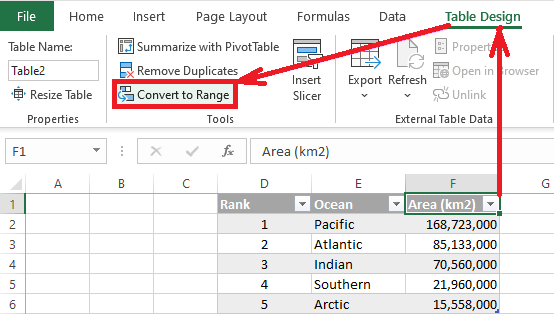
And then, either way, Microsoft Excel will display a prompt asking us to confirm our intention as well: 
After that, once we click on the Yes option, the Table is immediately changed back to a normal range of cells respectively: 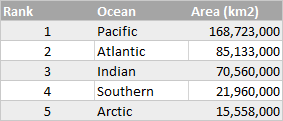
Note. We should keep in mind that this particular method would be changing a table to a usual range as well as removing all the features of an Excel table, like as automatic expansion, etc. And it does keep the table style formatting preserved, like as fill and font colors. And if in case we do not want it, then we can easily remove it.How can we convert Range to Table in Microsoft Excel?We have various methods that can be used for the conversion of the Range to Excel, which we are going to discuss one by one respectively: Method 1: By making use of the Table Feature to Convert Range to Table It should be noted that Microsoft Excel will have an Insert tab that offers an inserting table option in Tables Sections. Steps: Step 1: First, we will go to Insert Tab> and Select Table (in the Tables section). 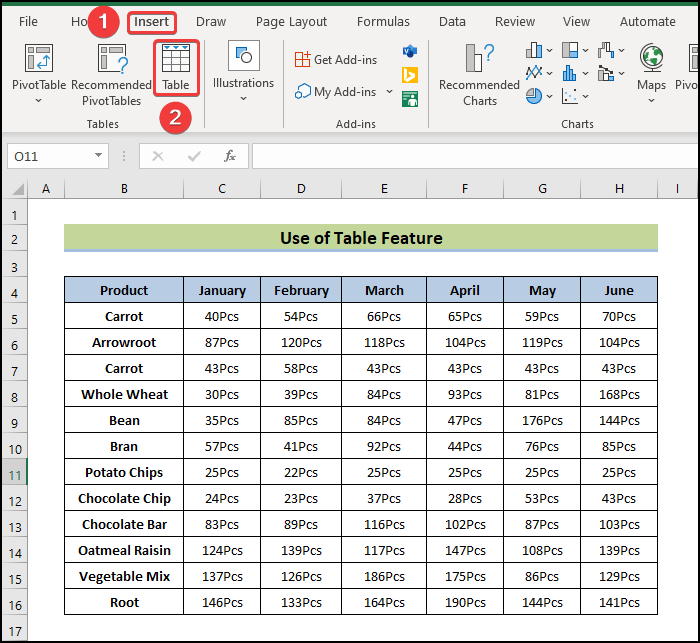
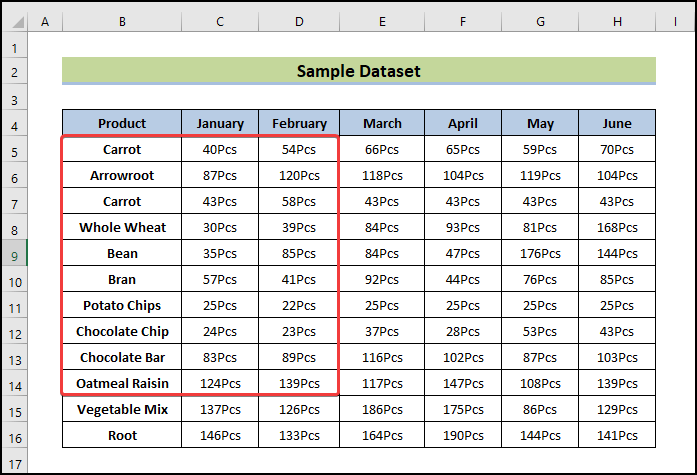
Step 2: After that a Create Table command box will get appear on the screen just after performing the above steps. Step 3: In this step, we will be selecting the Range that is from: B4:H16, which we want to convert into a table. Where is our data for our selected Table? Field and we will be ticking the box saying My Table has Headers respectively. 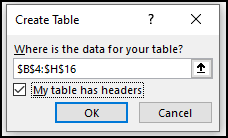
In this case, if we do not have the headers, keep the box Unticked. Step 4: Finally, we will click on the OK button. And the whole Range will be then converted into a table as seen below: 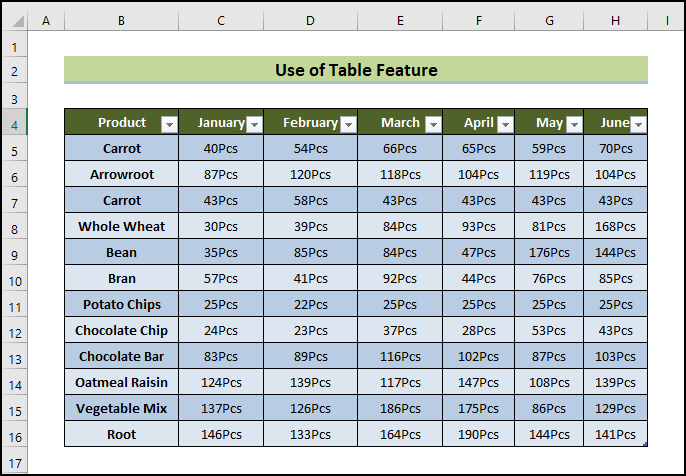
Method 2: By making use of the Keyboard Shortcuts to Convert Range to Table We can use the keyboard shortcuts to convert a range into a table. Steps: Step 1: First, we will press out the CTRL+T altogether. Step 2: Consequently, a Create Table window appears on the screen. 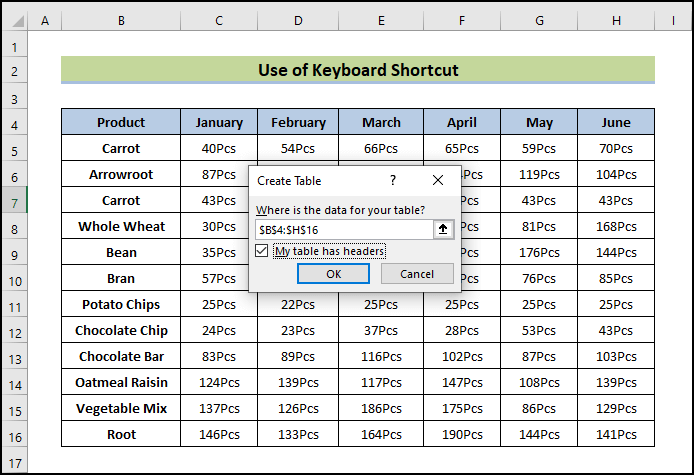
Step 3: In this step, we will select the RangeRange (i.e., B4:H16). If the columns have headers, we will Tick the box saying My Table has headers unless keeping it Unticked. Step 4: We will click the OK button to proceed further. Step 5: Then the selected Range will becomes a structured table: 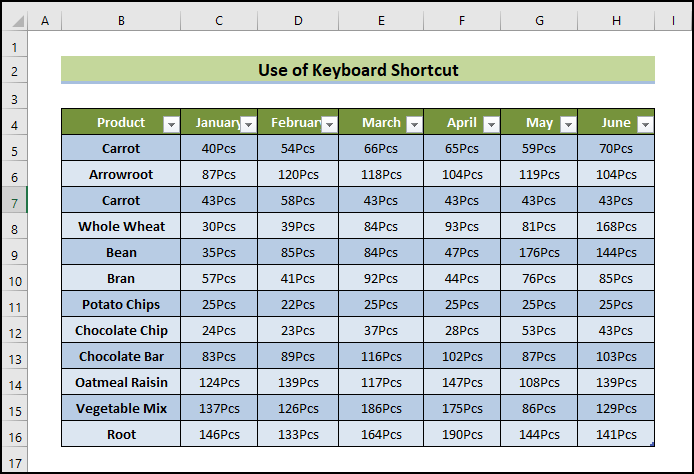
Method 3: By making use of the Format as Table Feature in order to Convert Range to Table The other most convenient way which can be used for the purpose of converting a range into a table is by just making use of the Format as Table feature. Steps: Step 1: First, we must hover to Home Tab > and Select Format as Table (inside the Style section). Step 2: We have lots of table styles which are pre-added and we will be choosing any of the Styles in order to format the Range as a table in an organized manner. 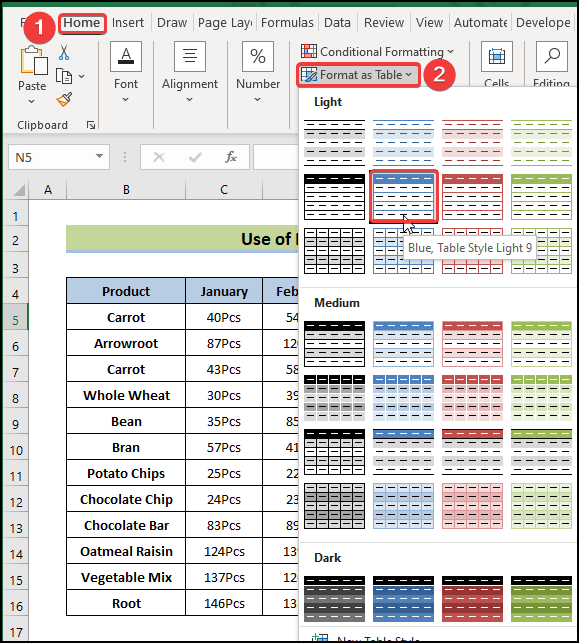
Step 3: Consequently, the Create Table window will get appears on the screen as similar to the previous methods. Step 4: Then, we will select the Range that is from B4:H16 and Tick the My Table has headers box as previously instructed. 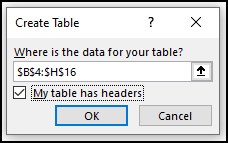
Step 5: Nextly, we will click the OK button, and the specified RangeRange converts into a table. 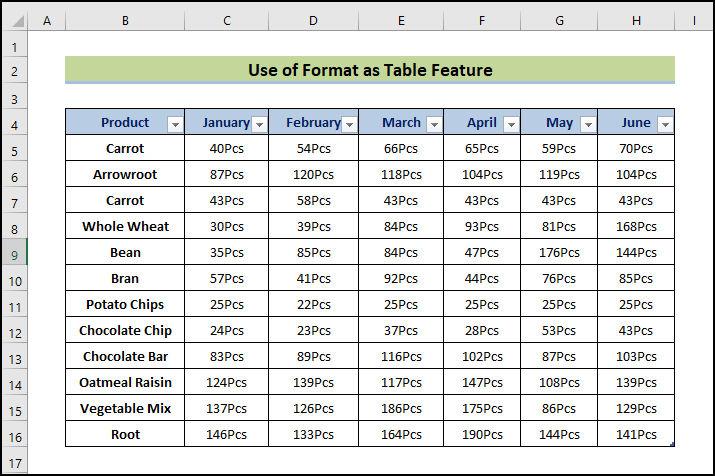
Next TopicHow to count cells with specific text?
|
 For Videos Join Our Youtube Channel: Join Now
Feedback
- Send your Feedback to [email protected]
Help Others, Please Share


