How to move columns in Excel?
Microsoft Excel, or Excel, is powerful spreadsheet software that helps us record data within multiple cells in one or more worksheets. The intersection of rows and columns forms these cells. So, cells are part of rows and columns. Proper arrangement of data in rows or columns plays an important role and is sometimes really important for better readability, usability and convenience. Thus, there may be cases when we may need to move rows or columns in an Excel sheet.
In Excel, moving a row/column usually refers to moving the data of that respective row or column to another desired row/column. In most cases, the primary purpose of moving a row or column is to restructure or arrange the dataset in the desired format to view specific columns in a meaningful sequence or fulfilling certain needs for using formulas.
In this tutorial, we discuss various step-by-step methods or solutions on how to move columns in Excel. This tutorial teaches us how to move one or more contiguous/non-contiguous columns on the same or another sheet. The methods discussed here work in all versions of Microsoft Excel.
Different Methods to Move a Column in Excel
As we said above, moving a column means rearranging the data from one column to another. The simplest way seems to be manually entering the data into the desired column, similar to the source or original data. This method is useful to some extent when we have only a small number of cells in the column we want to move. But, when the column contains multiple cells with the effective dataset, manually entering the data may not be an easy solution. In such a case, we have to use methods that can help us to move the columns within the sheet easily.
Although Excel doesn't offer any specific tool like Column Manager to move or rearrange columns within a sheet, some effective methods exist. Below are some common methods for moving columns in Excel:
Moving Excel Column using Drag-Drop
The simplest method to move a column in Excel involves using a typical drag-and-drop feature of Excel. This is one of the fastest ways to move columns. This usually takes a highlight and drag-drop movement within the sheet via the mouse.
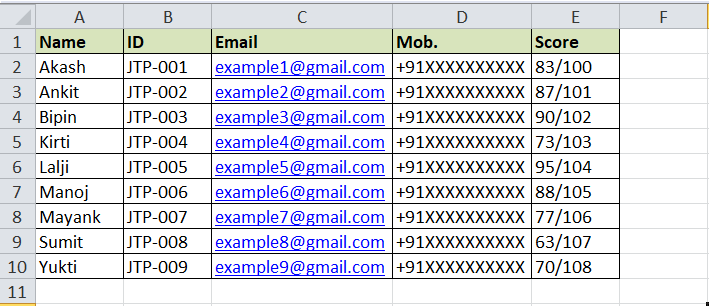
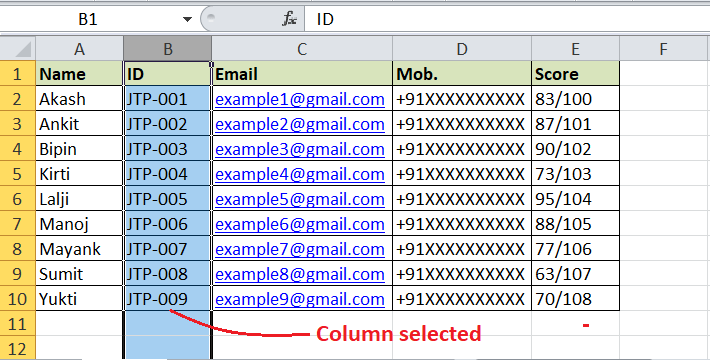
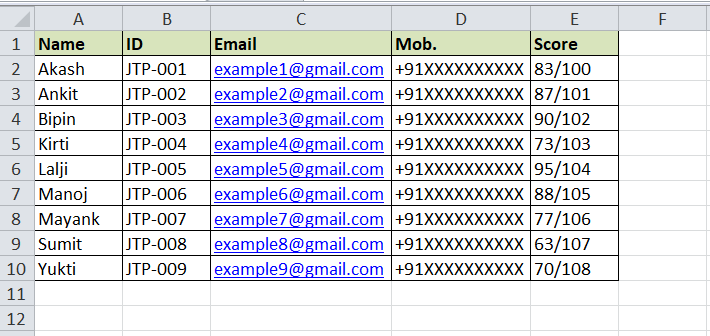
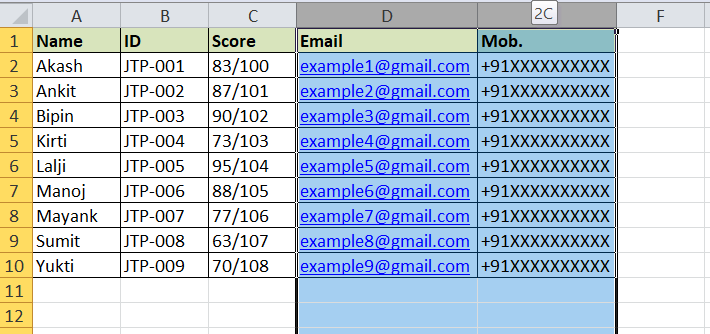
For example, consider the following sheet where we have the names of employees in column A and their IDs in column B.
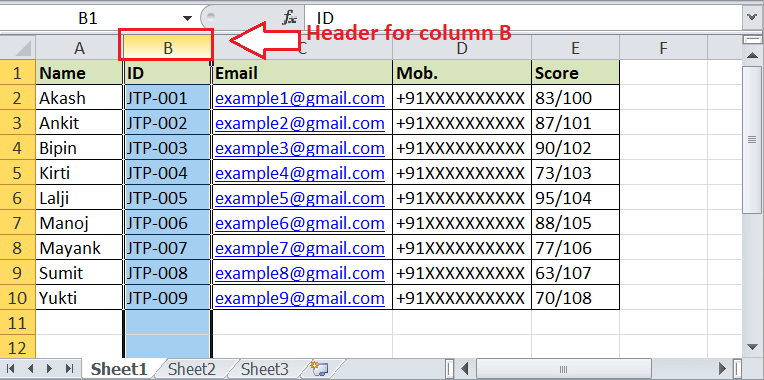
Let's say we want to move column B to the leftmost position of the sheet, making it the first column. We can move it accordingly using the following steps:
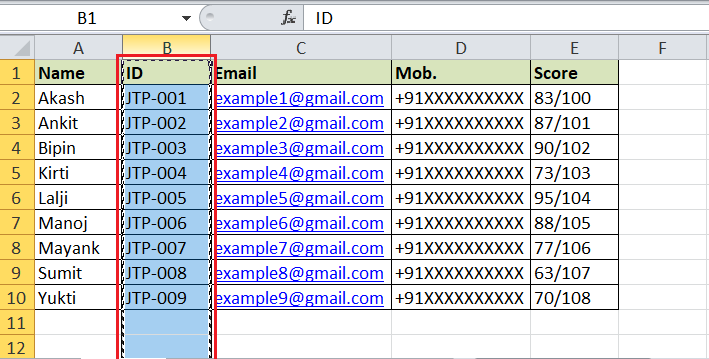
- First, we must select the entire column we want to move to a new location. To select the column, we must click on the top of the column (column's header or column letter).
Alternatively, we can click on any column cell and press the Ctrl and Space keys together to select the entire column.
- Next, we must click and hold the Shift Also, we must move the cursor to the left or right edge of the selected column until our cursor changes to a four-sided cross. After that, we must drag the column to the desired location, left or right.
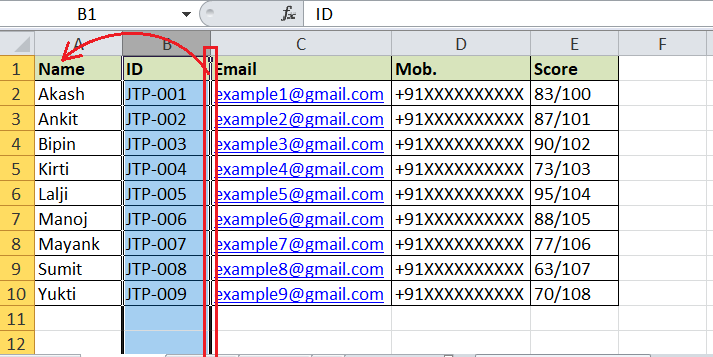
While dragging the selected column, we usually see that the borders of columns get dark, indicating where the new column will be inserted.
- After reaching the position we want to place a new column, we must release the mouse button and the Shift key. The selected column (B) will appear in the new location (leftmost column).

Similarly, we can move or reposition the desired rows within the worksheet. However, using the Shift key while dragging the row/column is essential. If we don't use the Shift key, our selected column will replace the data on the new location.
One major disadvantage of using the drag-drop method is that we cannot move columns between different worksheets with this method.
Moving Excel Column using Cut-Paste
Another easy and commonly used method to move a column in Excel involves using Excel's regular cut-paste feature. This works perfectly for moving one or more columns in the same sheet or on a different sheet in the workbook.
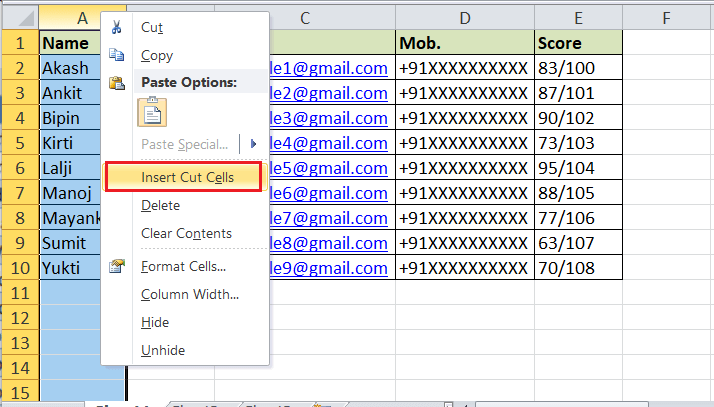
Let's reconsider the previous sample data where we need to move the column named 'ID' to the leftmost position of the sheet. Here are the steps for the cut-paste method to move columns in Excel:
- Like the previous method, we first must select the entire column we want to move. We can click on the column header or use the 'Ctrl + Space' keys after selecting any specific cell of the column. This will select the entire column.
- After selecting the column to move, we must press the keyboard shortcut 'Ctrl + X'. This will cut the selected column from its original location. We usually see the 'moving ants' effect around the column that has been cut in the sheet.
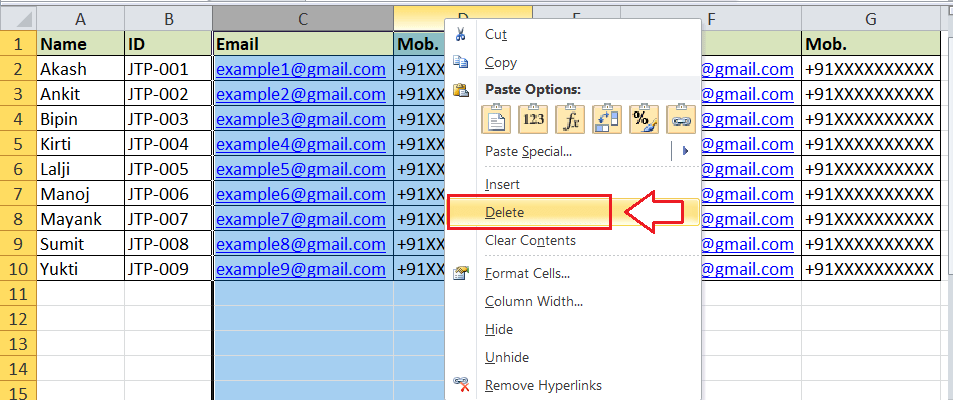
- After the desired column has been cut, we must select/highlight the column before the destination column where we want to place our cut column. For instance, we want to place a column in the leftmost area, so we select the column before which we want to insert the cut column, i.e., column A. Also, we must press the right-click button via the mouse on the selected or destination column's header.
- Next, we must select the 'Insert Cut Cells' option. Alternatively, we can simultaneously press the Ctrl key with the Plus sign (+). But, we must press the Plus (+) key from the numeric keypad area.
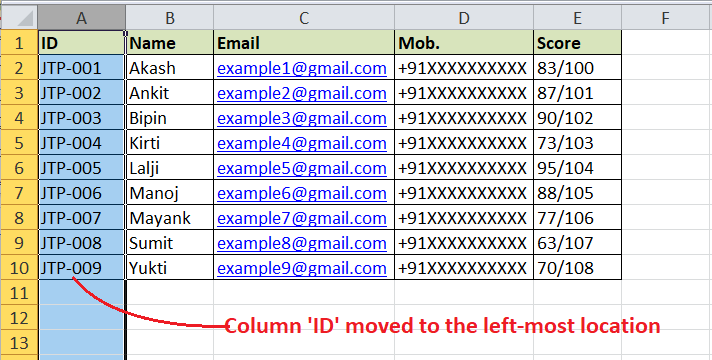
This immediately moves the desired column to the left of the selected column.
Moving Excel Column using Data Sort
Another method of moving columns in Excel involves using the 'Data Sort' feature. Although it is a straightforward method, it is a somewhat lengthy process compared to other methods. It is recommended to use the 'Data Sort' method for moving Excel columns only when we have to simultaneously arrange the order of multiple columns in the sheet.
Before continuing with this method, we must ensure that no data validation rules are applied to the columns we want to move. We must navigate the Data tab > Data Validation > Settings > Clear All > Ok after selecting the corresponding cells or a range to remove data validation.
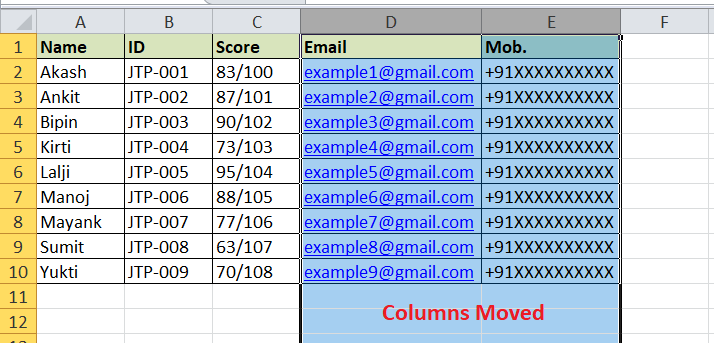
Let's retake the previous sample data where we need to move the column named ID from the second to the first position in the same worksheet.
Here are the steps to use the Data Sort method for moving columns:
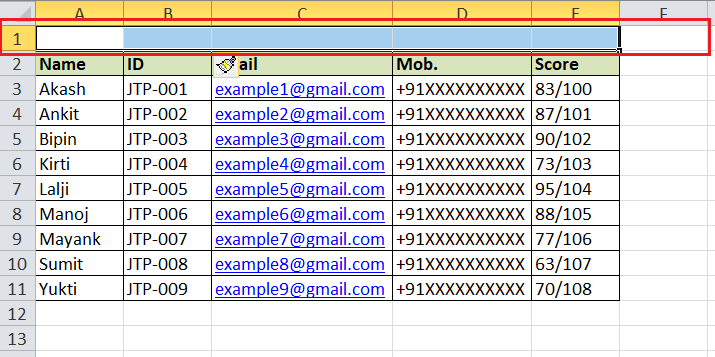
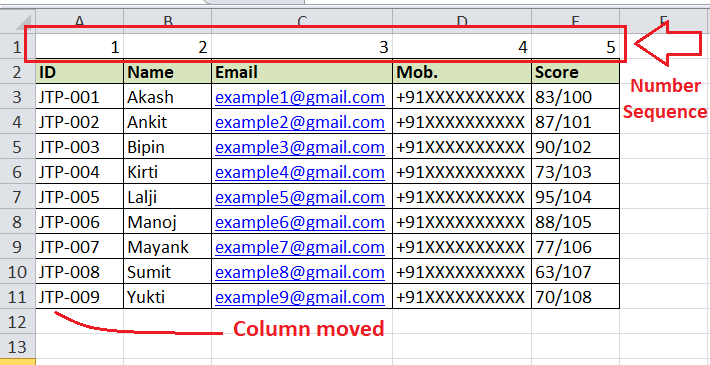
- First, we need to insert a new row at the top of our sheet. We must select any specific cell in the first row, press right-click button and select the 'Insert' option in the list. After that, we must choose the 'Entire Row' option. This inserts a new empty row at the very top area.
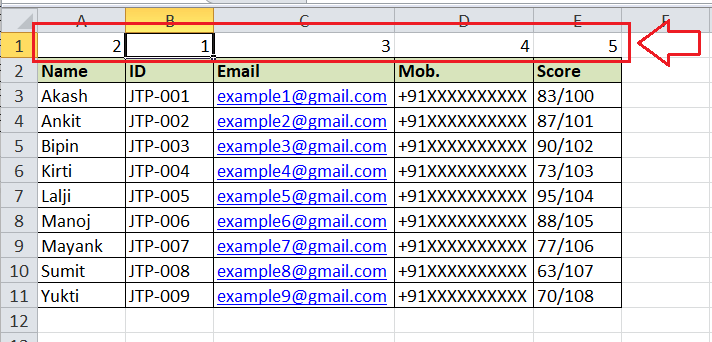
- Once the row is inserted at the top, we must go through each column and specify the number for the column in order we want to rearrange or move columns. We must assign a number for each column in the first row we added. For instance, we want to move the column named 'ID' to the leftmost position; thereby, we specify the number 1 for this column. Similarly, we specify numbers for others, such as:
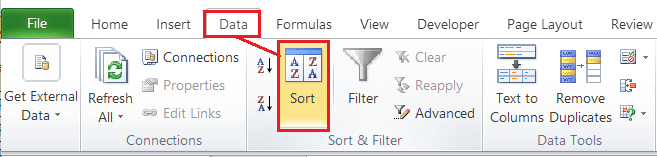
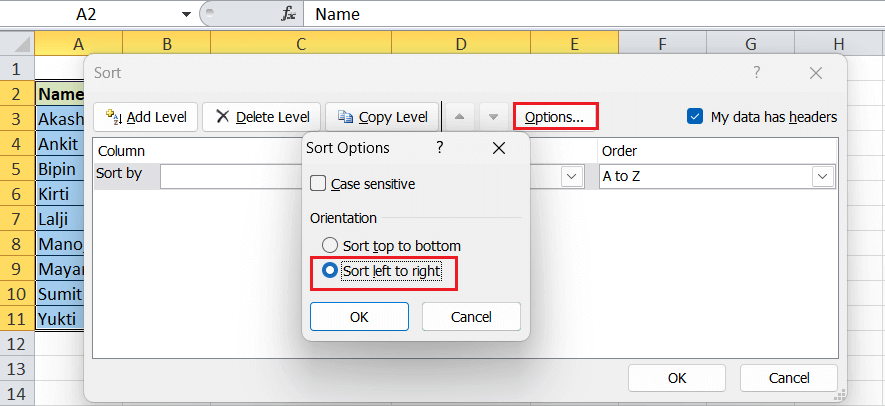
- Next, we must select the entire data in the sheet by pressing the keyboard shortcut 'Ctrl + A' and then navigate the Data tab > Sort under the section 'Sort & Filter'. This will launch the Sort dialogue box.
- In the Sort window, we must click the 'Options' button and choose the option 'Sort left to right' in the next window. Afterwards, we must click the OK button in the Sort Options window to return to the Sort dialogue box.
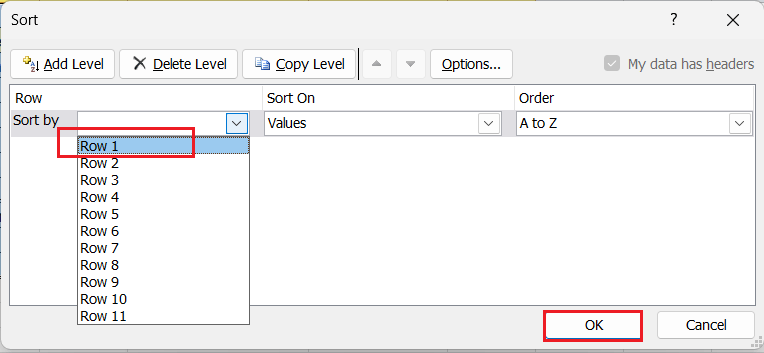
- In the Sort dialogue box, we need to select 'Row 1' in the 'Sort By' drop-down list and click the OK button.
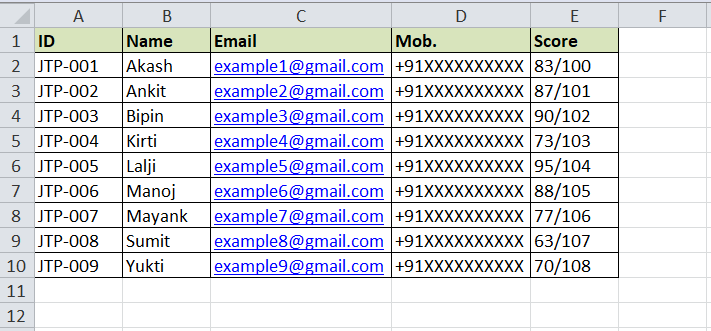
- After clicking the OK button, the columns are rearranged based on the specified sequence (assigned numbers).
Finally, we can press the right-click on the first row and choose the 'Delete' option to remove the entire row from our worksheet.
How to move multiple columns in Excel?
When we need to move multiple columns, we can use the typical drag-and-drop method. However, we can only move the adjacent (contiguous) columns. The method does not work for non-adjacent columns.
To select multiple columns, we must click on the header of the first desired column we want to move. Afterwards, we must press and hold the Shift key on the keyboard and click on the last desired adjacent column header. Lastly, we need to drag the selected column from one place to another by grabbing the edge of the border.
Besides the drag-drop method, we can also use the Data Sort method to move or rearrange multiple columns by assigning the desired number sequence accordingly. However, the cut-paste method does not always work to move multiple columns at once. If we try to cut multiple columns in Excel, we typically see the following message: "The command you chose cannot be performed with multiple selections." So, the cut-paste method is only useful for moving a single column.
Apart from this, we can use the copy-paste-delete method to move multiple columns at once when we have an issue dragging using the mouse for some reason. In such a case, we can execute the following steps:
- First, we need to select the multiple adjacent columns we want to move.
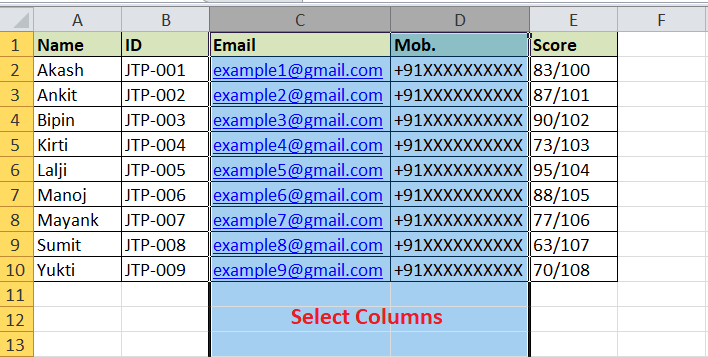
- Next, we must press the keyboard shortcut 'Ctrl + C' to copy the selected columns. Alternatively, we can press the right-click on the selected columns and choose the 'Copy' option in the list.
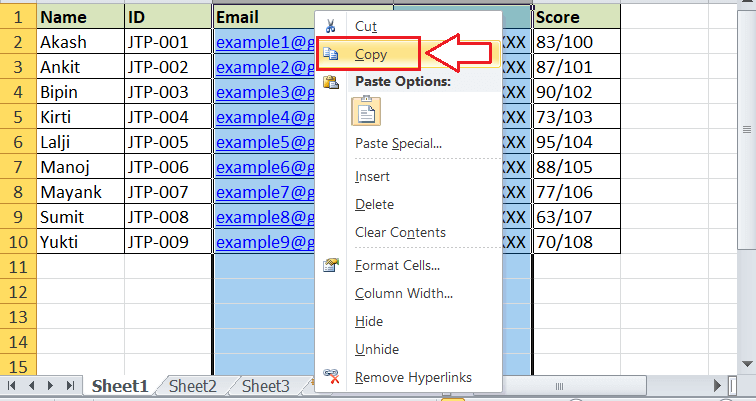
- After copying the columns to move, we must select the column before which we want to paste (or move) our columns. Lastly, we can right-click on the Colum's header and select 'Insert Copied Cells' or simultaneously press Ctrl and the plus sign (+) on the numeric keypad.
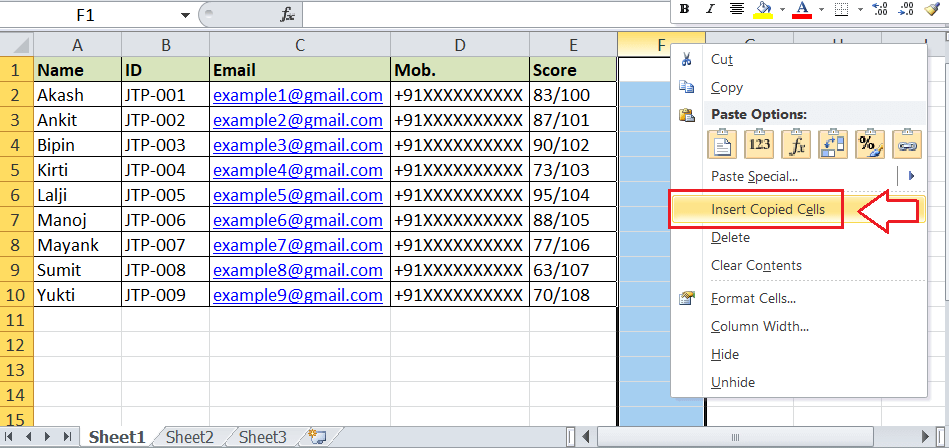
- Once the desired columns are copied, we can delete the original columns.
After deleting the original columns, we see that the desired columns are rearranged or moved to a new location accordingly.
Although the copy-paste-delete method works perfectly for moving multiple columns, it is a bit longer than the drag-drop method. Also, we cannot copy-paste-delete multiple non-adjacent columns either.
Note: It is best to use the Data Sort method to move multiple columns (both adjacent or non-adjacent) in the same worksheet.
How to move columns to a different worksheet in Excel?
As we discussed earlier, the drag-drop (with a Shift key) method works efficiently to move one or more columns in an Excel worksheet. Regrettably, we cannot leverage this method when we need to move columns between different worksheets of the workbook. In such a case, we have to either use the cut-paste method or the copy-paste-delete method.
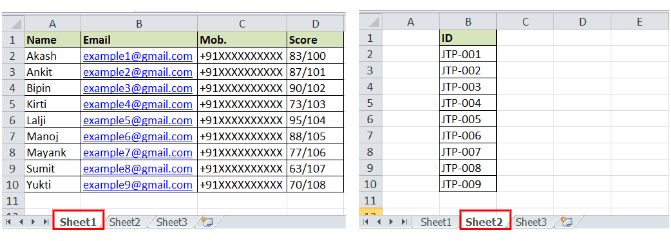
Let us take the same datasets as an example. However, the column named 'ID' is in the second sheet this time. We need to move the column (ID) from the second to the first sheet and place it in the leftmost area or location.
We must execute the below steps:
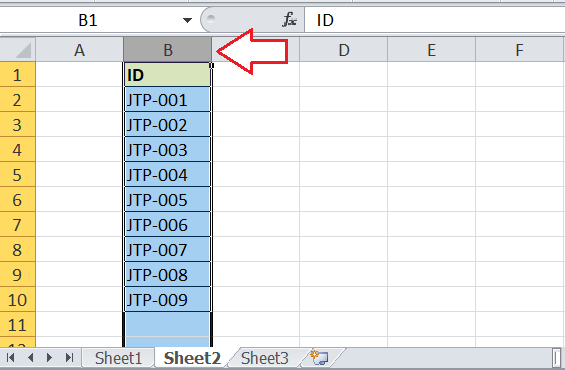
- First, we need to select the entire column we want to move. In our case, we select column B (ID) from sheet2.
- After selecting the column to move, we must press the keyboard shortcut 'Ctrl + X' to cut or 'Ctrl + C' to copy the entire column. Also, we can choose the Cut or Copy option from the right-click menu accordingly.
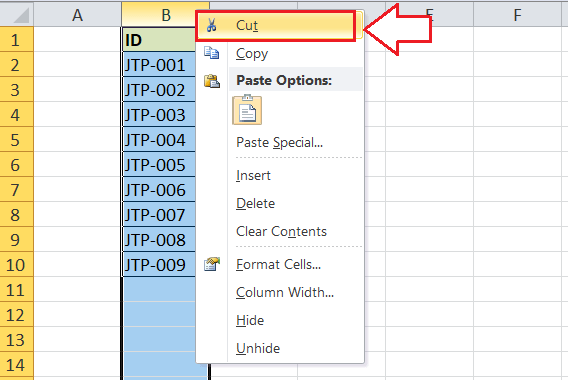
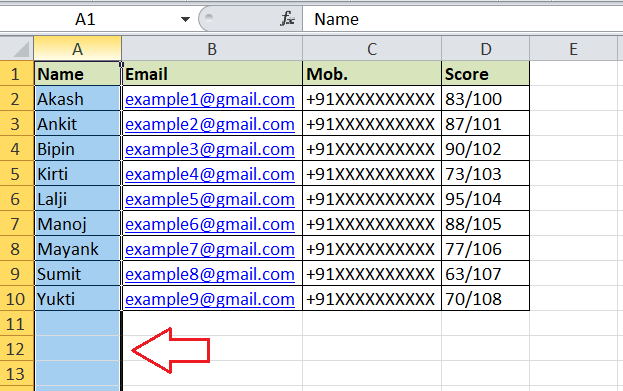
- After cutting or copying the column, we must navigate the sheet where we want to move our desired column. We can select the sheet from the Sheet tab. Also, we must select/highlight the column where we want to insert or move our desired column.
Since we need to move the column named ID to the leftmost location in Sheet1 from Sheet2, we select column 'A' in Sheet1.
- Lastly, we must press the right-click on the selected column header and click the option 'Insert Copied Cells'.
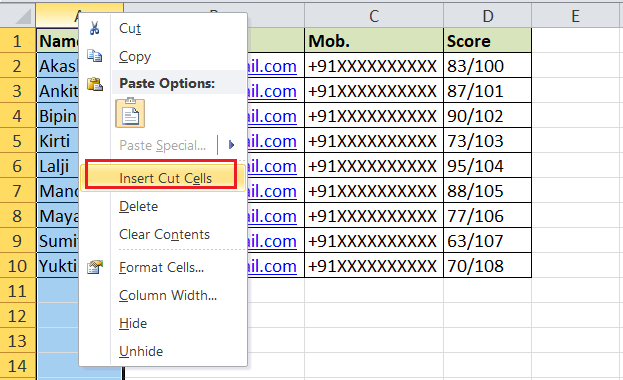
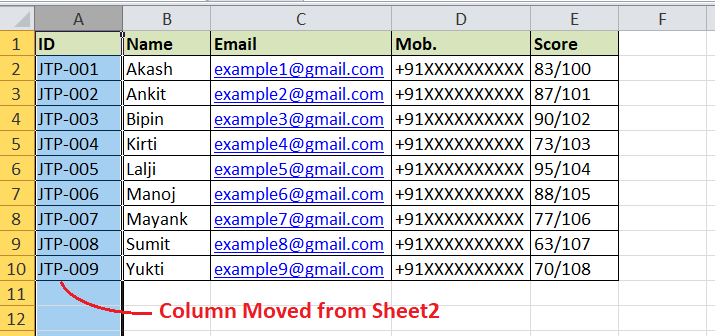
The copied column will appear before (to the left) the selected column in the sheet.
If we use the Copy option instead of the Cut, we must delete the original column from another sheet (i.e., Sheet2) if we don't need it.
The above steps can also help us move multiple columns (adjacent columns) in the workbook.
Important Points to Remember
- By default, when we normally move a column to another location in the sheet, the corresponding formulas, formatting, hidden cells, and other objects of the corresponding column are also copied to the new location.
- It is important to note that when we copy a column from one location to another in the sheet, the references of the cells of that column used in the formulas also change automatically. However, there may be cases when we have to manually modify some cell references to get accurate results from the formulas used. Therefore, we must double-check the formulas in the sheet after moving the column.
- We must ensure that the column we want to move does not contain any merged cells. If the column is part of a merged cells group, we cannot move it until we unmerge the corresponding cells.
|

 For Videos Join Our Youtube Channel: Join Now


