How to import the data from CSV file in ExcelCSV refers to the Comma Separated Values, which indicates the method of storing data. CSV file is basically a comma-separated value file that saves the tabular data in plain text. It is used by many popular spreadsheet programs, such as Excel spreadsheets and Google spreadsheets. CSV data is plain text values separated by comma but stored in tabular form. CSV file is a simple text file that does not contain any formatting, editing, macros, or maths operations. Besides that, the CSV file does not allow data manipulation. Therefore, CSV files are also known as flat files. It stores the data in tabular form, same as Excel and its extension is .csv. Why CSV data need to import in Excel fileCSV file is a simple text file that does not contain any formatting, editing, macros, or maths operations. CSV files are also called as flat files because CSV file does not allow data manipulation. So, you have to import the data to an Excel sheet to perform manipulation on data. Import the CSV file data to the Excel worksheet, then you are allowed to perform operations on it. We have discussed the steps for importing data to an Excel file with the help of an example. This chapter will show you how easily Excel users can import the CSV file data into an Excel worksheet. Let' see how it can be done. Steps to import CSV data to Excel fileFollowing are the steps to import the CSV file data into Excel file: Step 1: First of all, open a blank Excel file and navigate to the Data tab in the Excel menu bar. 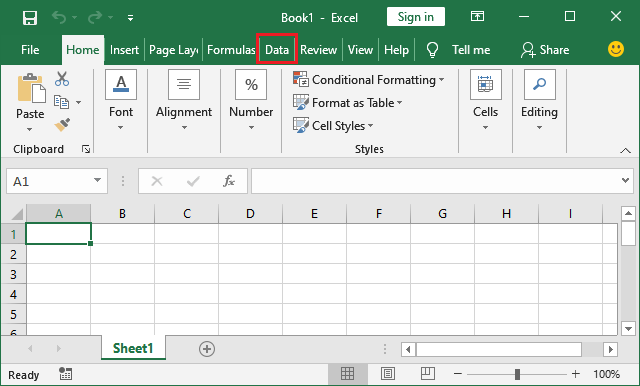
Step 2: In the Data ribbon, you will see a Get Extern Data dropdown button; click on it. 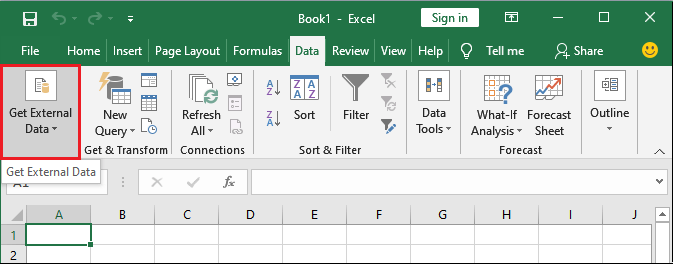
Step 3: From this dropdown list, click on the From Text option. From text option will allow importing plain text data (CSV data) to the Excel sheet. 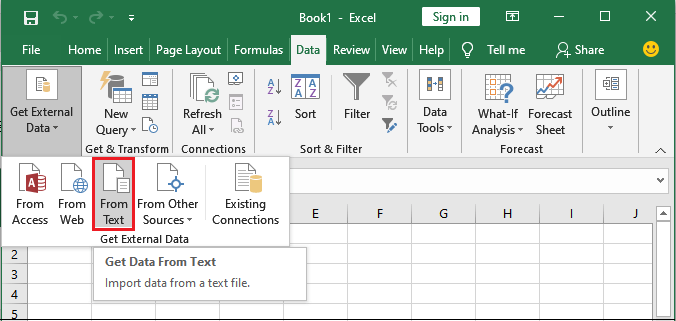
Step 4: Browse the CSV file in your system folder, select it and click on the Import button at last. 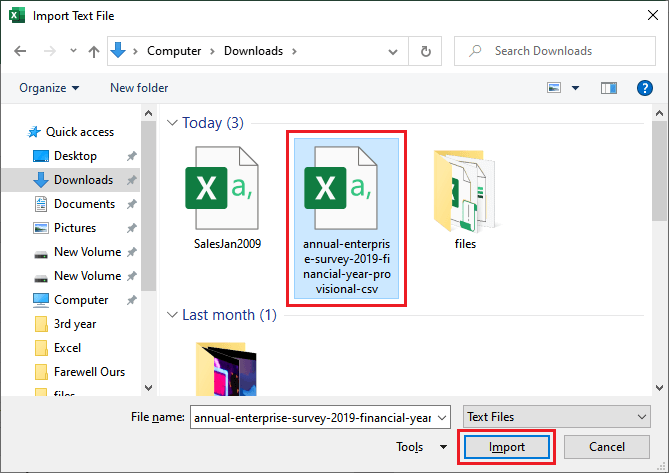
Now, you have to complete three steps:
Step 5: A text import wizard will open. Here, chooses the file type Delimited that will best describe our data. In the same wizard, mark the "My data has header" and then click on the Next button. 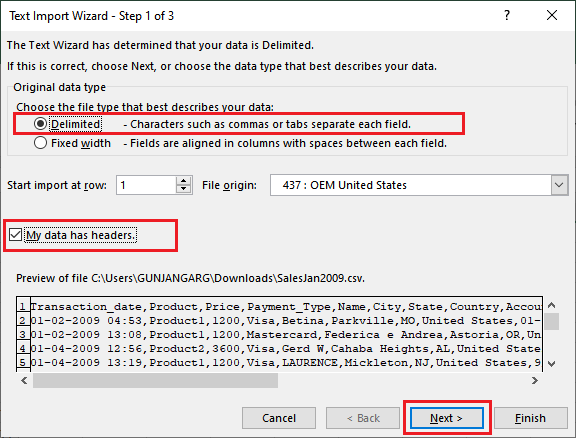
Step 6: Set the comma delimiter here. Mark the Comma checkbox and see the preview how data will be visible in the Excel worksheet after importing. Click the Next button. 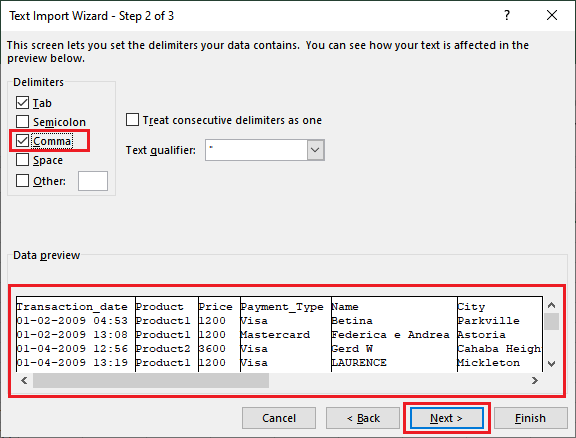
Step 7: In the third/last step, set the column format to General by marking the radio button and Finish the task. 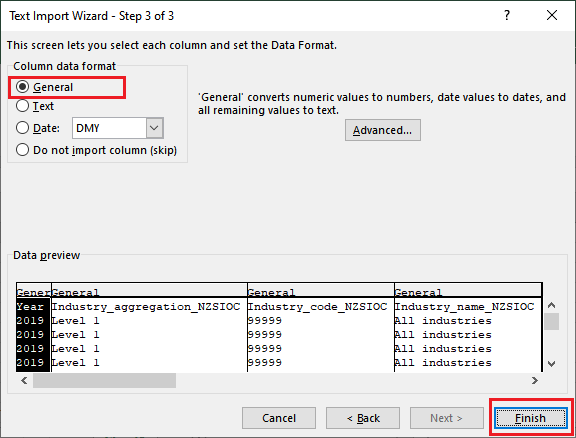
Step 8: A new popup panel will open where select the cell from where you want to import the CSV file data and click on the OK button. 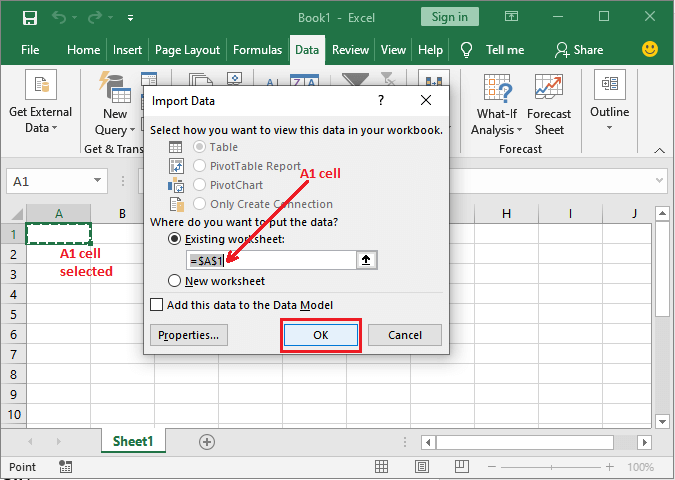
You can also select another cell back on the Excel worksheet from where the CSV file will start importing. Step 9: Your CSV file data has been successfully imported to the Excel file. Now, you are allowed to data manipulation operations on it. 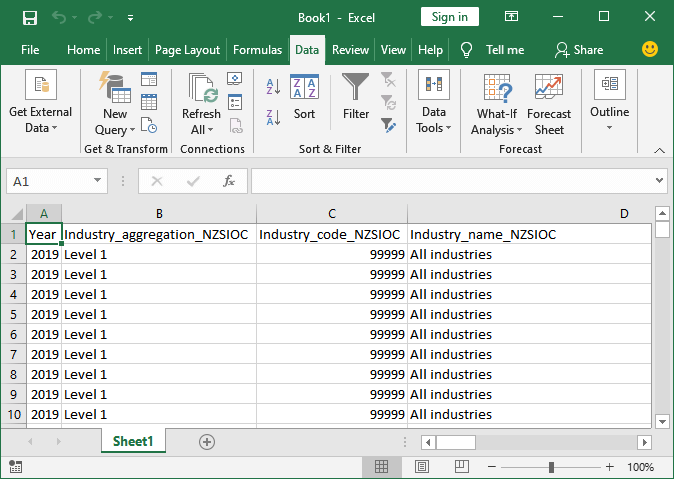
CSV file data has been imported in different columns as you have marked the Comma delimiter checkbox in step 6. What if do not mark comma delimiter option?In case you do not mark the comma delimiter, all the data of a row will insert into a single column separated by a comma, as shown in the below preview section. 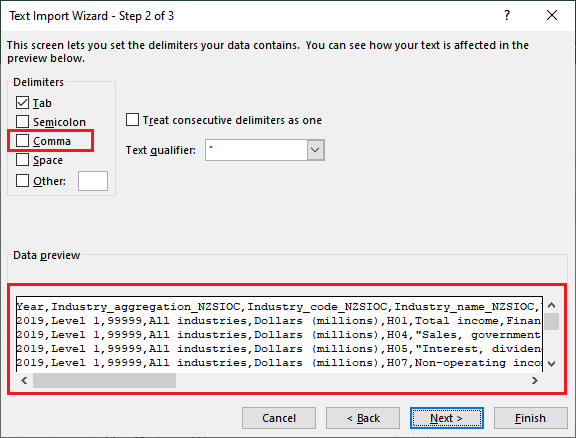
See how data will look like after importing in Excel worksheet. It is not so readable because everything is adjusted in a single column. 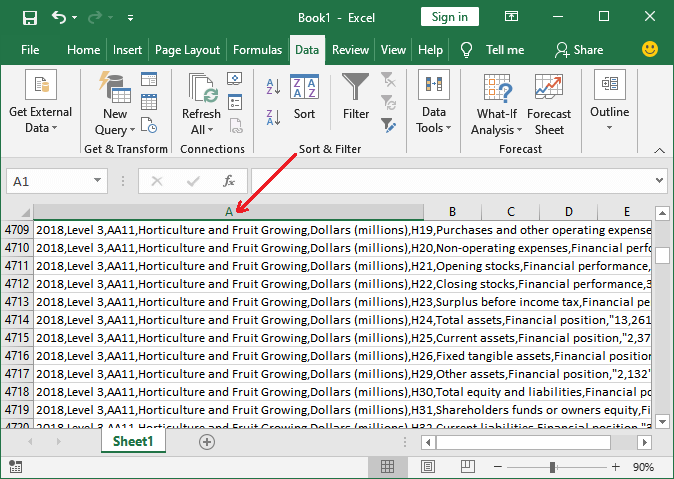
How CSV file is different from Excel fileCSV file and Excel worksheet both are used for storing the data in tabular form. But both have some differences; see the list below:
Next TopicHow to unlock scroll lock in Excel
|
 For Videos Join Our Youtube Channel: Join Now
Feedback
- Send your Feedback to [email protected]
Help Others, Please Share


