| |

Excel DATEVALUE FunctionMost of the time, you work with dates in Excel. However, these dates are not typed in Excel because, in the corporate world, you work with different applications. Therefore, you mostly import the data in an Excel sheet from other applications such as a database, a .csv file or other external sources. When you import data, especially dates, most likely, the dates will export as text entries. With naked eyes, they look like dates, but Excel will identify them as text entries, not date values. For such values, if you apply date functions, it will give you an error. In such situations, you are supposed to convert text values to date. Though there are various methods to convert text-to-date in this tutorial, we will cover the inbuilt Excel DATEVALUE function that quickly converts text date entries into valid Excel date. What is DATEVALUE Function?The Excel DATEVALUE function converts a date which has been entered as text to date value but in number format. For instance, the formula =DATEVALUE ("01/08/2015") will return the output as a serial number (42012) in the Excel date system that will represents August 1, 2015. Sometimes, dates in Excel seem as text values that are not recognized as proper dates. When you apply any Date formula to these date values, you get a #Value error. (Refer to the below image). This mostly happens when you are import data from external data applications, and it is quite likely that Excel converts the date entries of that data into text strings. 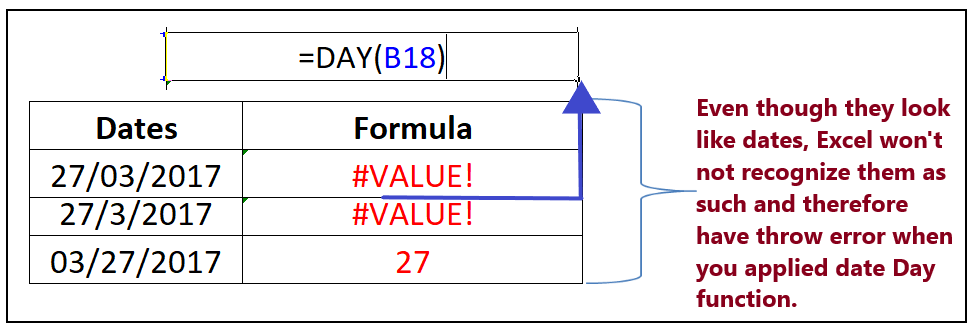
You can solve the above problem by using the inbuilt DATEVALUE function. This function converts a date text string into a valid Excel date. Excel dates are more useful than text dates as they can be formatted, used in different date formulas, and even manipulated with other formulas. NOTE: The DATEVALUE function returns a serial number as output. You must apply a date number format to present this serial number as a date.SyntaxParameterDATE_TEXT (required): This parameter represents the date which needs to be converted from text to date format. Things to Remember about Excel DATEVALUE functionBefore converting a date string data to date using Excel DATEVALUE function, please have a look at the below-given points:
ReturnThe DATEVALUE returns a serial number. For example, serial number 42012 represents August 1, 2015, in Excel's date system. ExamplesExample 1: Use DATE function to calculate dates and convert them in a proper date format.
To covert date text entries as date values using the DATEVALUE function, follow the below given steps: STEP 1: Add two helper columns named "Date Value" and "Date Format"
It will look similar to the below image: 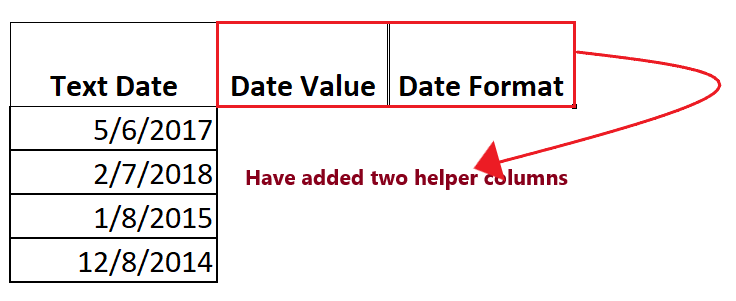
In the first column, we will convert the text entries into date types using the DATEVALUE function. Since DATEVALUE returns a serial number, we will apply a date number format to represent this number as a date in the second helper column. NOTE: Format the helper column and match it with the first column to make your Excel sheet more attractive.STEP 2: Type the DATEVALUE functionPut your cursor to the C4 cell (in the Date Value column second row) and start typing the function = DATEVALUE( It will look similar to the below image: 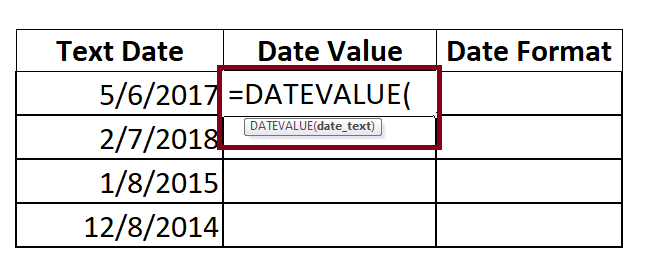
STEP 3: Insert the DATE_TEXT parameterThe DATE_TEXT parameter represents the date which needs to be converted from text to date format. Here, B5 represents the date text cell. The formula will be : =DATEVALUE(B5) It will look similar to the below image: 
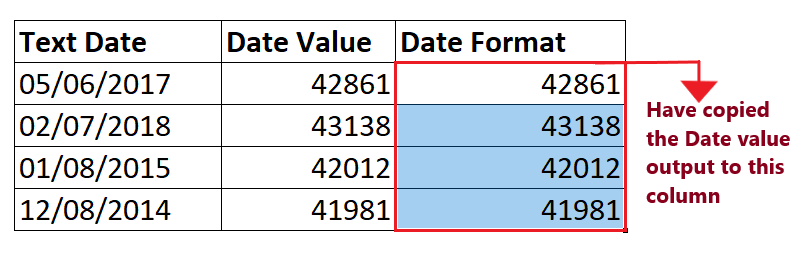
STEP 4: DATEVALUE will return the resultThis function will convert the date text entries into date type and will return a serial number. In our case it has returned 42861, which represents June 05, 2017 in Excel's date system. It will look similar to the below image: 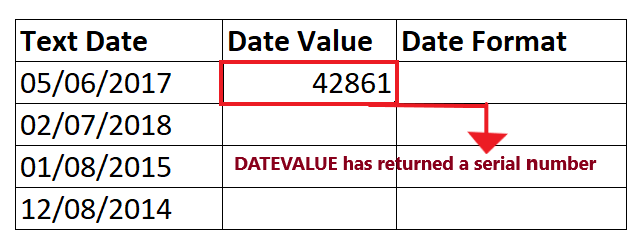
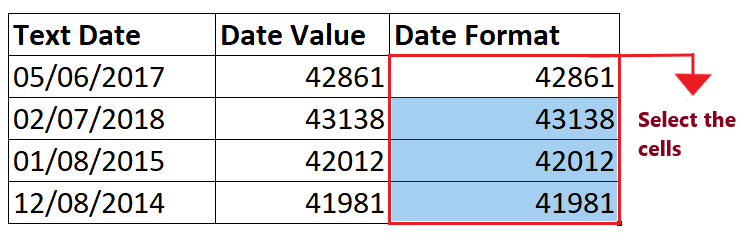
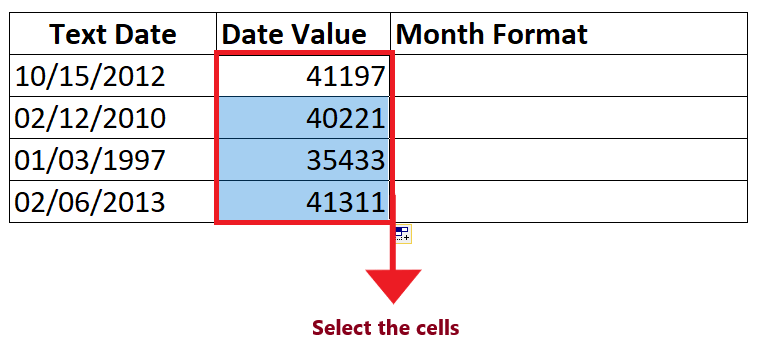
STEP 6: Drag the formula to other rows to repeatPlace your mouse cursor on the formula cell and point the cursor to the right corner of the cell. To your surprise, the mouse pointer will turn into a '+' icon. Refer to the below image: 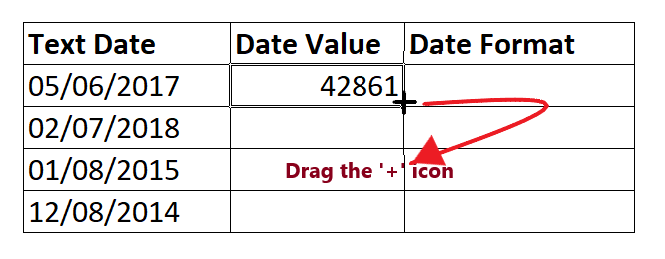
Drag the '+' icon down the cells. It will copy the DATEVALUE function to all your cells changing the cell reference as respective to the cell. It will convert the date text entries into date type and will return serial numbers for all the rows. Refer to the below image: 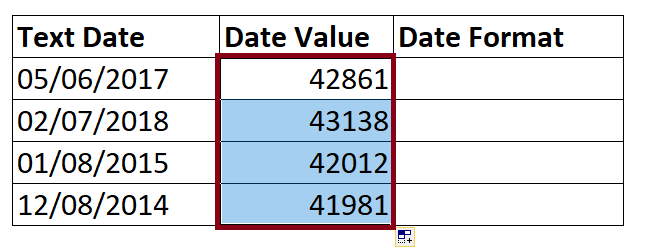
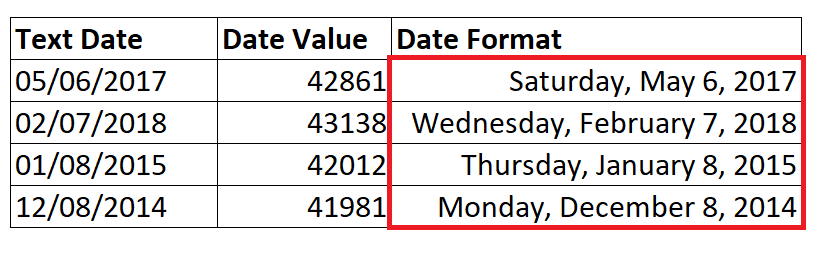
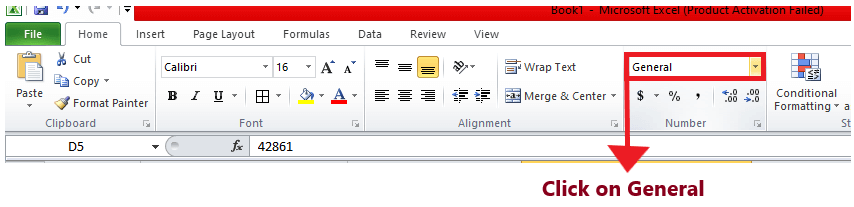
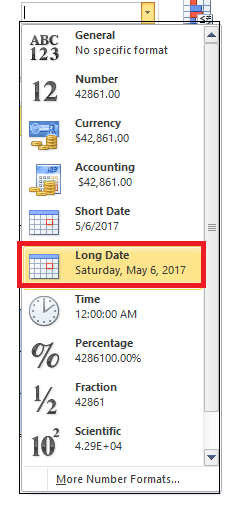
STEP 5: Apply a date number formatSince the returned output is in serial number format (though excel will consider it as date only), we need to convert it to date number format so anyone can easily understand the date.
Example 2: Use the DATE function to calculate dates, convert them in a proper date format and fetch the month of each date.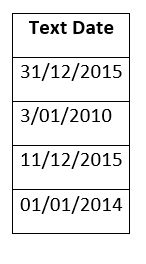
To covert date text entries as date values and find the month of each date, follow the below given steps: STEP 1: Add two helper columns named "Date Value" and "Month Value"
It will look similar to the below image: 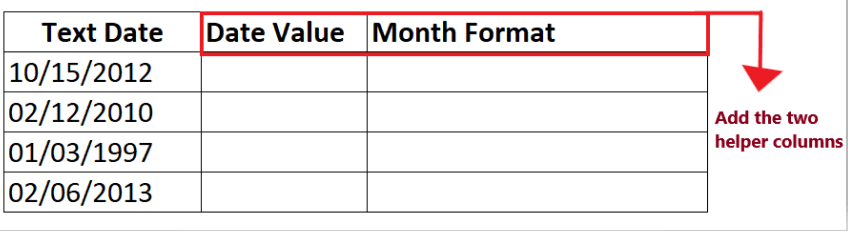
In the first column, we will convert the text entries into date types using the DATEVALUE function. In the second column, we will apply the Date MONTH function to fetch the month value for each date. NOTE: Format the helper column and match it with the first column to make your Excel sheet more attractive.STEP 2: Type the DATEVALUE functionPut your cursor to the C4 cell (in the Date Value column second row) and start typing the function = DATEVALUE( It will look similar to the below image: 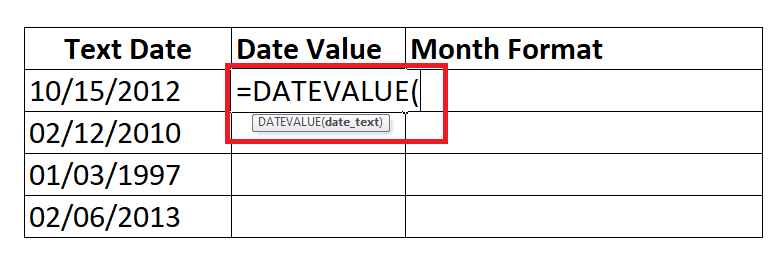
STEP 3: Insert the DATE_TEXT parameterThe DATE_TEXT parameter represents the date which needs to be converted from text to date format. Here, B5 represents the date text cell. The formula will be : =DATEVALUE(B5) It will look similar to the below image: 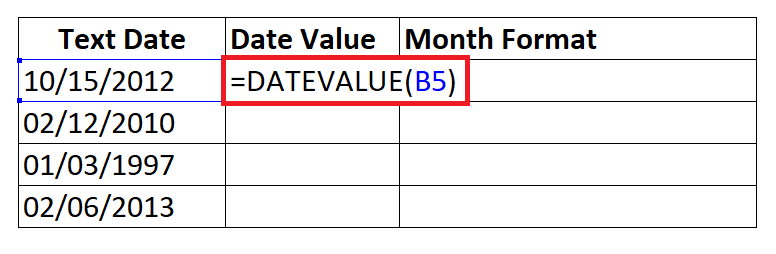
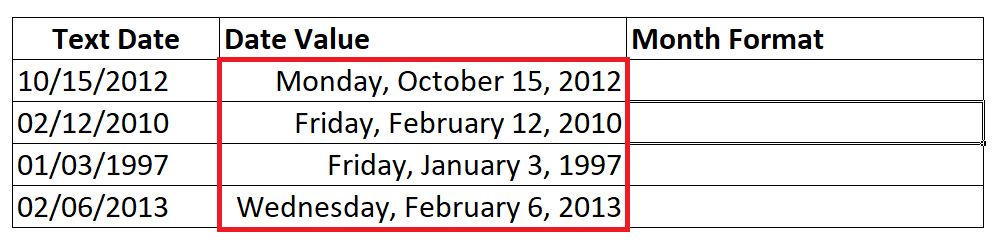
STEP 4: DATEVALUE will return the resultThis function will convert the date text entries into date type and will return a serial number. In our case it has returned 41197, which represents October 15, 2012 in Excel's date system. It will look similar to the below image: 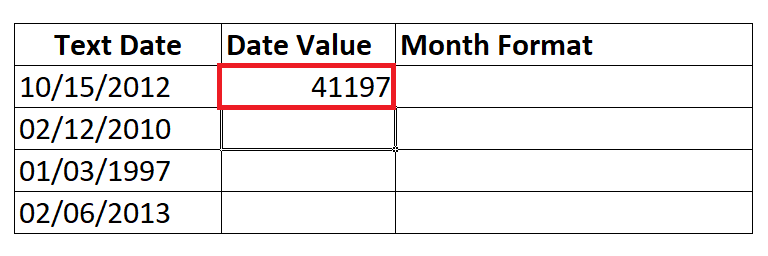
STEP 6: Drag the formula to other rows to repeat
Refer to the below image: 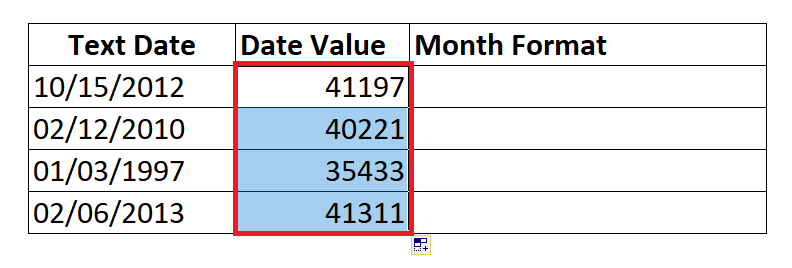
STEP 5: Apply a date number formatSince the returned output is in serial number format (though excel will consider it as date only), we need to convert it to a readable date format.
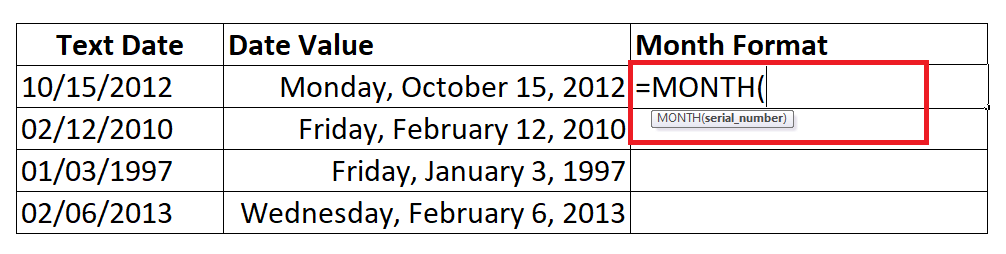
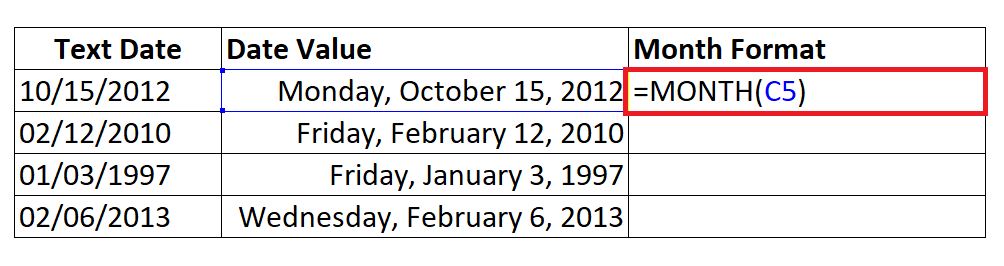
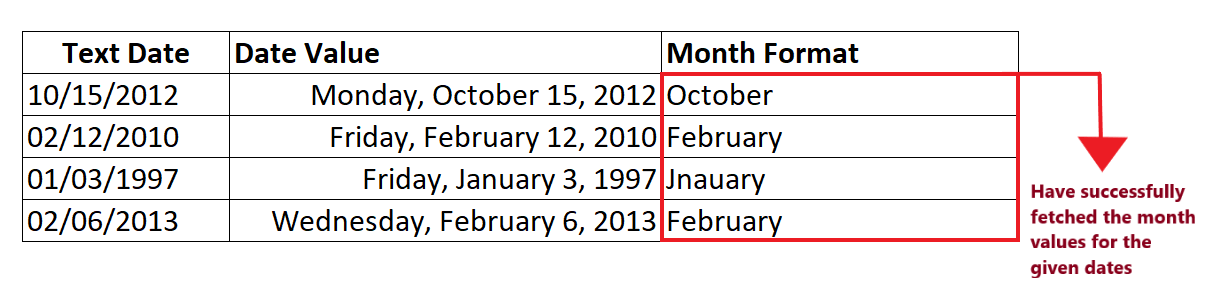
Step 6: Apply the MONTH Function
Eureka! We have successfully solved the problem, and hopefully, you have understood how to convert text data entries into a valid date using Excel DATEVALUE function.
Next TopicExcel SUBSTITUTE Function
|


 For Videos Join Our Youtube Channel: Join Now
Feedback
- Send your Feedback to [email protected]
Help Others, Please Share


