| |

How to Add ImageView in Android StudioThis article will provide you a detailed guide for adding ImageView in Android Studio. Before diving into the main topic first let us understand what is Android Studio and what is ImageView. What is Android Studio?Android Studio is the official Integrated Development Environment (IDE) for Android app development. It is based on the IntelliJ IDEA platform and provides a suite of tools and features for designing, building, and testing Android applications. Android Studio includes an emulator for testing apps on virtual devices, a code editor with advanced code completion and analysis features, and tools for debugging and profiling app performance. What is ImageView in Android Studio?An ImageView in Android Studio is a UI element that displays an image within a layout. It is a subclass of the View class and can be added to a layout like any other UI element, such as a TextView or Button. The ImageView is used to display images in an Android app and can be configured to scale, crop, or adjust the aspect ratio of the displayed image. 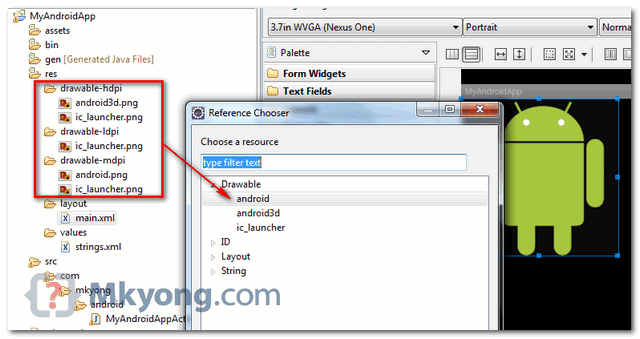
The ImageView can display images from various sources, including local resources, assets, and network resources. To display an image in an ImageView, you can set the image resource using the setImageResource() method or use a third-party library like Glide or Picasso to load the image asynchronously from a URL. In addition to displaying images, the ImageView can also be used to handle user interactions, such as touch events, using event listeners. You can set an OnClickListener on an ImageView to handle click events, for example, and perform an action when the user clicks on the image. Steps to be followed for Adding ImageView in Android StudioAdding an ImageView to an Android Studio project can be a simple task if you follow the steps outlined below. Before we begin, ensure that you have a basic understanding of the Android Studio IDE and that you have created a new project. 1. Locate the layout file where you want to add the ImageViewThe first step is to locate the layout file where you want to add the ImageView. This is typically found in the app/res/layout directory of your project. 2. Drag and Drop the ImageView from the Palette:In Android Studio, you can use the Palette to drag and drop UI elements onto your layout. Locate the ImageView element in the Palette and drag it onto your layout. Alternatively, you can right-click on your layout and select "Insert" from the context menu, then choose "ImageView." 3. Configure the ImageView properties:Once you have added the ImageView to your layout, you can configure its properties. In the "Attributes" panel, you can set the image resource, adjust the size and position, and set other properties such as the scale type. To set the image resource, click on the ImageView in the layout editor, then navigate to the "Attributes" panel. Click on the "srcCompat" attribute and select the image you want to use from the resource selector. You can also set the image programmatically using ImageView's "setImageResource" method. To adjust the size and position of the ImageView, you can use the layout editor or set the layout parameters programmatically. In the layout editor, you can click and drag the ImageView to adjust its position or use the "Constraints" panel to set constraints on the ImageView's position relative to other UI elements. You can also set the layout parameters programmatically using ImageView's "setLayoutParams" method. 4. Add the image to your project:Before you can set the image resource of your ImageView, you need to add the image to your project's resources. To do this, create a new directory in your project's "res" folder called "drawable." Then, add your image file to this directory. Android Studio will automatically generate an ID for your image resource that you can use to set the ImageView's image. 5. Set the image resource programmatically:In some cases, you may want to set the image resource of your ImageView programmatically. To do this, you can use ImageView's "setImageResource" method. For example, if you have an image resource with ID "my_image" in your project's resources, you can set it as the ImageView's image like this: This code retrieves the ImageView with ID "my_image_view" from the layout, then sets its image resource to "my_image." 6. Testing:Finally, run your app in the emulator or on a physical device to test the ImageView. You should see the image displayed in the ImageView as expected. In conclusion, adding an ImageView to an Android Studio project is a relatively straightforward process that can be accomplished in just a few steps. By following these steps, you can add an ImageView to your project and display images in your app with ease. Hope you understood this topic. |
 For Videos Join Our Youtube Channel: Join Now
Feedback
- Send your Feedback to [email protected]
Help Others, Please Share


