How to Format an SD Card on AndroidSD card or external memory card is one of the crucial devices to store your data. But due to various reasons, people sometimes want to format it. It may be because they didn't need their stored data anymore or because of a virus attack on their SD card. 
Formatting in computing technology is the deletion of all the data on your storage device. Before you start formatting your storage device like an SD card, it is advised to keep a backup of all your essential data that you want to keep for further use. If you want to format your SD card on an Android device and look for how to do this, you will get all your solution here. There are various techniques or methods available to format your SD card, and one of the simple methods to format it on most Android devices is using the Settings menu. Note: It is important to note that formatting your SD card will erase all your stored data from your SD card. And this process is irreversible, and you can't retrieve data once the SD card gets formatted.Some of the everyday situations when you need to format your SD cardBefore we illustrate how you can format your SD card on an Android phone, let's see some common reasons why you should format a memory card on Android or other devices.
Before formatting your SD card on Android or other devices, we ensure to keep a backup of your essential or other data that you want to keep. Method 1: on Android 8.0 (Oreo) and aboveFollow the below-mentioned steps to format your SD card on an Android device running OS version 11. Step 1: Insert an SD card The latest smartphones come with an extra slot to place an SD card on the SIM tray. You will find a component on the left side of your smartphone with a pinhole. Insert the pin or SIM tray tool into the pinhole and lightly press to eject it. Place your micro SD card in its slot into the SIM tray and reinsert it. Your Android smartphone automatically detects it. Step 2: Open the Settings app Launch the Settings app on your Android smartphone. To do this, tap on the icon that looks like a gear on your home screen. Alternatively, you can also swipe down from the top of the device screen to visit the Quick menu and tap on the gear-looking Settings icon. Step 3: Scroll down and tap Battery and device care Scroll down to the Settings screen, look for the Battery and device care (in some devices, it is Battery and storage) option, and tap on it. 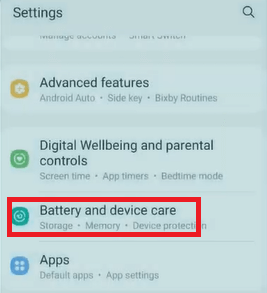
Step 4: Tap Storage From the list of available options on the next screen, tap on the Storage option. 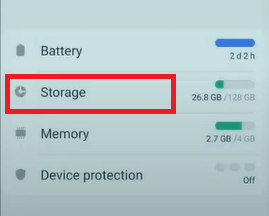
Step 5: Tap the More menu On the Storage screen, tap on the more menu (three vertical dots) icon at the upper-right of your screen. Step 6: Tap Advanced Click on the more menu from the pop-up option, and tap Advanced. 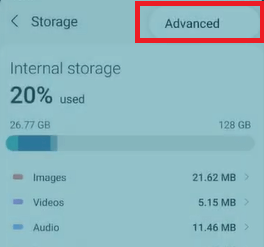
Step 7: Tap SD Card Now tap on the SD card option at the bottom of the screen that represents your SD card placed in your device. 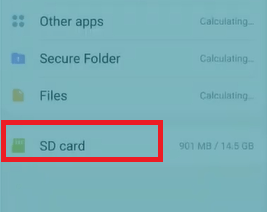
Step 8: Tap Format Tap on the Format option. 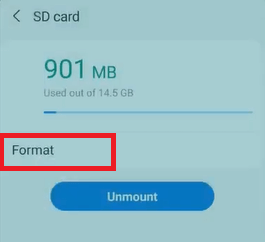
Step 9: Confirm your action Finally, confirm your format action by tapping on Format SD card, which formats your SD card. 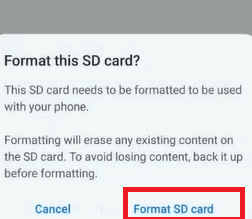
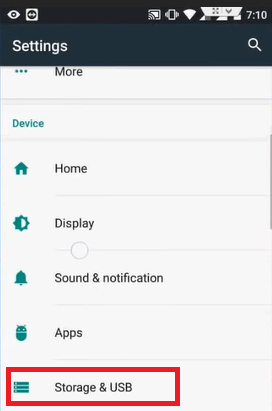
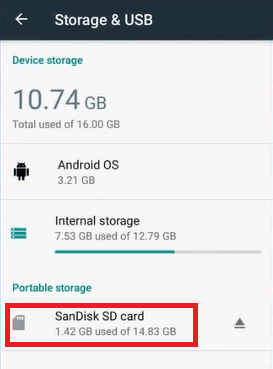
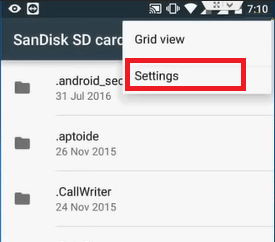
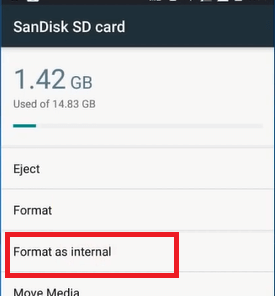
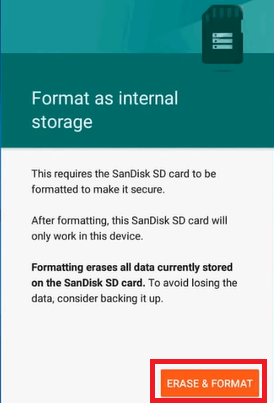
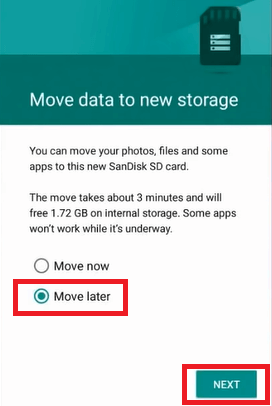
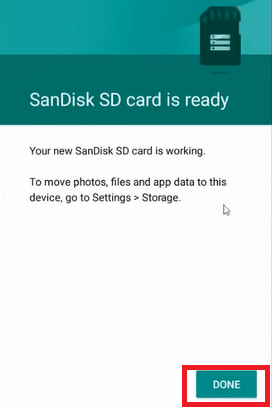
Method 2: on Android 7.0 (Nougat) and belowThe steps to format an SD card on Android running on OS version 7.0 and below are mainly similar to what we illustrated above. The only difference is in the device's structure and UI. Following are the steps to format an SD card on an Android phone running on 7.0 or below: Step 1: Insert an SD card Insert the SD card into your Android device's SD card slot. The process may be different based on manufacturers and device models. You may have to remove your Android phone's back cover to find an SD card slot. In some devices, you even need to remove the device's battery for it. Step 2: Turn the power on of your Android phone After inserting the SD card into your phone, place the back cover and turn the power on your Android smartphone. Step 3: Open the Settings app Launch the Settings app on your Android device. To do this, tap on the gear-looking icon from the App (drawer) list. Alternatively, you can also swipe down from the top of the device screen to visit the Quick menu and tap on the gear-looking Settings icon. You may also find it on the home screen. Step 4: Tap Storage Scroll down the Settings screen to the Storage option. Once you find tap on it. Step 5: Tap SD card Scroll down the Storage screen and find the SD card option. The option may be varies based on the device you are using, and it may be "Erase SD card" or "Format SD card". Step 6: Tap Format SD card Now tap on the "Format SD card" or "Erase SD card", depending on the option available on your phone, to completely delete data from the SD card. Step 7: Confirm Format SD card A pop-up screen may warn that you cannot recover data after you format your SD card. Confirm your action by tapping on the Format SD card. The formatting process starts, and your SD card gets formatted after a few moments. Format your SD card as Internal Storage on your Android phoneIf your Android phone's internal memory is less and you run out of apps, you can use an SD card for internal memory storage. To use the SD card as internal memory, you need to format it as Internal Storage. Here are the steps to format an SD card and use it as Internal Storage on your Android phone. The exact measures and terms used may vary based on the device model you are using, but they mostly follow the similar steps:
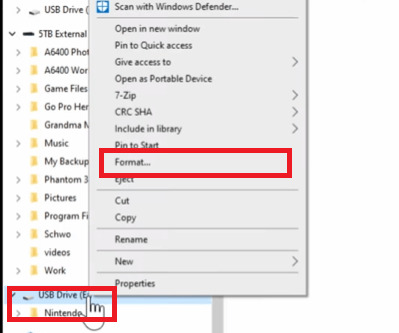
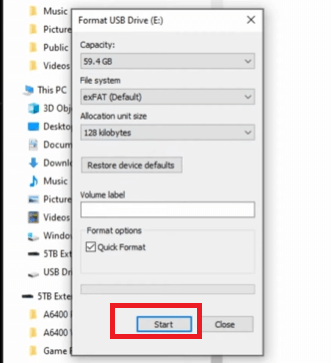
Format SD card on your computerThere are different ways to format an SD card on a PC. Based on your computer model, you can use either a card reader or an adapter.
Next TopicHow to Rotate Screen on Android
|
 For Videos Join Our Youtube Channel: Join Now
Feedback
- Send your Feedback to [email protected]
Help Others, Please Share


