How to install a computer processor
Before getting startedIf you are going to install the latest processor on a desktop computer, you must review all of the sections and follow the instructions on this page.
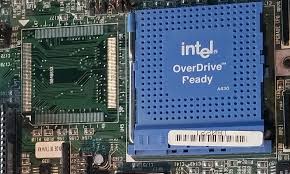
Remove previous processorBefore a new processor can be added to a computer, you need to remove the old processor from the system if it already has a processor installed. The heat sink must first be removed before the processor can be removed if the CPU is a socket processor with a connected heat sink. First, remove the cable that powers the fan from the majority of socket heat sinks. Next, you need to see clamps keeping the processor in place on either side. One end of the clip can be released with the help of applying pressure to the bigger end and pulling it away from the processor. If your computer has a processor that utilizes a ZIF socket processor, look for a little arm on the side of the processor after the heat sink has been removed. A small metal bar serves as the arm, and by turning the bar from horizontal to vertical, the processor is released. 
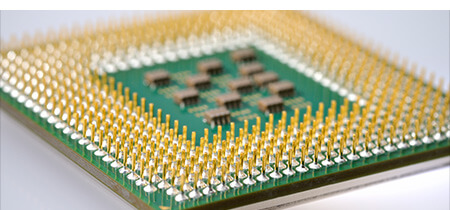
You will require a chip and processor remover tool if your processor is a LIF processor in order to remove the processor. It is likely that this utility comes with the processor if you are going to add a new one. If not, you can purchase it at a nearby computer store or retail outlet. Now, you are required to put the object in between the socket and the CPU. The processor should then be carefully removed from the socket, a little at a time, on each side. Be careful not to bind or break any of the pins while doing this. In most cases, the heat sink does not need to be removed, and cannot be removed in most situations if your processor is a slot processor. Then, you need to find two tabs on either side of the slot processor that needs to be removed. The processor should be able to be removed with the help of drawing it out vertically after these slots are adjusted to the outer position. Install processorUse the instructions below in order to install your processor after removing the old one from the computer. Socket processor Start moving the metal arm on one of the sides of the socket to the vertical position is the first step when you are going to install a ZIF socket processor. After that, you are required to check the processor's top, which ought to have a little dot in one of the corners. Pin One is marked by this dot on the processor's bottom. Next, you need to check the motherboard's socket. The socket must be devoid of a hole or marked with a 1 for pin 1. Then, place the processor in a way through which pin 1 and hole 1 are matched and set it on the processor down. If everything is in place, connecting the processor should be secure when you move the metal arm to the horizontal or downward position. Start by looking at the top of the processor to find pin one that is marked with a tiny white dot if you are installing a processor with a LIF socket. Once pin one has been discovered successfully, find pin one on the motherboard socket by looking at the socket and pin one. Finding a hole that is missing or a little "1" next to one of the four corners will help you find socket pin number one. When the processor's pins are appropriately positioned, then you need to carefully press them into the socket until it is firmly fastened. Slot processor Lastly, before you are installing a slot processor, you are required to turn the tabs on either side of the support brackets so they face outward. After that, insert the processor with the help of pushing it into the slot. The two tabs should snap into position once they are inserted into the brackets. Apply heat compoundBefore connecting the heat sink, you can coat the surface of the CPU with a specific substance, which is called thermal grease. It can lower the temperature of your CPU by assisting in the transfer of heat from the CPU to the sink. Attach heat sinkAttach the computer heat sink to the CPU after the heat compound has been applied and the processor has been mounted. Note: Users who are going to install a socket processor should be careful not to scratch the motherboard at the time of attaching the heat sink clip. Additionally, be careful not to put too much pressure on the plastic clip while attaching the heat sink bracket to it because doing so could cause it to crack.In the last, drop the motherboard inside the casing to continue the process when you have successfully installed the CPU and all other essential parts, such as the RAM, SSD, and GPU. Before finishing the build, you will eventually need to apply the thermal paste and install the CPU cooler. 
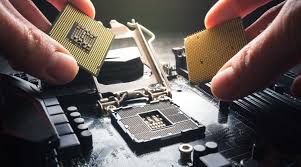
Additionally, in order to install the CPU, there is also some other instructions step by step given below. You may also follow these steps if you are getting stuck by using the above steps. Installing a CPU, like many other components of PC construction, is a simple procedure. So, there is no need to be concerned about making a mistake because we will walk you through each stage. 1. Keep your CPU where it is Keep your seat firmly in place. Do not need to remove your CPU from its packaging just yet. 2. Ready your motherboard Installing the new CPU on a new motherboard is the most straightforward option, but we are not assuming that you are going to do that. There may be a plastic cover over the CPU socket if you have a new motherboard. The CPU cooler and the new CPU will obviously be in the way if you are going to replace a CPU on a motherboard that already has a CPU. You must remove anything that is blocking the CPU socket in both circumstances. Also, familiarizing yourself with the retention arm (and, in the case of an Intel socket, the metal bracket) is also a good idea, which holds the processor in place once inserted. Through this, you can get an idea of how much force is required to press down. Maintain the open, up position of the retaining arm. You are ready to go on now that your CPU socket is open. 3. Line up your CPU Note: It is ideal to just touch the sides of your CPU when holding it. Touching the underside or the metal cover can leave behind unwanted residue that can impede performance.Your CPU must be inserted into its motherboard socket in the correct orientation. Luckily, in order to help you get the alignment correct, the CPU and socket almost often have indicators. Then, on the corner of your CPU and the socket, you need to look for a corresponding indicator. It will probably look like a little triangle. If you are unable to notice anything, check the documentation for your motherboard and processor. 4. Set the CPU into its socket Make sure you have aligned your CPU with the socket correctly, then it should drop right into place. If it does not seem just right, you may need to gently, and we mean softly, move it around. For example, in the socket, AMD CPU pins can be a little more difficult in order to align with the socket holes. 5. Close the retention arm You should be able to easily push down the retention arm once your CPU is correctly installed in the socket (if it's an Intel CPU, lower the bracket first). Now, you need to double-check the CPU's seating in the socket, if the retention arm seems to be opposing you. We have found that a little push with your pinky finger is adequate to close the retention arm; therefore, you risk injuring your CPU if you try to force it (You have bent CPU pins this way, and it will not fun trying to bend them back). You are all set once the retention arm is lowered and your CPU is seated. Note: Double-check that your motherboard's CPU power socket is connected to your power supply if you are also configuring the rest of your computer. It is distinct from the remainder of the motherboard's bigger power connector.
Next TopicWhat does Alt + Space do
|
 For Videos Join Our Youtube Channel: Join Now
Feedback
- Send your Feedback to [email protected]
Help Others, Please Share


