How to install computer memory (RAM)If you are going to install RAM (memory) on your computer, first, you need to verify that you have purchased the correct chip or your computer can accept it. Then, you will be ready to install a RAM upgrade on your computer. The overall process is pretty similar, but the exact procedures will vary slightly based on your computer's configuration. 
The following suggestions and information may be useful for you if you are installing or considering a RAM (memory) upgrade in your computer system. Before getting startedGo over this checklist first before beginning the installation if you have already bought the RAM and are ready to install it.
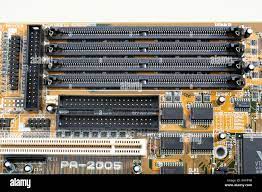
Locate memory slots and install memoryTo safely install RAM modules in your computer's motherboard, you need to follow the procedures given below: DIMM (DRAM, SDRAM, and DDR) memory installation stepsNote: Hold the memory by the sides at either end of the module when it's time to hold it. Avoid bending, flexing, or dropping the memory when you are handling it. When installing the memory into the computer system, do not use excessive pressure. If you apply too much pressure, the memory module and the slots on the motherboard may be damaged. Lastly, equally, divide the pressure when installing the memory module with the help of pressing on both corners.Locate the memory slots on the computer motherboard if you have purchased correct memory. If your computer does not have any memory slots accessible, you can remove one or more memory modules before the memory may be installed. 
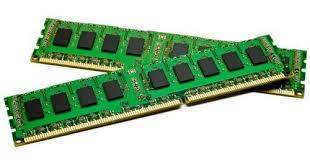
Note: It may be difficult to reach the memory slots if the computer has a compact form factor. Before you can easily access cables or expansion cards, you may need to temporarily remove them. Make sure you remember where each wire and card go before disconnecting anything from the computer.Because each DIMM slot on a motherboard is a bank, the computer will work even if only one memory module is purchased. When you are ready to install the memory, before placing the memory module into the computer, examine it. One or more notches at the bottom of the memory module should be visible on the card. These notches resemble the ones in the image below. 
Now, you need to ensure that the notches on the memory stick are matched to the memory slot you are using. The memory can only be placed in one way, thanks to these notches. The memory will not fit into the slot physically if it is incompatible. After checking the notches and directions, you must slide each memory slot tab out or away from the memory module in order to install memory into the computer. As the memory module is placed, these tabs will snap into position. Next, gently and firmly insert the memory module into the slot when you have successfully removed these tabs. When the memory module is being pushed, two tabs should snap together and hold the memory module in place. Now, you need to plug the system back in and turn it back on when you have completely installed the memory in the computer. The RAM should be automatically recognized and set up at the time computer is booting. If you are facing a problem with the memory, in order to identify or set up, go into the BIOS setup and make sure the memory is appropriately detected. RIMM memory installation stepsThe C-RIMM memory module distinguishes RIMM memory modules from DIMM memory modules. This module permits data to flow continuously through the computer system. You are required to remove the C-RIMM before installing a new RIMM. This module has only a few or no chips on it, and it is a small circuit board. Then, you need to push the RIMM memory module to a 90-degree angle or a vertical position when you have successfully removed the C-RIMM module, and the two tabs are in the outer position. When the memory module is being pushed, two tabs should snap together as well as hold the memory module in place. Notebook (laptop) memory installation stepsWhen you are going to install memory into the laptop (Notebook), make sure that the memory slots must be located before the memory can be located in a laptop. If you are not sure where to look for these slots, below is given a list of likely locations:
If you have followed all the above suggestions, but you are still unable to find the slots, we recommend you to make contact with computer manufacture for further assistance and information. The next step is to install the computer memory if you have found the slots. In modern times, most laptops have the same process for RAM installation. As compared to desktop computers, laptops are thin in size; therefore, the memory banks in laptops are horizontal. It is necessary to place the memory in the slot at an angle (approximately 75 degrees). After you have put the memory into the slot, you'll need to press down on it to secure it in place. The memory should also be aligned horizontally with the machine. SIMM memory installation stepsA bank is required for 30 and 72-pin SIMM memory modules. Two sockets serve as one bank in computers that use 72-pin SIMMs. Unless the computer or motherboard manufacturer specifies otherwise, two memory modules of equal value must be inserted in pairs. The process to install the most SIMM memory is same. The memory is inserted at a 75-degree angle and then shifted to a vertical (90-degree) angle while still in the slot. The memory module should click into place when shifted to a vertical position. Make sure that both sides are snapped into place when you are installing the memory module. Here, you need to pay attention, the computer may be damaged if a memory module is not inserted correctly. We suggest you the larger memory modules should be put in the lowest available bank. If your computer system has two 4 MB memory modules and you're adding two 32 MB memory modules, place the 32 MB memory modules in banks 0 and 1 or 1 and 2. Note: SIMM modules may be required to be installed in a specific order by some computer manufacturers. And, consider moving the memory to a different position if the installation of your new computer does not work.Set memory in BIOSTest the memory after it has been installed successfully in the computer system. Replace the casing on the computer. Connect the computer's components such as keyboard, monitor, and power supply cord. Finally, switch on your PC. Tip We advise you do not attach with computer remaining cables just yet. You may need to reconnect all of the cables if you are facing problems. Enter the BIOS setup while the computer is booting up, verify that the memory is detected, then alter the settings as needed to fit your memory specifications. Save the adjustments, exit BIOS, and reset the computer once the verification and configuration are complete. |
 For Videos Join Our Youtube Channel: Join Now
Feedback
- Send your Feedback to [email protected]
Help Others, Please Share


