How to Replace a Laptop Touchpad
In the current digital era, computers are becoming a necessity in our everyday life. They are essential to our ability to communicate, work, and have fun. The touchpad is one of a laptop's essential parts since it makes it easy for us to use and navigate our gadgets. But with time, laptop touchpads might have problems, just like any other hardware. When that occurs, being able to replace a laptop's touchpad might help you save needless money and irritation. We will lead you step-by-step through the process in this extensive tutorial.
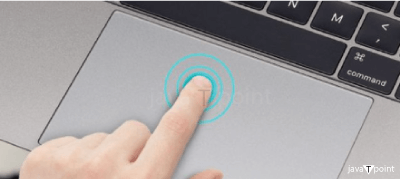
What is a touchpad on a laptop?
Let's define a laptop touchpad before we go into the replacement procedure. The small, rectangular touchpad, sometimes referred to as the trackpad, is situated on laptop's keyboard. It functions as a substitute for a conventional mouse, enabling you to move the pointer and carry out different operations by gliding your finger over it. For computers, the touchpad is a key input device, hence its proper operation is crucial.
 Indications of a Broken or damaged Touchpad Indications of a Broken or damaged Touchpad
It's important to know the typical symptoms of a malfunctioning laptop touchpad in order to assess if it needs to be replaced. This could consist of the following:
- Unresponsive Touchpad: If your touchpad doesn't respond to your touch or is erratic in its movements, it might be time for a replacement.
- Physical Damage: Cracks or physical damage to the touchpad's surface can affect its functionality.
- Cursor Jumps: If the cursor on your screen jumps around unexpectedly, it could be due to touchpad issues.
- Inconsistent Clicks: Problems with left and right-click functions can be indicative of touchpad problems.
Now, let's proceed with the step-by-step replacement process:
Step1: Unplug and turn off your laptop
It's crucial to turn off your laptop and make sure it's unplugged from all power sources before starting the touchpad replacement procedure. Both your safety and the integrity of your laptop depend on you taking this step. To carry out this:
- Close Your Laptop: Utilize the operating system's shutdown or power-off feature to correctly shut down your laptop, save any work that hasn't been saved and end all open apps.
- Unplug the charger: If your laptop is using a charger, disconnect it from both the laptop and the wall socket.
- Disconnect External Devices: Unplug all external devices from your laptop, including any USB drives, mice, or keyboards.
You can completely avoid the possibility of electrical risks when servicing the internal components of the laptop by following these instructions.
Step 2: Take the battery out (if only possible)
If the battery on your laptop is detachable, follow these steps. Many contemporary computers have integrated, non-removable batteries instead of detachable ones. If the battery on your laptop is detachable, do the following:
- Find the Battery: The majority of laptops feature a bottom-mounted latch or release mechanism for the battery. Usually, there is a battery icon on the label.
- Release the Latch: To release the battery, slide or press the latch in the designated direction, if there is one.
- Battery Removal: Carefully remove the battery by lifting it out of its compartment. Take is cautious not to overstretch or break any connectors.
In order to further minimize the risk of electrical shock, moving the battery also guarantees that the laptop is not powered on while you are using it.
Step 3: Get to the Touchpad Section
The model and design of your laptop will determine how to access the touchpad region. It may be necessary to remove the keyboard cover on some laptops and the bottom panel on others. How to get to the touchpad area is as follows:
Taking Out the Lower Panel:
- Flip Your Laptop: Gently invert your laptop such that the bottom panel faces upwards.
- Determine Screw Locations: The bottom panel is probably held in place by a number of screws. Note where they are.
- Remove Screws: Using a screwdriver, carefully remove the screws. Keep them organized and separate from other components.
- Remove the Bottom Panel: Carefully remove the bottom panel when all of the screws have been removed. It might need to be gently pryed but try not to use too much force to avoid damaging it.
Extraction of the Keyboard Cover:
- Find the Screws or Latches: In this situation, removing the keyboard is frequently necessary to gain access to the touchpad. Look for any latches or screws holding the keyboard cover in place.
- Eliminate Screws or Latches: Take care to remove any screws that may be present. If there are any latches, pry them open with a tool.
- Remove the Keyboard Cover: Carefully remove the keyboard cover after addressing any screws or latches. The ribbon cable that attaches the keyboard to the motherboard should be handled carefully. Remove it carefully so as not to harm the connector or cable.
You may now start the replacement procedure since you have access to the touchpad area. This is where the outdated touchpad that has to be replaced is located.
Step 4: Cut the Touchpad Cable Off
You must find and unplug the touchpad cable now that you are within the touchpad area. The laptop's motherboard and touchpad are connected by this cable. Take these actions:
- Find the cable for the touchpad: Search for a tiny, short wire or a flat ribbon cable that is attached to the outdated touchpad. Usually, a connection is used to secure this cable.
- Release the Connector: The connector holding the touchpad cable in place should be gently released. There might be a latch on it that you have to slide to the side or flip up. Take care not to harm the cord or connector.
- Disconnect the Cable: Carefully remove the touchpad cable from its socket when the connector has been loosened. To prevent damage, proceed slowly and deliberately.
You can replace the old touchpad with a new one by unplugging the touchpad cable, which essentially separates the old touchpad from the laptop's motherboard.
Step 5: Reconnect the touchpad table
Now, the touchpad wire is unplugged, you can take out the outdated touchpad:
- Unscrew or Unclip: The old touchpad on your laptop may be fastened with screws or clips, depending on how it was made. If there are any screws, use your screwdriver to carefully remove them. Remove any clips that are keeping it in place with care.
- Remove the Old Touchpad: Carefully remove the old touchpad from its housing after removing any fastenings. Use caution to prevent any harm.
You are now prepared to install the new touchpad after removing the old one.
Step 6: Install the new Touchpad
It's time to install the new touchpad now that the old one has been removed:
- Place the New Touchpad: Gently slide the new touchpad into the spot where the old one was taken out. Make sure its housing fits it correctly and securely.
- Put the Touchpad in position: If your laptop has screws, put the replacement touchpad in position using the right screws. If it has clips, tuck them in gently.
You were getting your laptop ready for the next steps in the replacement procedure by installing the new touchpad.
Step 7: Attach the touchpad cable again
Now that the replacement touchpad has been installed, it's time to reattach it to the laptop's motherboard:
- Look for the Connector Reattaching the touchpad cord is necessary. On the, motherboard of the laptop, look for the connector.
- Put the Cable in Apply light pressure as you slide the touchpad cord into the connector. It should blend right in. Make sure it is positioned correctly.
- Suppose the connector includes a clasp, flip or slide it back into place to guarantee the security of the cable. That ensures a reliable connection.
Reconnecting the touchpad cable will allow the internal components of the laptop to communicate with the touchpad once more.
Step 8: Reassemble Your Laptop
You're nearly finished. It's time to reassemble your laptop:
- In the event that the bottom panel was removed, carefully return it to its rightful location. Press it carefully into place after lining it up with the screw holes.
- In the event that the keyboard cover was removed, replace it, making sure it screws or clicks into place. Gently reattach the ribbon cable to the keyboard to prevent damage.
- Put It Back Together: Replace any screws that were taken out during disassembly by tightening them into their original positions.
- You can return your laptop to its original condition by reassembling it with the new touchpad installed.
Testing the New Touchpad
It's crucial to test the new touchpad before declaring the replacement procedure finished.
- Activate your laptop: Turn on your laptop and let it finish booting up.
- Examine the touchpad. Check to see if the new touchpad works properly and is responsive. Try out different touchpad functions, such as clicking, dragging the pointer, and making gestures.
- Look for Loose Screws: Verify that all of the screws are firmly in place to ensure that the laptop is not missing any parts.
You can be sure that the replacement procedure was effective by carefully testing the new touchpad.
These instructions will walk you through changing your laptop's touchpad. To make sure the replacement is done correctly, always remember to take your time, be organized, and work carefully. To protect your laptop from potential damage, it's best to get help from a qualified expert if you have any problems or feel uneasy performing these instructions.
Conclusion
Although it may seem like a difficult process, replacing a laptop's touchpad may be done effectively with the correct equipment and a logical approach. However, it's usually a good idea to get professional assistance if you are not comfortable handling it alone. For a laptop to operate smoothly, the touchpad must be working properly, therefore don't be afraid to fix any problems you find.
|

 For Videos Join Our Youtube Channel: Join Now


