| |

Phoenix BIOS help and supportTo help you visualize how a Phoenix BIOS might be set up, we have simulated one in this page. In addition to providing you with illustrative pictures of the Phoenix BIOS, we'll also give you a quick rundown of the options and some examples of how to use them. The Phoenix BIOS differs in what ways?
Navigation informationThe Phoenix BIOS has a very user-friendly interface and is quite simple to use. Use the up and down arrow keys to move between the screens of the Phoenix BIOS. Pressing the right or left arrow keys alternates between each of the accessible options. By pressing Enter, +, or -, you can modify an item after it has been selected. Menus and screenshotsNote: The images in this section come from a particular Phoenix BIOS version. It's possible that your computer's Phoenix BIOS is running a different version than what's displayed in these images. You may get a broad sense of what to search for in the Phoenix BIOS by looking at these images.Here are some illustrations of the Phoenix BIOS setup windows. This BIOS is divided into a number of menus, as seen in the image below. Main menuAn example of the Main menu section of the BIOS is shown below. Here, a user can view the specifications of the computer and modify the time, date, and other system-specific settings. 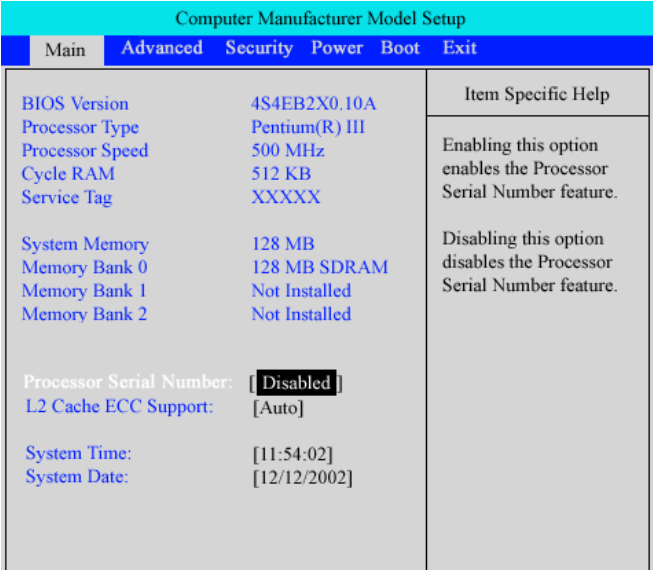
Advanced menuYou can modify the system settings using the Advanced option, as displayed below. You can modify the settings for each of the many categories using the six more sub-menus that are divided up into this menu, as illustrated. 
Peripheral ConfigurationOptions for the computer's serial, parallel, and legacy USB ports can be found in the Peripheral Configuration section. IDE ConfigurationA user can define or modify any values pertaining to IDE devices attached to the computer using the IDE configuration (e.g., hard drive and CD-ROM drive). Diskette OptionsYou can enable, disable, and modify the settings for the computer's attached diskette drive using the Diskette Options. DMI Event LoggingViewing the DMI event log, clearing the log, and turning on or off this functionality are all possible using DMI Event Logging. Video ConfigurationYou can change video-related parameters in the Video Configuration, such as the Palette Snooping, AGP aperture size, and the default adapter. Resource ConfigurationAny memory or IRQ resources can be reserved or made available by a user using the Resource Configuration. Security menuYou can secure the computer's BIOS by entering a password in the Security menu. Here, you can establish a Configuration Password to access the BIOS setup or a User Password to set a password that is required every time the computer starts. The user must delete the CMOS or BIOS password if they establish a BIOS password and then forget it. 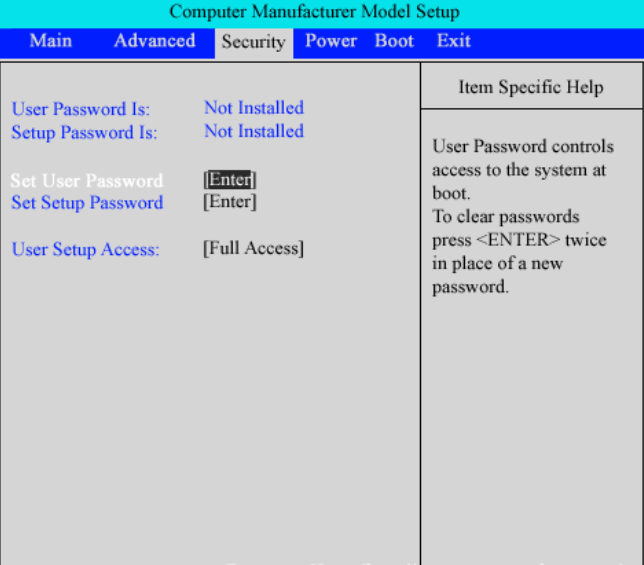
Power menuThe power management features on the computer can be enabled and disabled by the user using the Power menu in the following section. This graphic is not included because this part essentially only deals with turning power management on and off and identifying hardware that has power management functions. Boot menuThe Boot menu is the last element of this Phoenix BIOS sample. The user can adjust this section to control how well the computer and its accessories activate during the startup process. Users can specify the order in which the bootable devices should start, as seen below. When you want to start from a CD-ROM or floppy diskette, this section is crucial. An individual can choose from a list of accessible hard disks or other detachable devices using one of three sub-menus. 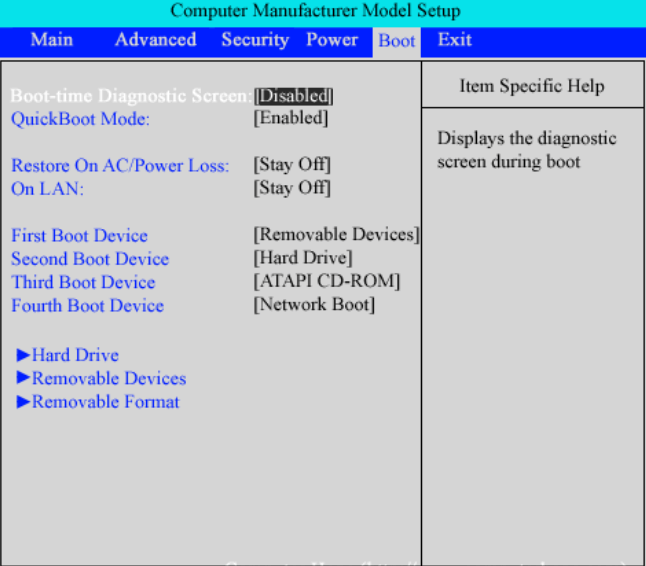
Why Upgrade Old BIOS to UEFI?You probably have an idea of why switching from the legacy BIOS to UEFI is a good idea, but just to be sure, here's what you need to know. Both BIOS and UEFI serve the same purpose for your computer: they are motherboard chip-integrated background programs that provide you control over many crucial low-level items. You can regulate things like boot order, attached hardware, fan speeds, the actual lights on your computer, and system time using your BIOS or UEFI. Even today's motherboards allow you to overclock and under volt your CPU! It's very potent. UEFI fundamentally serves the same purpose as the old BIOS but does it better. With UEFI, you get (ostensibly) quicker boot times, bigger storage capacities, greater driver support, better update procedures, and a 64-bit option (whereas BIOS is only 16-bit). In other words, upgrading to UEFI is something that is worthwhile. Even while the motherboard software is technically UEFI, it should be noted that even recent PCs (including Windows 11) frequently still refer to it as the BIOS.
Next TopicWhat are WASD keys
|
 For Videos Join Our Youtube Channel: Join Now
Feedback
- Send your Feedback to [email protected]
Help Others, Please Share


