VirtualBox InstallationIn this article, we will discuss how to install VirtualBox. But first, we have to know about VirtualBox. What is VirtualBox?VirtualBox is a free and open-source software program for virtualizing the x86 computing architecture. Oracle Corporation developed it. It works as a hypervisor and develops a Virtual Machine where the user can run another operating system. The "host" OS is the operating system where VirtualBox runs. The "guest" OS is the operating system running on the Virtual Machine. As the host OS, VirtualBox supports Windows, Linux, Solaris, Open Solaris, and MacOS. When setting up a virtual machine, the user can determine how many processor cores and how much RAM and disc space would be devoted to the VM. When the VM is running, it may be "paused". History of VirtualBoxInnotek GmbH originally developed it. VirtualBox was released as an open-source software package on January 17, 2007. Sun Microsystems later purchased the company. Oracle Corporation bought Sun on January 27, 2010, and took over VirtualBox production. Features of VirtualBoxThere are various features of VirtualBox. Some of the essential features are as follows: PortabilityVirtualBox is a Type 2 hypervisor cross-platform OS, which means a Virtual Machine built on a single host would be run on other hosts. Guest Virtual Machine could be imported and exported according to its requirement using the Open Virtualization Format (OVF). Guest AdditionThese are the collections of tools installed on the Guest OS to optimize its performance and offer extra host system integration and communication. VM GroupsVirtualBox offers group functionality. This functionality allows the user to individually and collectively organize virtual machines. Generally, it is possible to apply operations such as start, pause, close, reset, shutdown, save state, power off, and so on to VM classes such as individual VMs. Hardware SupportVirtualBox supports the Guest SMP, multiscreen resolution, built-in iSCSI support, USB devices, full ACPI support, and PXE network boot. SnapshotVirtualBox provides the guest with VM state details with the save snapshot function. In time, we can go back and get the virtual machine back. How the VirtualBox Works?Oracle VirtualBox is scalable and bendy. In theory, software program virtualization isn't overly complex. We can run many operating systems on top of VirtualBox. Each operating system can be independently started, paused, and stopped. The hypervisor is applied as a Ring zero kernel service. The kernel includes a device driver tool known as vboxsrv. This device driver manages the tasks or activities, including loading hypervisor modules for functionality, allocating physical memory to the digital visitor machine, and saving and restoring the visitor technique's context. Whenever any interruption occurs, we can use another OS to start execution and identifying while the VT-x or AMD-V activities want to be handled. The user itself manages its OS scheduling throughout its execution. The user operates on the host system as a single process and scheduled via a host. Apart from this, there are extra device drivers present while the user permits the OS to access resources like disks, community controllers, and different devices. Besides kernel modules, other processes are running on the host that help the running guest. The VBoxSVC process begins automatically in the background when a guest VM is booted from the VirtualBox GUI. Installation of VirtualBox in WindowsIf we want to install the VirtualBox in windows, we can use the following steps: Step 1: First, we need to go to the VirtualBox Website through the https://www.virtualbox.org/ in the system's internet browser. It is the link where we will download the VirtualBox setup file. Step 2: Click on the Download VirtualBox button, which appears on a blue button on the page. 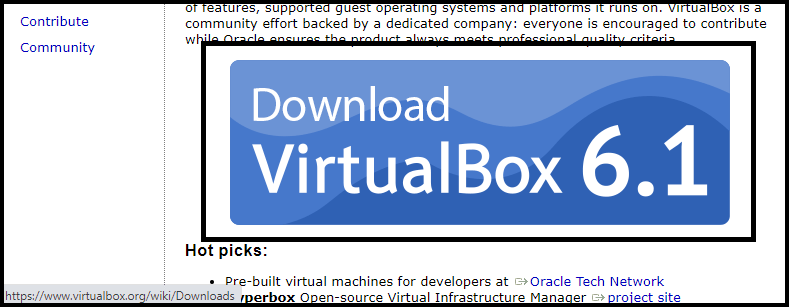
Step 3: Now, Click on the Windows hosts link. We will see it below the "VirtualBox 6.1.16 platform packages" option. 
Step 4: Now, open the VirtualBox EXE file from where we have downloaded this file in the system. After that, the VirtualBox installation window will open. 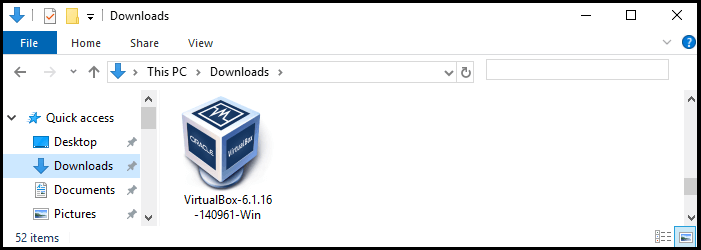
Step 5: Click on the Next button in the Welcome window. 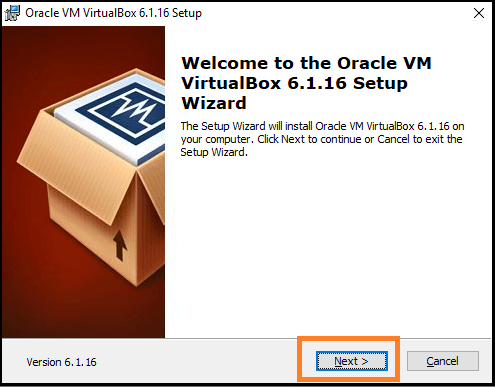
Step 6: Choose the installation folder and click on the Next button. 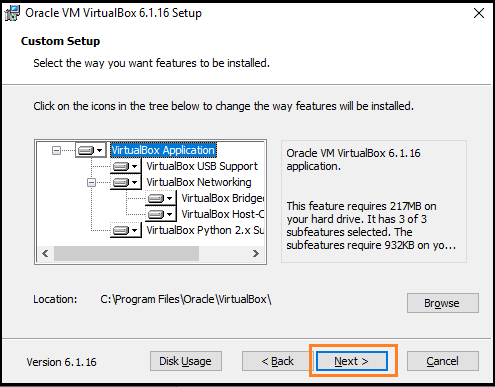
Step 7: Now, we will choose the features that we want to install and then click on the Next button. 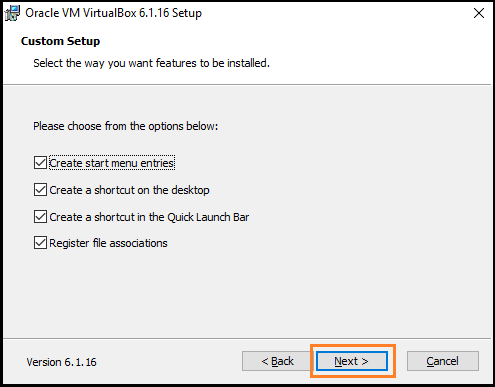
Step 8: Click on the Yes button to install the Oracle VirtualBox interfaces. 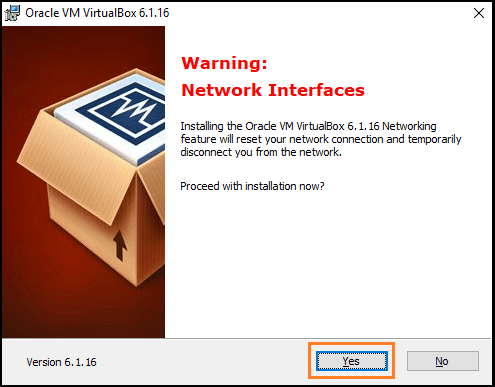
Step 9: Click on the Install button when it prompted. After that, it will start installing the VirtualBox in our system. 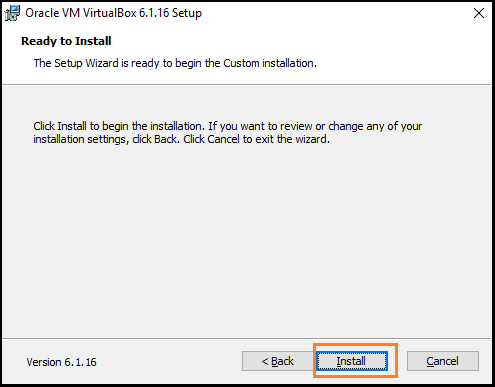
Step 10: After completing all these processes, click on the Finish button. When we do this, the installation tab will be closed, and VirtualBox will be opened. Now, we can create a virtual machine to run any OS on the system. 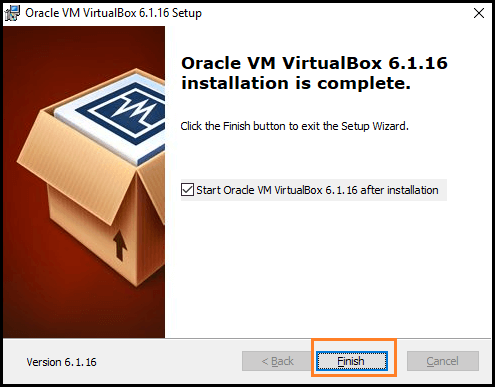
Next TopicWhat is a Num Lock
|
 For Videos Join Our Youtube Channel: Join Now
Feedback
- Send your Feedback to [email protected]
Help Others, Please Share


