| |

How to Transfer Photos from Android to ComputerPhotographs are the memories that people collect in the events that take place in their life. Today, everyone used to have android smartphones with good camera quality, and through it, people click the pics. But, making memories means more storage requirements on mobile phones. When the memory fills up, there comes out two options, i.e., either to delete some pictures for making more storage or transfer it to another location. Deleting sometimes seems to be an unwanted option but transferring the photos to another location is a good option. So, one would definitely go with the option of transferring the photos to another location. Here, we will learn how to transfer photos from an Android mobile to a computer system and what the steps are included in it. Transferring Photos from an Android Phone to a ComputerThere are various methods through which we can transfer our mobile phone photos to our computer system. We will discuss these methods one by one. Transferring Photos via USB CableIt is the foremost method which is used for transferring photos/documents from an android system to a computer system. We need a USB cable to transfer photos from the mobile to the computer. Follow the below steps to transfer photos from android to computer: 1) Connect the USB cable with your mobile phone and computer. Attach the broader pin of the cable to the computer slot and the thin pin to the mobile slot. 2) Enable file transfer on your mobile phone so that the transfer of file can take place. 3) When the computer recognizes the mobile, the name will be displayed on the system. A snapshot is shown below: 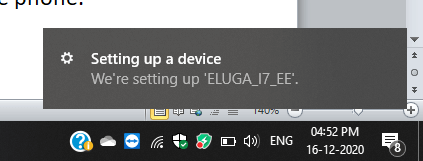
4) Click on the mobile name you can see with other PC drives, as shown below: 
5) Click on Internal Storage, and there you will see many folders. You need to select 'DCIM' and move to the folder from where you want to transfer the photos to the computer. A snapshot is shown below, where we have selected the 'Camera' folder: 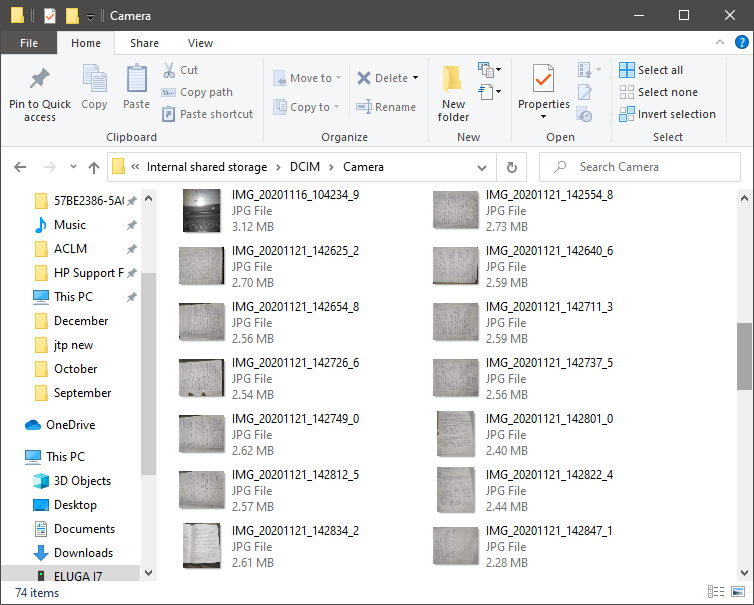
6) Select the photos that you want to transfer from the mobile phone to the PC and press Ctrl+X. It will cut the images from your mobile phone. 7) Now, choose or create a location on your PC where you want to save these photos. Move to the desired location and press Ctrl +V, and the photos that you cut will get paste here, as you can see in the below snapshot: 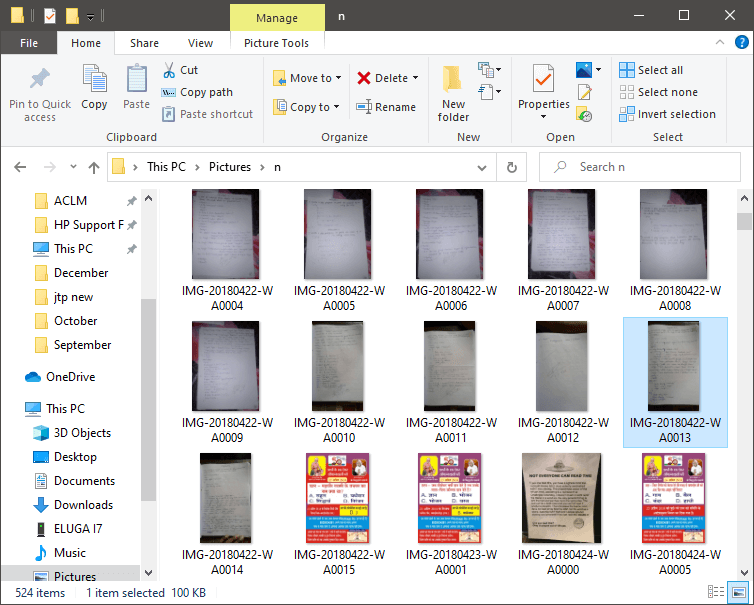
8) When the photo transfer is completed, remove the USB cable from the mobile phone as well as from the computer. In this way, the phone storage will also be free, and the transfer of photos will be done on your computer. Transferring Photos via Google DriveGoogle Drive is a Google platform that lets us transfer and upload documents, images and other things from one place to the other or from one person to another person. With this, Google provides 'Google Photos' that also allows us to keep and share photos with people and friends. No need to worry, when we create our Gmail account, we are also provided with certain other apps of Google from which Google Photos is the one. Just we need to enable syncing of photos of your mobile device. Thus, using Google Photos and Google Drive, we can have photos on our computer system as well. Here, we will discuss the steps through which we can share photos from our mobile phone to our computer system: 1) Open Gmail on your computer's internet browser and sign-in to your account. However, if you do not have a Google account, create an account by fulfilling the details asked. Sign in to your account then. 2) When Gmail opens up, and you will see 9 dots combination in square form (known as Google Apps) at the top right corner next to the 'Settings' icon, as you can see in the below snapshot: 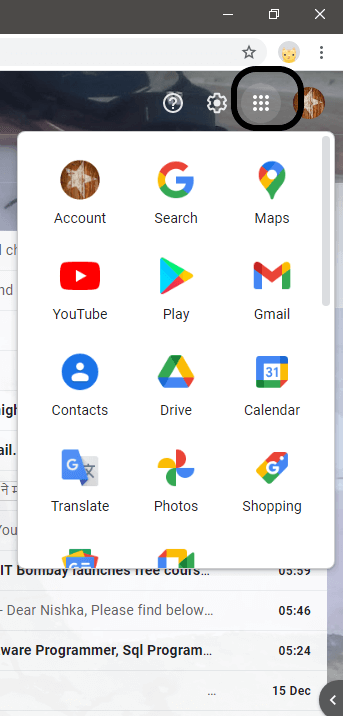
3) When you click on these dots, you will see various other Google apps, as shown in the above snapshot. 4) From the list of Google Apps, 'Google Drive' and 'Google Photos' are the ones. As you have to share photos with your system, you need to open Google Photos, so click on the Google Photos icon, which is named as 'Photos' under the apps list. A snapshot is shown below: 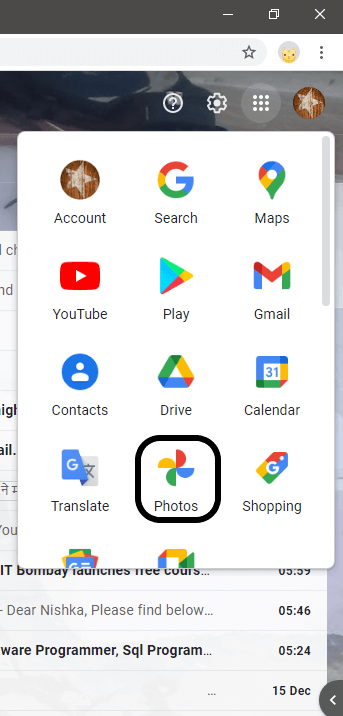
5) If you have already enabled syncing on Google Photos on your mobile device, the images of your mobile will be saved to the Google Cloud, and you can see those photos on your computer also. But if not done so, sign-in to Google Photos, and it will enable syncing of photos on Google Photos. 6) Now, choose the photos that you want to transfer to your computer and click on the three vertical dots and click on 'Download' or press 'Shift + D'. The selected photo will get downloaded to your computer. 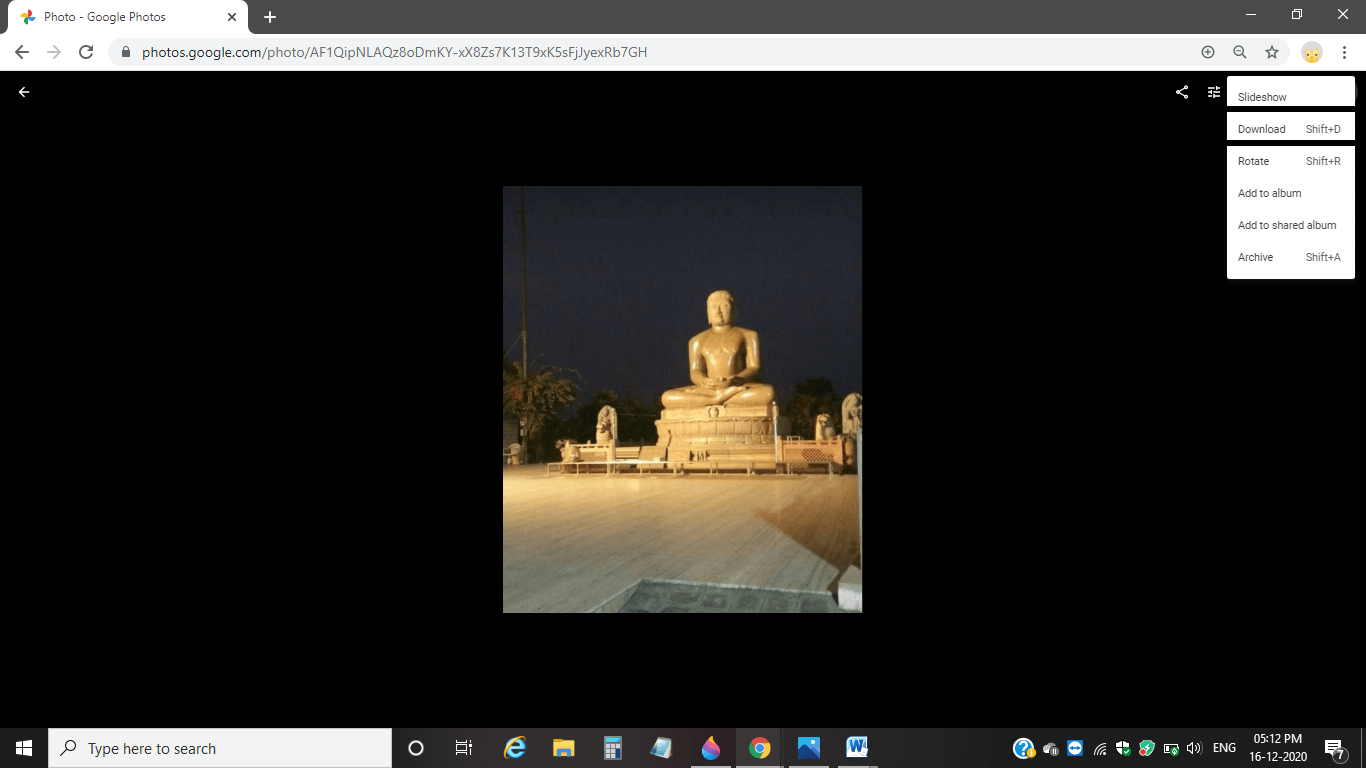
7) In the case of Google Drive, you need to upload your photos on it and then you can open Google Drive on your computer and view or download the photos to your computer. Note: The Google account on which you have synced or uploaded the photos of your mobile, you should sign-in to that same account on your system also.However, Google Photos is a method to share photos to our computer, but Google Photos is a storage place, so it is recommended that there is no need to transfer photos to the system if we want to keep them for viewing only. Open Google Photos on the system and view them. Similar to Google Photos and Google Drive, there are other software also available such as Microsoft Photos or Dropbox, that facilitate us to store, transfer, and view photos at any time and any location. Other Methods of Transferring Photos to Computer
Thus, all these discussed above are some methods through which we can share or transfer photos from our mobile device to our computer system. The need is to choose a compatible and appropriate method as per the specifications of the device. |
 For Videos Join Our Youtube Channel: Join Now
Feedback
- Send your Feedback to [email protected]
Help Others, Please Share


