| |

How to Set up SSH SOCKS Tunnel for Private Browsing in WindowsThere are many times you want to secretly search the internet, access geo-restricted information, or circumvent any interim firewalls that your network may implement. One choice is to use a Proxy server, but this includes downloading client software on your computer and establishing the own private VPN (Virtual Private Server) or subscribing to a VPN program. The other safer option is to redirect the local network traffic into an encrypted SOCKS proxy gateway. By using this approach, all the proxy programs will link to the SSH (Secure shell) API, and the API (Application Programming Interface) will forward all traffic towards its final destination. Your Internet Service Provider (ISP) and other third parties will not be able to examine your traffic and restrict your links to websites. In this tutorial, we will initiate the process of building an encrypted SSH tunnel and configuring Google Chrome and Firefox web browsers to use SOCKS proxy. What is SSH SOCKS TunnelSSH SOCKS Proxy functions have the same working functionality as a VPN that you might use to anonymously tunnel network traffic from your local computer to the remote SSH server. SSH tunneling is a way of transmitting arbitrary networking information over to an encrypted SSH link. It can be used to apply protection to legacy software. It can also be used to introduce VPNs (Virtual Private Networks) and to navigate intranet resources through firewalls. SSH is a norm for safe remote login and file transfer over untrusted networks. It also offers a way to control the data traffic of any given program using port forwarding, practically tunneling any TCP/IP connexion over SSH. This ensures that the data traffic of the application is directed to flow within the secured SSH link such that it cannot be eavesdropped or intercepted while in transit. SSH tunneling helps you to apply network protections to outdated programs that are not native. 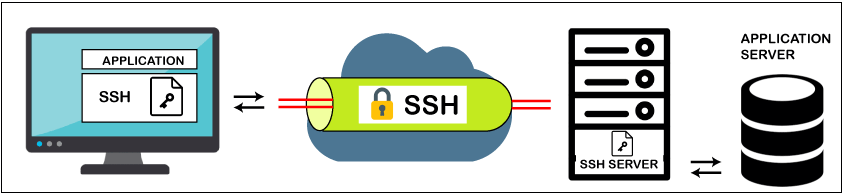
The figure gives a simplified description of SSH tunneling. Safe connexions over an untrusted network are formed between the SSH client and the SSH server. This SSH link is secured, maintains secrecy and honesty and authenticates the correspondence of the parties. Use of SSH SOCKS TunnelingThe SSH connexion is used by the program to connect to the server of the program. With tunneling allowed, the program contacts the local host port that the SSH client listens to. The SSH client then forwards the application to the server via its encrypted tunnel. The server then connects to the main application server-usually on the same computer or at the same data center as the SSH node. 
Advantages of SSH SOCKS TunnelingThe benefits of SSH SOCKS tunneling are listed below:
Setting up the SSH Tunnel for Private BrowsingThe users who are using Windows in their systems, they can Set up an SSH tunnel with the help of Putty SSH client. For downloading and setting up the SSH Tunnel, you are required to follow the below-given steps. Step 1: First, you need to click on the below-given link. You got the following screen after clicking on the link. https://www.chiark.greenend.org.uk/~sgtatham/putty/latest.html 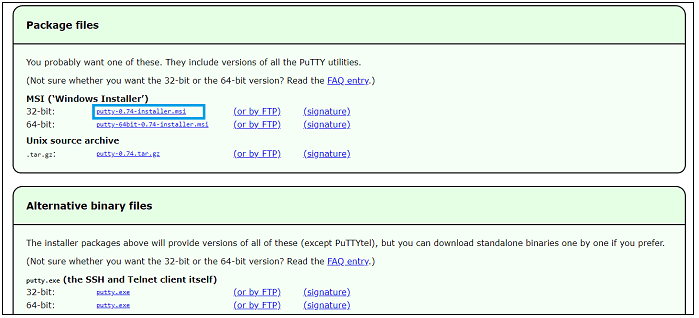
Step 2: You can select the downloading link according to the system requirements of your system. After launching the setup, you got the following screen. 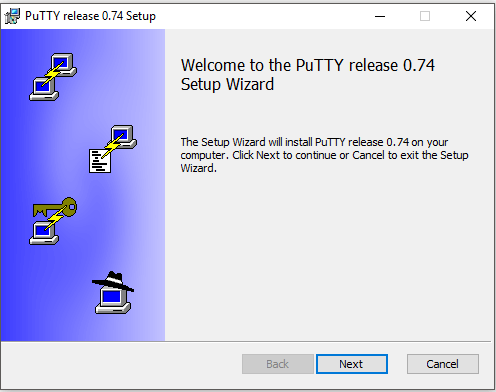
Step 3: After clicking on the Next button, you got the below snippet. 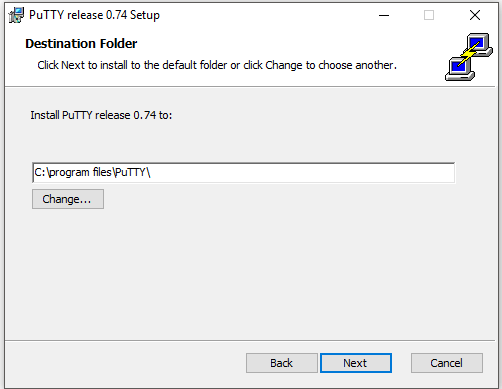
In the above screen, you can select the location where you want to install the Putty software. You can also change the location by clicking on the change button after it, click on Next for the further process. Step 4: After clicking on the Next, you got the following screen. Now, you are required to click on the install button for installing the product features of the Putty in your system for SSH tunneling. 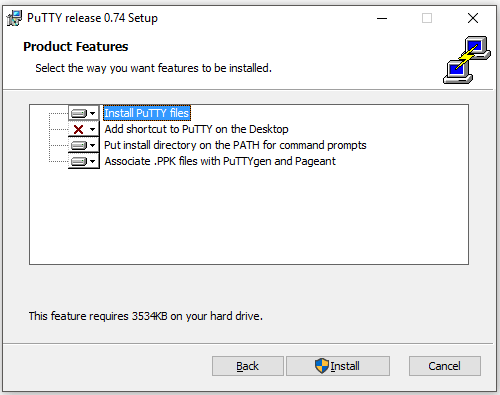
Step 5: After clicking on the install, you got the following snippet. 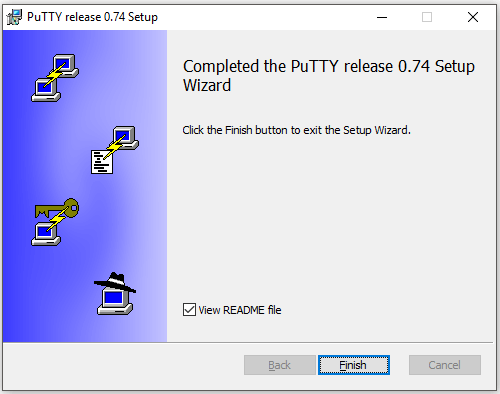
Now your entire setup is installed. You can create the SSH tunnel for private browsing. Configuration of PuttyLet's take a look at Putty configuration with the help of the following steps. Step 1: First, you are required to launch the .exe file, and you get following screen. 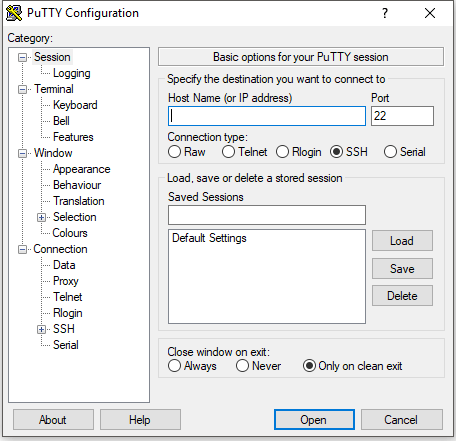
Step 2: Now, you need to enter the Hostname or server IP address in the specific text field, as shown below. 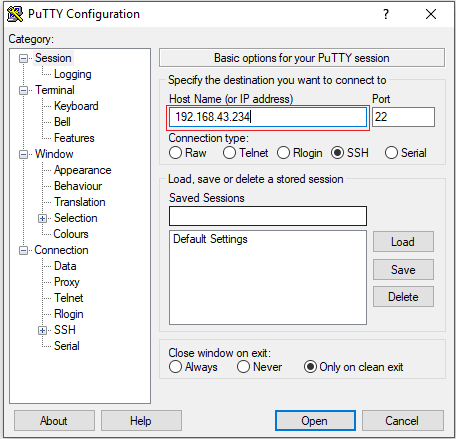
Step 3: Now, you have to disburse the SSH option that appears in the connection menu displayed in the below-mentioned snippet. 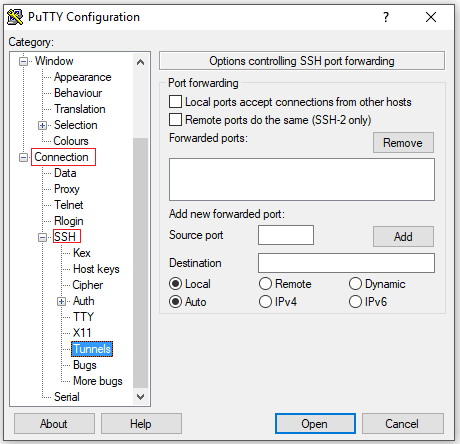
Step 4: Now, in the source port field, you have to enter the port number 9090 and select the radio button named as Dynamic. It is represented in the below screenshot. 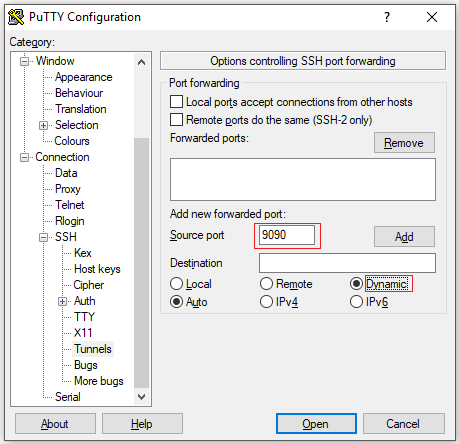
Step 5: Now, you are required to click on the Add button next to the source port field, as shown below. 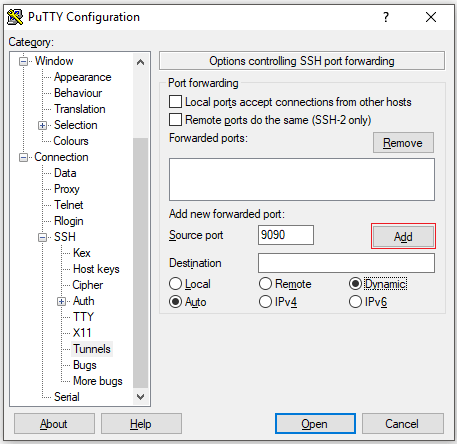
Step 6: After clicking on the Add button, you get the entered port number in the above text field. It is defined in the below snippet. 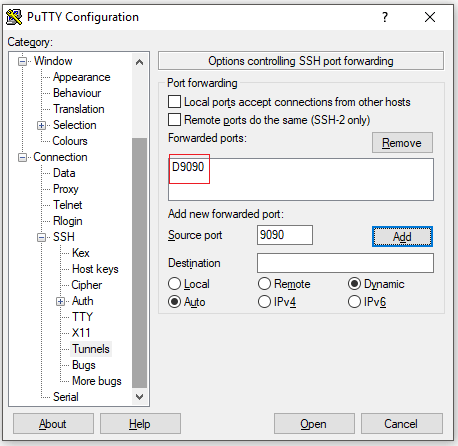
Step 7: Now, you move to the Session tab to store the settings so that you do not need to update them each time. Then insert the session name in the saved Session field and click on the Save button. It is displayed in the below snippet. 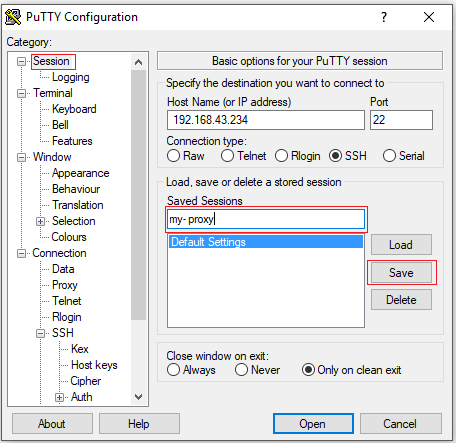
Step 8: Now, you need to choose the Saved session and then click on the open button for Sign in to the remote server. It is shown in the below snippet. 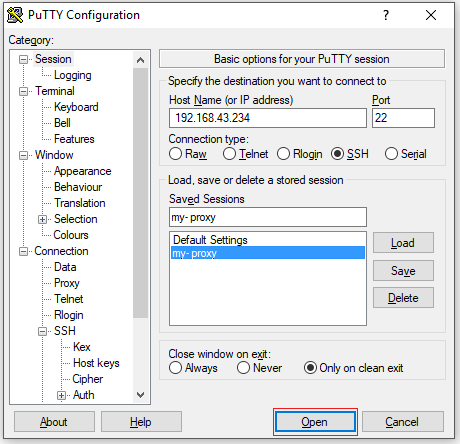
Step 9: A window appears asking for the username and password. You will be signed in to your account until you enter the username, and password and the SSH tunnel will be enabled. Creating public key authentication helps you to connect your network without inserting a password. Browser Configuration to use a proxy serverThe proxy settings enable an indirect agent to be placed between your web browser and the server call another device. A proxy is a software-based computer device that functions as something like a middle-man. On your device, you require the proxy setting to connect with the proxy server. Since you've unlocked the SSH SOCKS tunnel, configuring your favorite browser to use it, is the last phase. Here, we have explained the proxy server configuration for different browsers. SSH SOCKS Configuration for Firefox browserSome steps of SSH SOCKS configuration are given below. These steps are similarly used for Linux, MacOS, and Windows. Step 1: First, you need to open the Firefox browser and then click on the ☰ (hamburger icon) at the upper-right hand corner. It helps you to expand the browser's menu, as shown in the below screen. 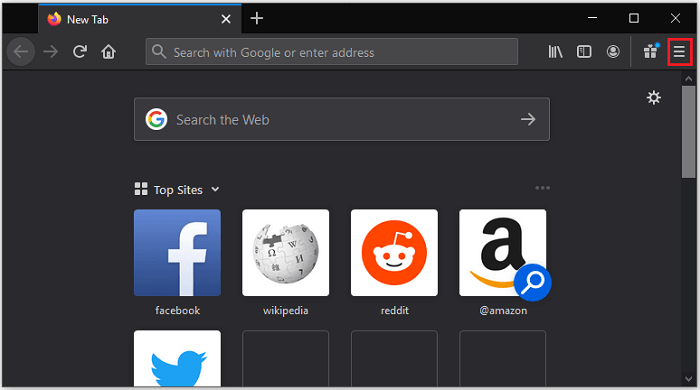
Step 2: Now, click on the options tab, and you obtain the following snippet. 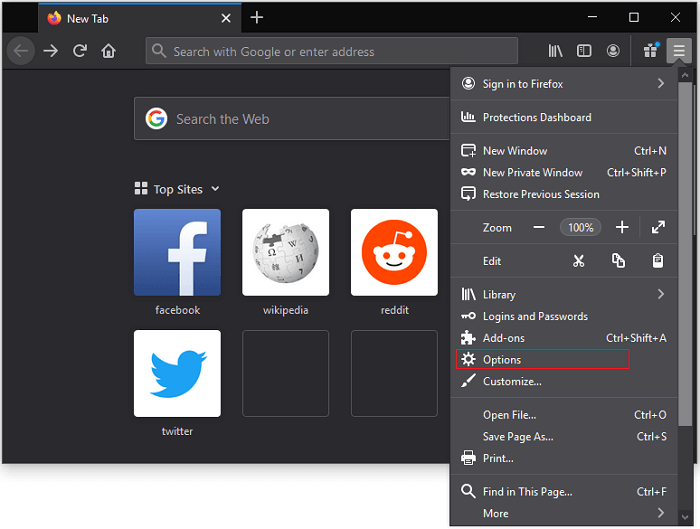
Step 3: After clicking on the Options in the Menu tab, you get the following screenshot. 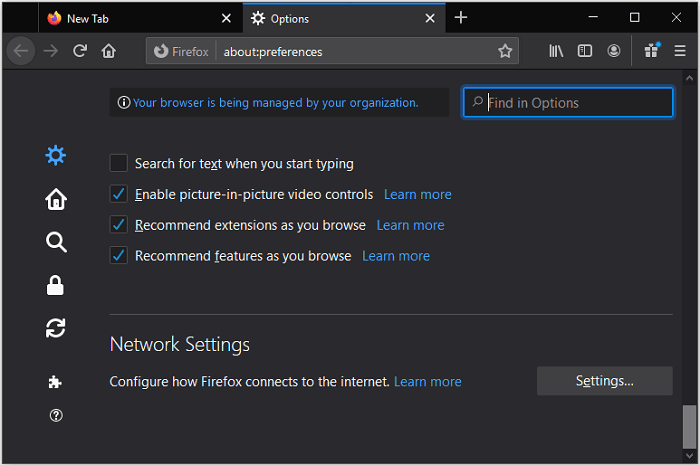
Step 4: Now, you are required to scroll down to the Network setting region and select the setting button. It is displayed in the below figure. 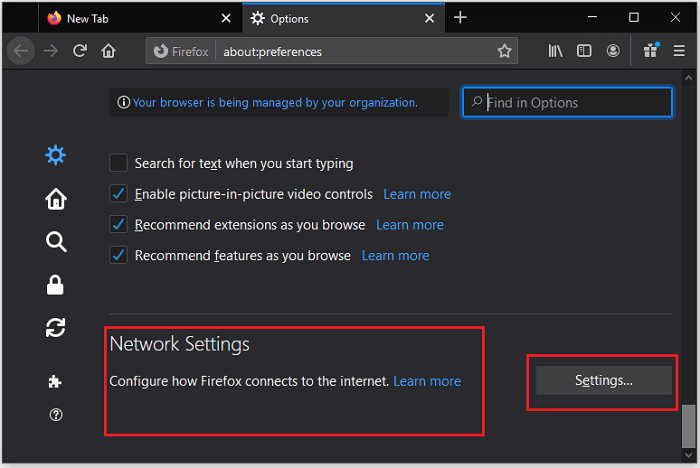
Step 5: After clicking on the setting… option, a new window will open, and you get the following screen. 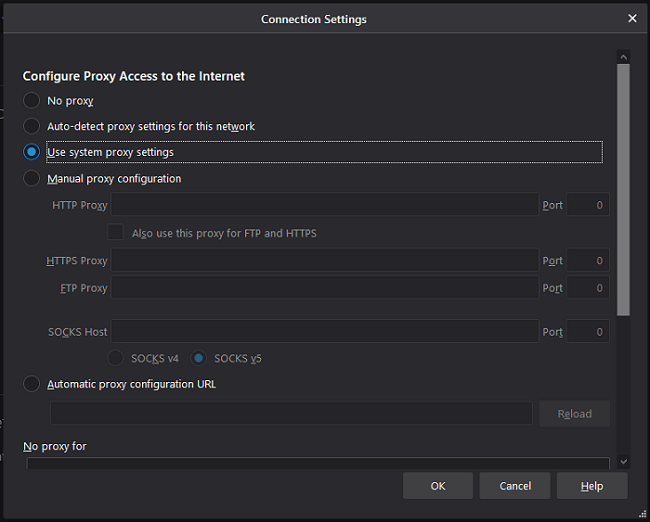
Step 6: Now, you are required to click the radio button of Manual proxy configuration and enter 127.0.0.1 in the SOCKS Host text field. It is displayed in the below snippet. 
Step 7: Now, enter the port number 9090 into the port field next to the SOCKS Host as represented in the below screenshot. 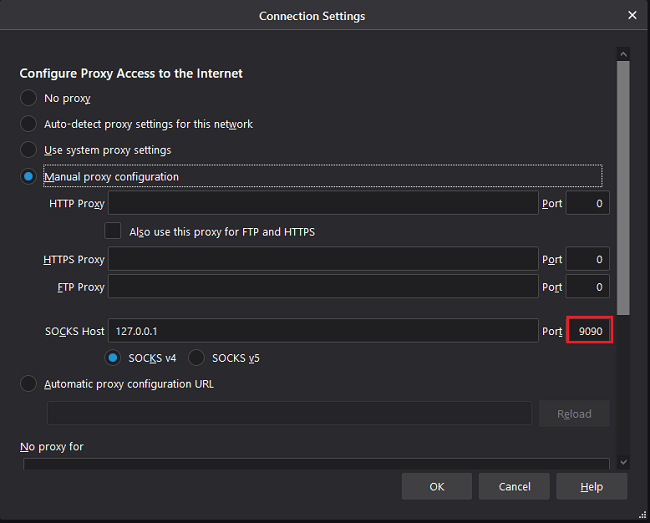
Step 8: After entering the port number, you need to select the SOCKS v5 Domain Name Server checkbox after it taps on the OK button to save these settings. It is defined in the following screen. 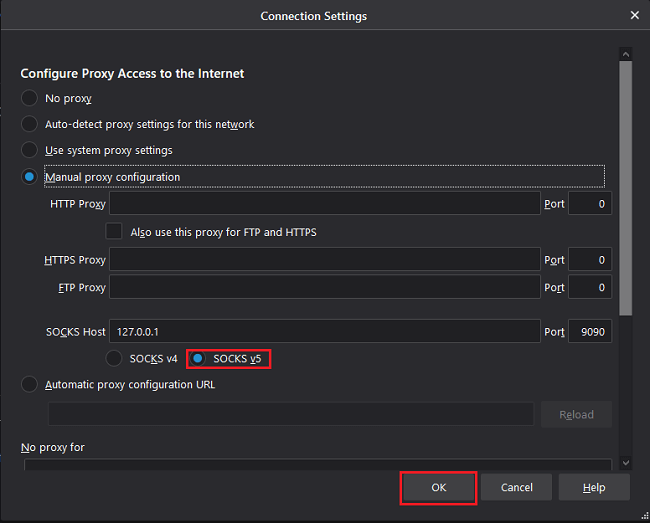
Step 9: After clicking on the OK button, your browser is configured to the proxy server. If you want to check this, then you can type Google.com in the URL and search for your own IP address as What is my IP. The browser will return you the IP address of your device. It is shown in the below snippet. 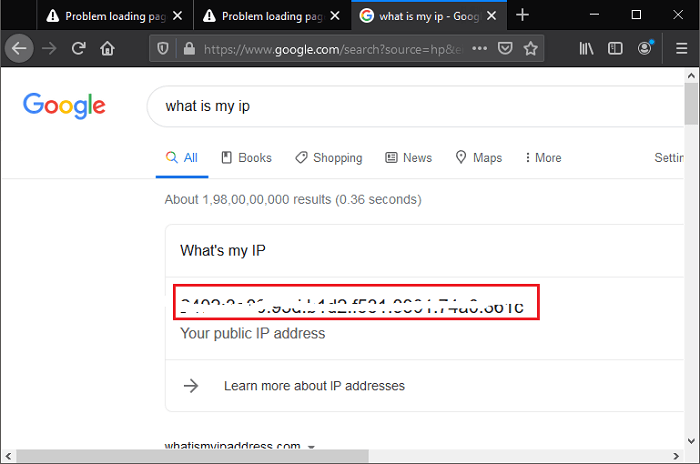
If you want to go back to the previous settings, then go to the Network settings, select the radio button of System proxy settings, and click on OK to save the settings. There are also many extensions that can allow you to customize proxy settings for Firefox, such as FoxyProxy. SSH SOCKS Configuration for Google Chrome browserThe default device proxy settings are used by Google Chrome. You can use a plugin like SwitchyOmega or launch a Chrome internet browser from the command prompt instead of modifying your operating system proxy settings. You can also use the SSH tunnel with the help of the Command prompt in Google Chrome with the below-given commands. If it doesn't exist, the profile will be automatically generated. This helps you to concurrently run several iterations of Chrome. "Launch google.com and search" "what is my IP" to verify the SSH tunnel is functioning perfectly. The IP address displayed in your browser should be your server's IP address.
Next TopicSmall Computer System Interface
|
 For Videos Join Our Youtube Channel: Join Now
Feedback
- Send your Feedback to [email protected]
Help Others, Please Share


